In this article, you will discover how to create stunning eye makeup looks by mastering the art of layering and blending eyeshadows. By learning these techniques, you will be able to add depth and dimension to your eye makeup, making your eyes pop and stand out. Whether you are a makeup enthusiast or a beginner, this guide will walk you through step-by-step instructions to help you achieve a flawless and professional-looking eyeshadow application. Get ready to enhance your eye game and unleash your creativity with the mesmerizing world of eyeshadow layering and blending.

Color Theory
Understanding the Color Wheel
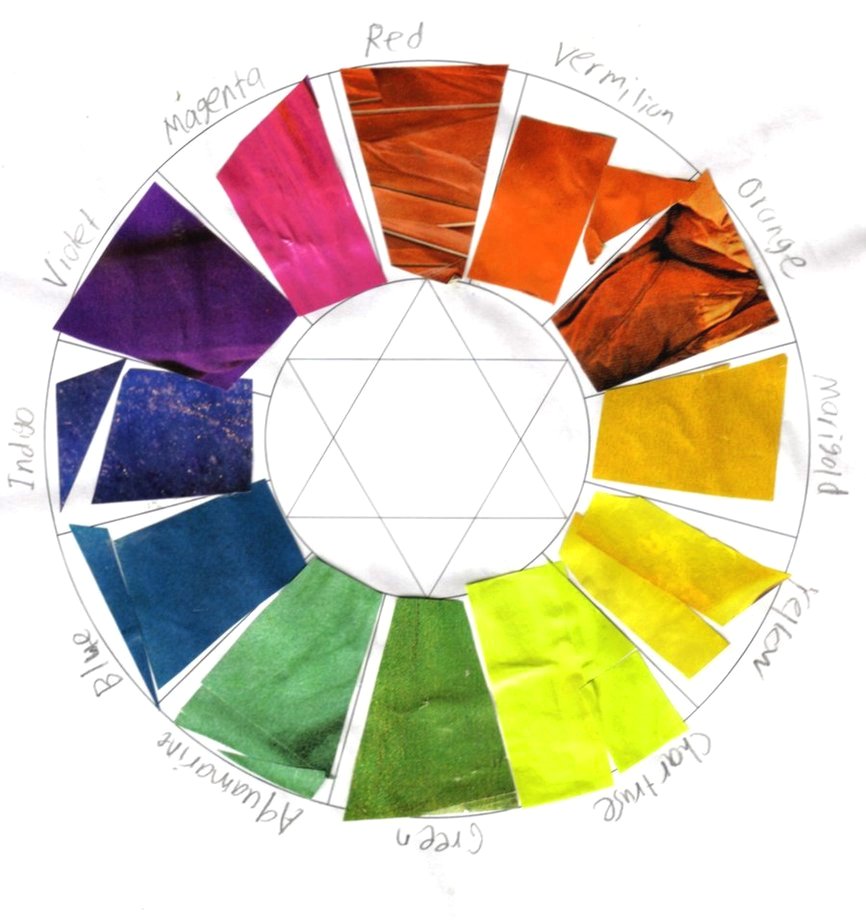
Understanding the color wheel is essential when it comes to creating eye-catching eyeshadow looks. The color wheel is a visual representation of the colors in the spectrum, organized in a circular arrangement. It consists of primary colors (red, yellow, and blue), secondary colors (orange, green, and purple), and tertiary colors, which are a mix of primary and secondary colors. By understanding the relationships between these colors, you can create stunning color combinations that will enhance your eyes and make them pop.
Complementary Colors
Complementary colors are pairs of colors that are directly across from each other on the color wheel. When used together, they create a striking contrast and can make each other appear more vibrant. For example, if you have blue eyes, using eyeshadows with warm orange or copper tones can make your eye color stand out. By understanding the concept of complementary colors, you can create harmonious and eye-catching looks.
Analogous Colors
Analogous colors are groups of colors that are adjacent to each other on the color wheel. These colors share similar undertones and create a cohesive and harmonious look when used together. For instance, if you have green eyes, using eyeshadows in shades of green and blue can create a beautiful and complementary effect. Analogous colors allow you to create a soft and blended eyeshadow look that is pleasing to the eye.
Monochromatic Colors
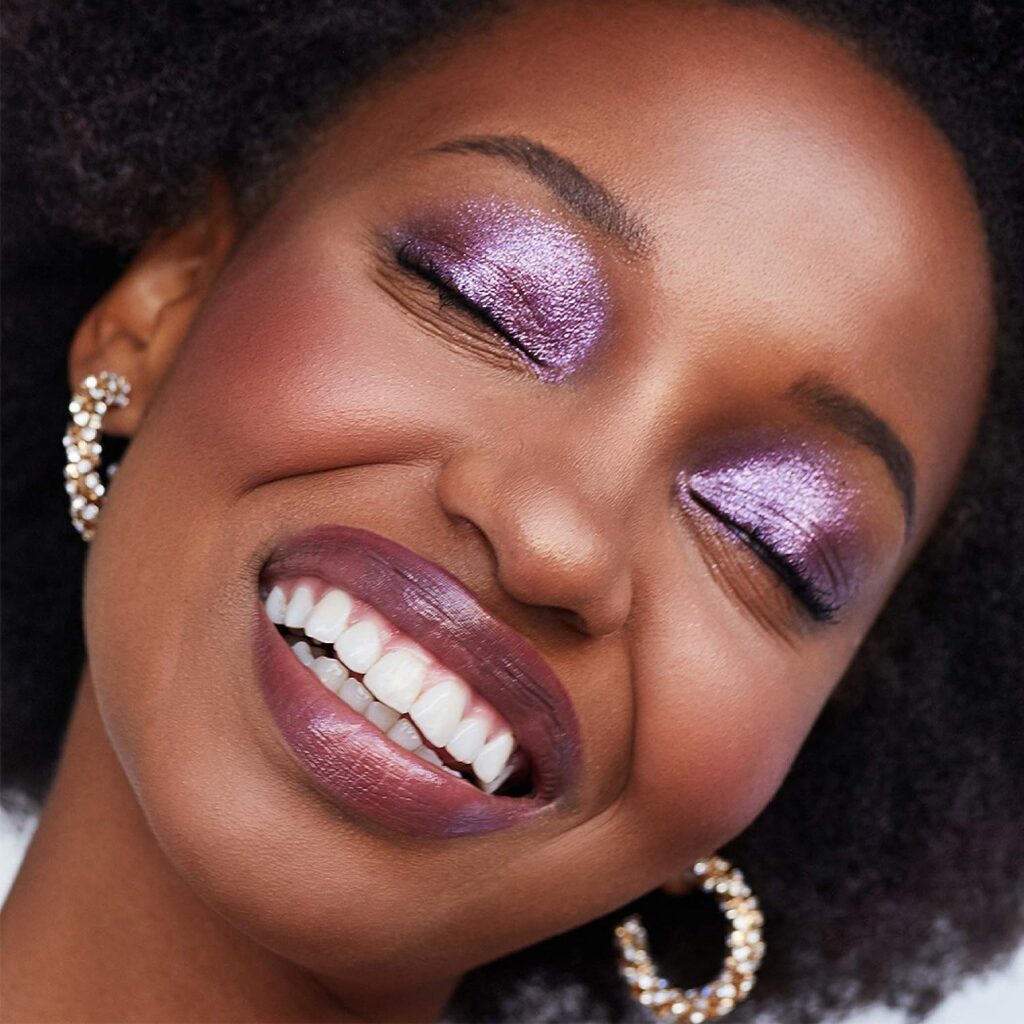
Monochromatic colors consist of different shades and tints of a single color. This color scheme creates a cohesive and harmonious look with a subtle variation in shades. For example, if you choose to create a monochromatic eyeshadow look using shades of purple, you can use lighter tones on the inner corner and darker shades on the outer corner to add dimension and depth to your eyes. Monochromatic looks are elegant and sophisticated, making them a great choice for both everyday and special occasions.
Preparation
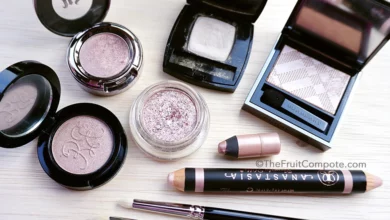
Choosing the Right Eyeshadow Palette
Choosing the right eyeshadow palette is crucial for creating stunning eye looks. When selecting a palette, consider your eye color, skin tone, and the occasion you are getting ready for. Neutral palettes with a mix of matte and shimmer shades are versatile and can be used for both natural and glam looks. Additionally, consider the pigmentation and blendability of the eyeshadows to ensure smooth application and long-lasting wear.

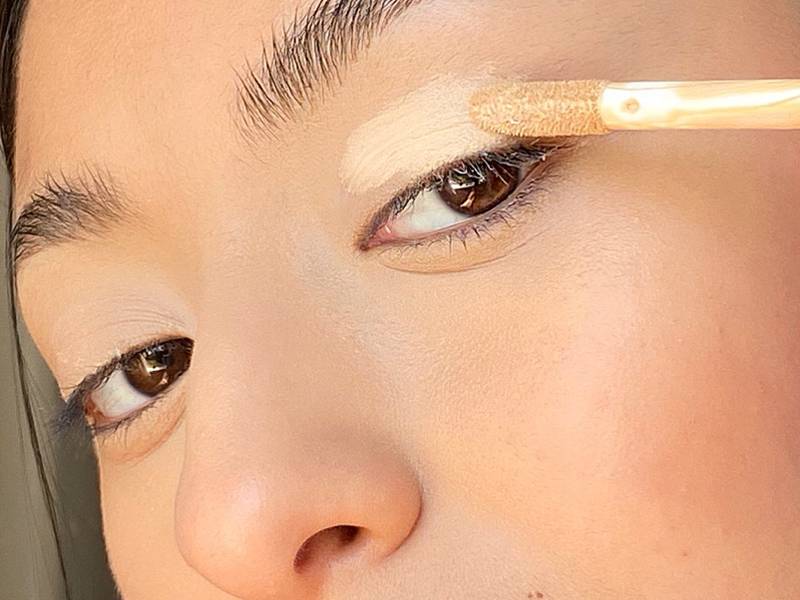
Priming the Eyelids
Before applying eyeshadow, it is important to prime the eyelids. Eyeshadow primer creates a smooth canvas for the eyeshadows, enhances color payoff, and helps prevent creasing and fading throughout the day. Apply a small amount of primer directly onto the eyelids and blend it evenly using your fingers or a brush. This step will ensure that your eyeshadow stays vibrant and lasts all day long.
Setting a Base
After priming the eyelids, set the primer with a matte eyeshadow that closely matches your skin tone. This will create a seamless base and help the other eyeshadows blend more effortlessly. Using a fluffy blending brush, gently sweep the matte shade across the entire eyelid, from the lash line to the brow bone. This step will also prevent any tackiness and ensure that the subsequent eyeshadow colors apply smoothly.
Selecting Transition Shades
Transition shades are essential for creating a gradient effect and seamlessly blending different eyeshadow colors. These shades are typically medium-toned matte eyeshadows that help transition from the lighter base shade to the darker shades used on the outer corners. Select a shade that is one or two shades darker than your skin tone and apply it to the crease area using a fluffy blending brush. This will create depth and dimension and provide a smooth transition between colors.

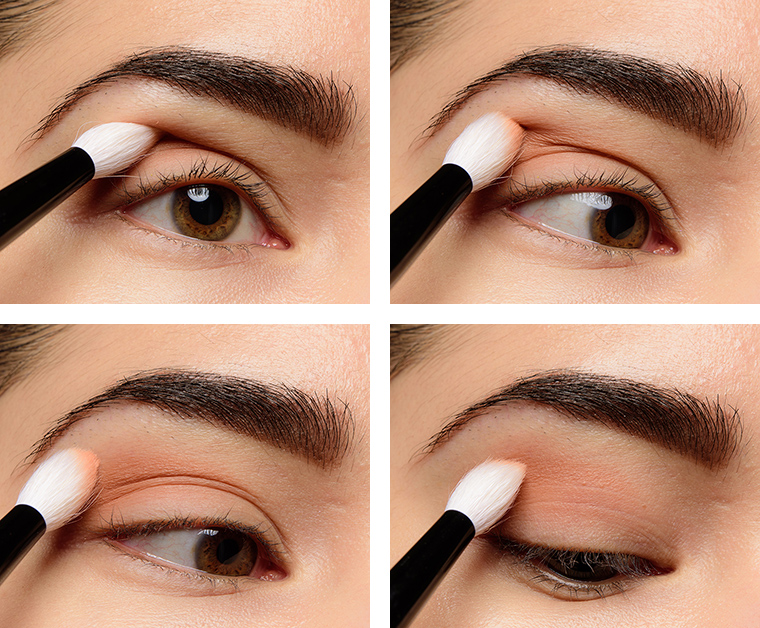
Layering Techniques
Light to Dark
Layering eyeshadows from light to dark is a classic technique that adds depth and dimension to the eyes. Start by applying a light shade, such as a shimmery champagne or ivory, all over the lid and up to the brow bone. Then, gradually build up the intensity by adding medium-toned shades to the crease and outer corners. Finally, use a dark shade to add depth and definition to the outer V and along the lash line. This layering technique creates a beautiful gradient effect that can be customized according to your preferences.

Dark to Light
The dark to light layering technique is a great way to create a bold and dramatic eye look. Begin by applying a dark shade, such as a deep brown or black, to the outer V and the lower lash line. Then, gradually lighten up the crease and lid area by adding medium-toned shades. Finish the look by applying a light shimmer shade to the inner corner and the center of the lid. This layering technique creates a striking contrast and draws attention to the center of the eyes.
Matte and Shimmer Combination
Combining matte and shimmer eyeshadows is a fantastic way to add dimension and interest to your eye makeup. Start by applying a matte transition shade to the crease and outer corners. Then, layer a shimmery shade on the lid, focusing on the center for a pop of brightness. This combination of finishes creates a beautiful contrast and makes the eyes appear more vibrant and captivating.
Using Different Finishes
Experimenting with different finishes can completely transform your eyeshadow look. Matte eyeshadows provide a soft and natural look, while shimmery and metallic finishes add a touch of glamour and shine. Experiment with different finishes to create unique and personalized eye looks. For a more intense and dramatic effect, consider using glitter or duochrome eyeshadows. The possibilities are endless, so don’t be afraid to get creative and embrace your individual style.
Utilizing Tertiary Colors
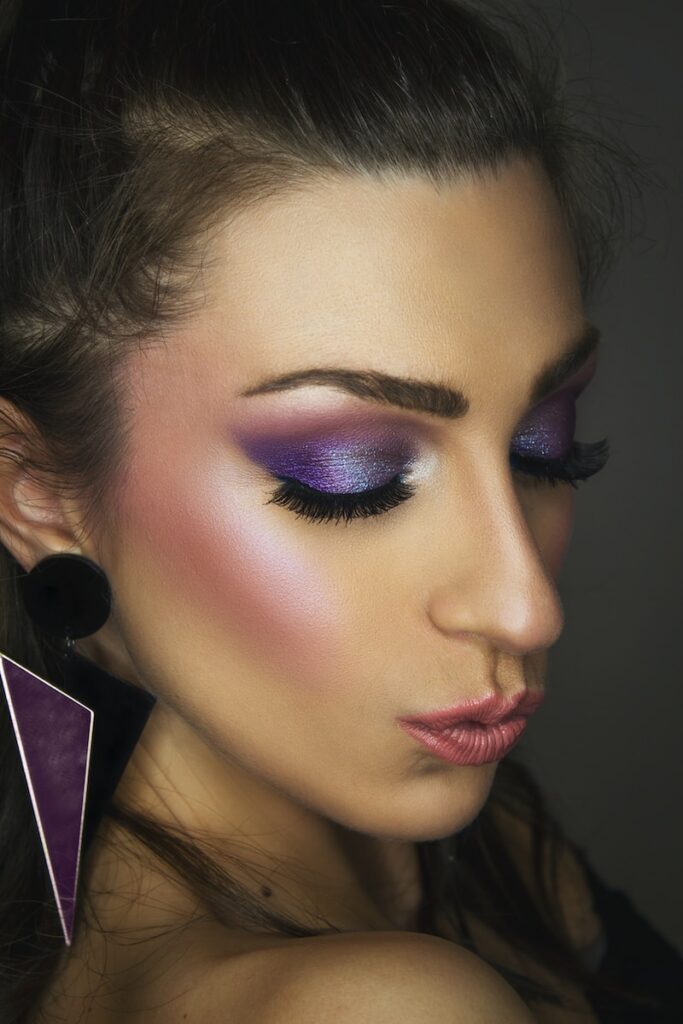
Tertiary colors, which are created by mixing primary and secondary colors, offer endless opportunities to create unique and eye-catching eye looks. These colors provide a wider range of shades and can be used to create stunning combinations. For example, mixing a warm red with a cool blue can create a beautiful purple eyeshadow. By exploring and incorporating tertiary colors into your eyeshadow looks, you can create complex and visually captivating eye makeup.
Blending Techniques
Using a Blending Brush
A blending brush is a must-have tool for seamlessly blending eyeshadows together. The fluffy bristles of a blending brush allow for effortless blending and create a soft and diffused effect. To blend eyeshadows, gently sweep the brush back and forth in windshield wiper motions across the crease and outer corners. This technique ensures that there are no harsh lines and that the colors blend seamlessly together.
Circular Motion
Blending eyeshadows in a circular motion is another effective technique to achieve a seamless and well-blended eye look. Using a blending brush, make small circular motions in the desired area, gradually working towards smooth and even blending. This technique helps to soften the edges of eyeshadows and create a beautiful gradient effect.
Windshield Wiper Motion
The windshield wiper motion is a technique that involves moving the brush back and forth in a horizontal motion, simulating the motion of a windshield wiper. This technique is especially effective for blending eyeshadows along the crease and outer corners. It allows for precise blending and ensures that the eyeshadows seamlessly transition into each other, creating a cohesive and well-blended look.
Feathering Technique
The feathering technique involves using a very light hand and gently sweeping the brush across the desired area, creating soft and subtle transitions between eyeshadow colors. This technique is particularly useful when working with intense or dark colors, as it helps to minimize any harsh lines and create a more diffused and natural effect.
Blending with Fingers
Blending with fingers can be a quick and convenient way to blend eyeshadows, especially when you’re on the go or don’t have a brush handy. The warmth of your fingers helps to melt the eyeshadow onto the skin, allowing for seamless blending. Simply use your fingertips to gently pat and blend the eyeshadows together, working from the inner corner to the outer corner. This technique is especially effective for cream or liquid eyeshadows, as the warmth of your fingers helps to blend them effortlessly.
Creating Dimension
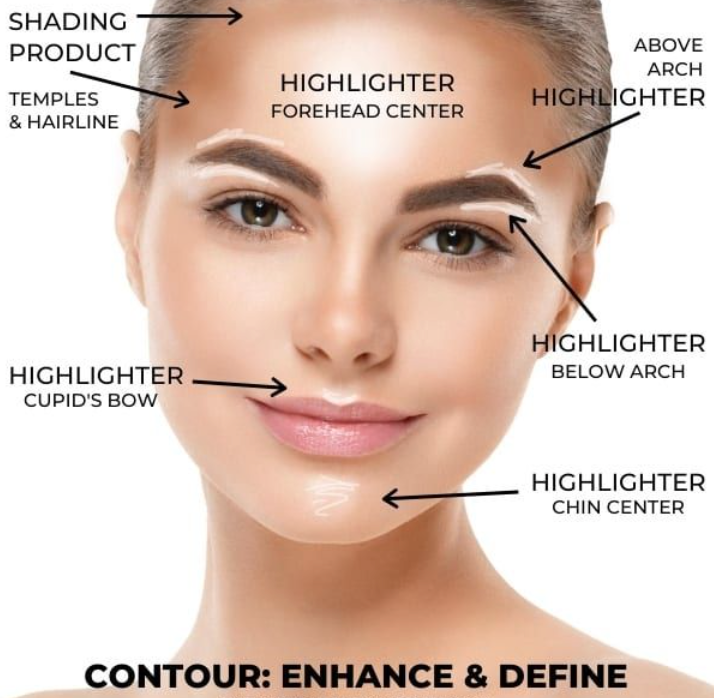
Highlighting the Inner Corner
Highlighting the inner corner of the eyes is a technique that helps to brighten the eyes and create a youthful and fresh look. Apply a shimmery or light eyeshadow to the inner corner using a small brush or your fingertip. This technique helps to make the eyes appear larger and more awake, especially when paired with darker shades on the outer corners.
Defining the Crease
Defining the crease is crucial for adding depth and dimension to your eyeshadow look. Use a medium-toned matte eyeshadow and a fluffy blending brush to apply the color to the crease area in back-and-forth motions. This technique creates a shadow effect, making the eyes appear more defined and contoured.
Adding Depth to the Outer V
Adding depth to the outer V is a technique that helps to create a more dramatic and captivating eye look. Use a dark eyeshadow and a small, tapered brush to apply the color to the outer corner of the eye, following the natural shape of the eye. This technique adds depth, dimension, and a touch of smokiness to your eye makeup.
Enhancing the Brow Bone
Enhancing the brow bone is a technique that helps to lift the eyes and create a polished and well-rounded eye look. Use a light matte eyeshadow slightly lighter than your skin tone and apply it to the brow bone using a fluffy brush. This technique highlights the brow bone, creating a subtle contrast and making the eyes appear more lifted and defined.
Smudging Eyeliner for Gradient Effect
Smudging eyeliner can add depth and dimension to your eye makeup, creating a gradient effect. Apply your desired eyeliner along the lash line and gently smudge it using a small smudging brush or a cotton swab. This technique softens the eyeliner and blends it seamlessly with the eyeshadows, creating a seamless and polished look.
Special Effects
Cut Crease Technique
The cut crease technique is a popular trend in eyeshadow application that creates a crisp and defined crease line. Start by applying a light eyeshadow all over the lid as a base. Then, using a small angled brush and a darker eyeshadow, carefully draw a line along the natural crease of the eye, creating a “cut” effect. Blend the darker shade up towards the brow bone, maintaining a defined crease line. This technique creates a sharp and glamorous look that is perfect for special occasions or bold makeup looks.
Halo Eye Look
The halo eye look is a stunning and elegant technique that creates a halo of color around the center of the lid. Start by applying a medium-toned eyeshadow to the outer corners and the inner corners of the eyes. Then, use a lighter shimmer shade to apply to the center of the lid, creating a halo effect. Blend the colors together at the edges to create a seamless transition. This technique creates a mesmerizing and ethereal eye look that is perfect for any occasion.
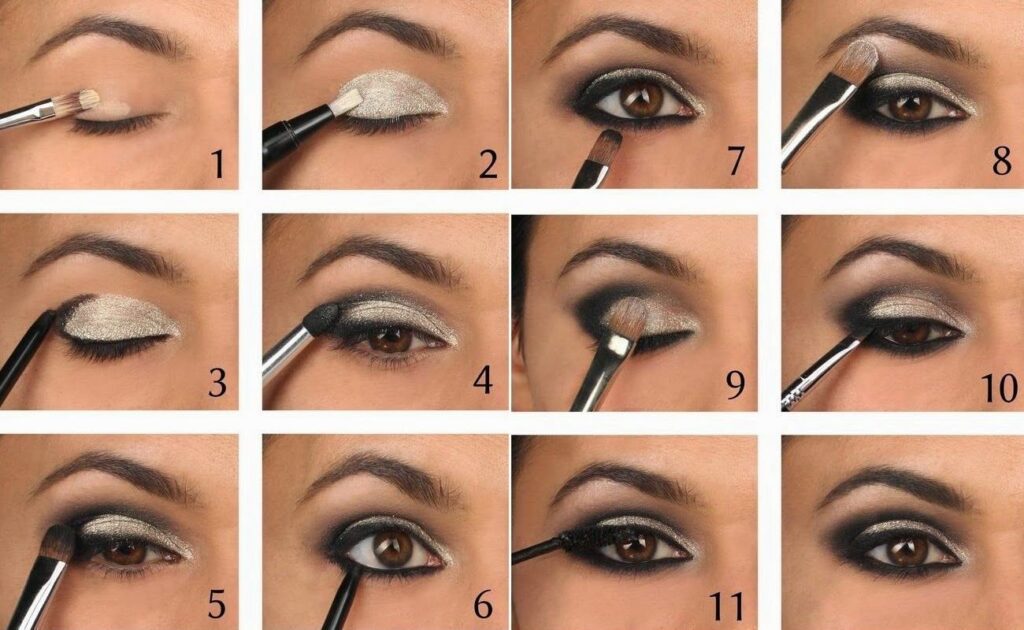
Smokey Eye Look
The classic smokey eye look is a timeless and sultry technique that adds drama and intensity to your eye makeup. Start by applying a dark eyeshadow to the outer corners and blend it into the crease. Then, apply the same shade along the lower lash line for a smoldering effect. Use a medium-toned eyeshadow to blend the edges and soften any harsh lines. This technique creates a smoldering and seductive eye look that is perfect for a night out or special events.
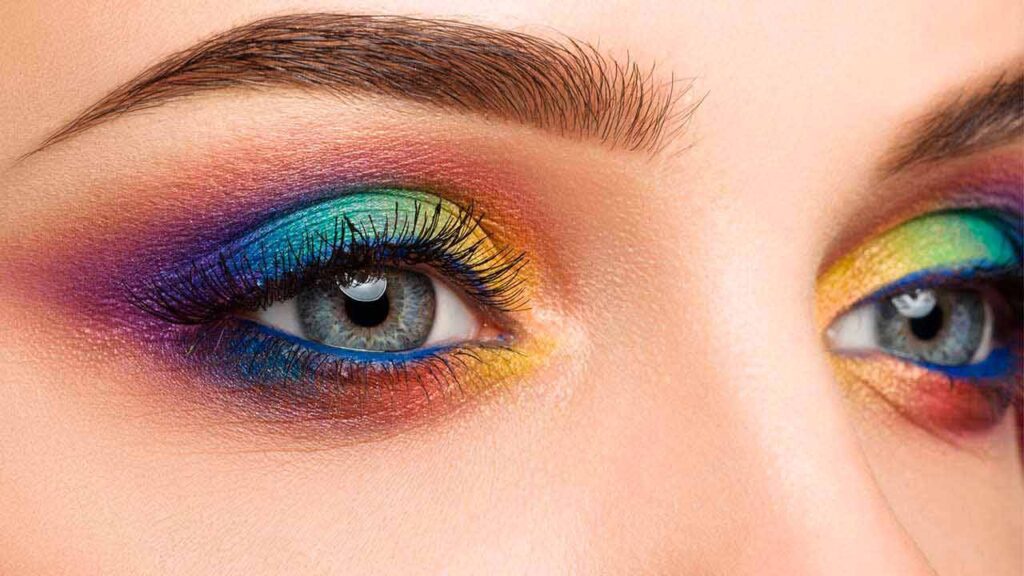
Gradient Rainbow Eye
The gradient rainbow eye is a playful and vibrant technique that incorporates a range of colors for a fun and colorful look. Start by choosing a range of eyeshadow colors from the same color family, such as blues or pinks. Apply the lightest shade to the inner corners and gradually deepen the colors as you move towards the outer corners. Blend the colors together for a seamless and gradient effect. This technique allows you to showcase your creativity and create a bold and eye-catching eye look.

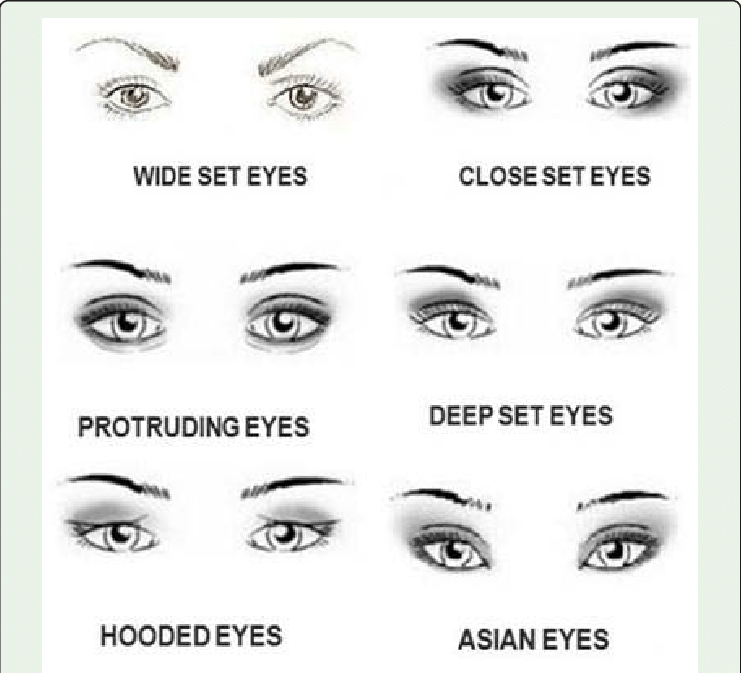
Working with Different Eye Shapes
Hooded Eyes
Hooded eyes have a fold of skin that partially or fully covers the eyelid. To enhance hooded eyes, it’s important to create the illusion of more lid space. Focus on using lighter shades on the mobile lid and adding depth to the crease using darker shades. Extend your eyeshadow slightly above the crease to create a lifted effect. Using shimmery shades on the center of the lid can also make the eyes appear more open and brighter.

Monolid Eyes
Monolid eyes have a flat surface without a visible crease. To enhance monolid eyes, focus on creating dimension using eyeshadow techniques. Use a transition shade in the crease to add depth and blend it out towards the brow bone for a gradient effect. Concentrate shimmery shades on the center of the lid to create the illusion of dimension. It’s also helpful to apply eyeliner along the lash line, gradually thickening towards the outer corners, to elongate the eyes.
Almond Eyes
Almond eyes have a slightly upturned outer corner and a visible crease. To enhance almond eyes, focus on creating balance and symmetry. Apply a transition shade in the crease and blend it towards the brow bone. Concentrate darker shades on the outer corners and extend it slightly upwards to elongate the eyes. Lastly, apply a highlight shade on the inner corners and the center of the lid to brighten and open up the eyes.
Round Eyes
Round eyes have a circular shape with equal distance between the inner and outer corners. To enhance round eyes, focus on elongating and creating the illusion of length. Apply a transition shade in the crease and extend it slightly beyond the outer corners to lengthen the eyes. Use a darker shade on the outer corners and blend it towards the temples to add depth. Applying eyeliner along both the upper and lower lash line, gradually thickening towards the outer corners, can also elongate the eyes.
Downturned Eyes
Downturned eyes have a slight droop at the outer corners, giving them a sad or tired appearance. To enhance downturned eyes, it’s important to focus on lifting and creating a lifted effect. Apply a transition shade in the crease and blend it upwards towards the brow bone. Concentrate darker shades on the outer corners and blend it upwards to create a lifted effect. Applying eyeliner along the upper lash line, extending it slightly upwards, can also uplift the eyes.
Close-Set Eyes
Close-set eyes have a narrow space between them. To enhance close-set eyes, focus on creating the illusion of distance. Apply a light or neutral shade on the inner corners to open up the eyes. Use a transition shade in the crease and blend it towards the brow bone. Concentrate darker shades on the outer corners and blend it outwards to widen the eyes. Applying eyeliner along the outer two-thirds of the upper lash line and the outer one-third of the lower lash line can also create the illusion of more space.
Wide-Set Eyes
Wide-set eyes have a larger space between them. To enhance wide-set eyes, focus on creating the illusion of less space. Apply a transition shade in the crease and blend it towards the brow bone. Concentrate darker shades on the inner corners and blend it inwards to visually bring the eyes closer together. Applying eyeliner along the inner two-thirds of the upper lash line and the inner one-third of the lower lash line can also create the illusion of less space.
Prominent Eyes
Prominent eyes have a more protruding appearance and are often characterized by a visible eyelid. To enhance prominent eyes, focus on softening and balancing the eye shape. Apply a transition shade in the crease and blend it towards the brow bone to create depth. Concentrate darker shades on the lid and outer corners. Avoid applying shimmery shades on the center of the lid, as it can accentuate the prominence. Instead, focus on applying a matte shade on the center of the lid.
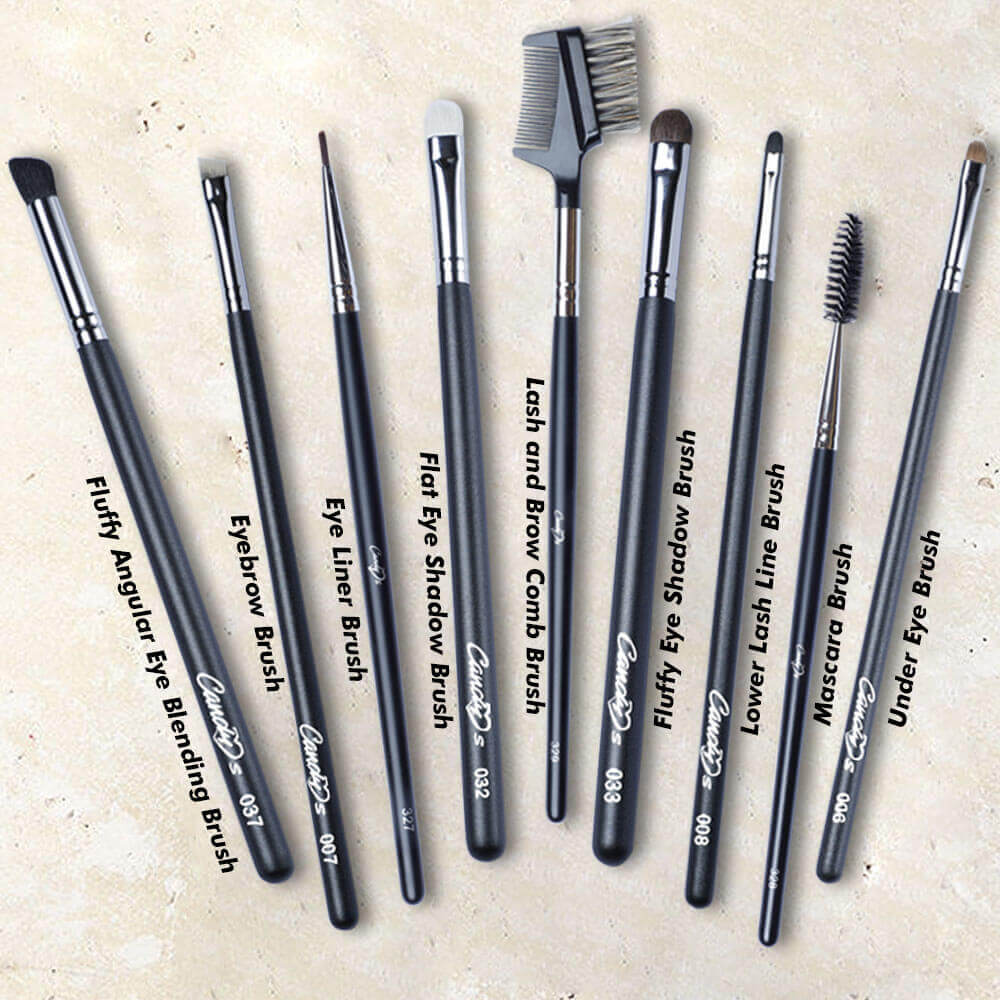
Choosing the Right Tools
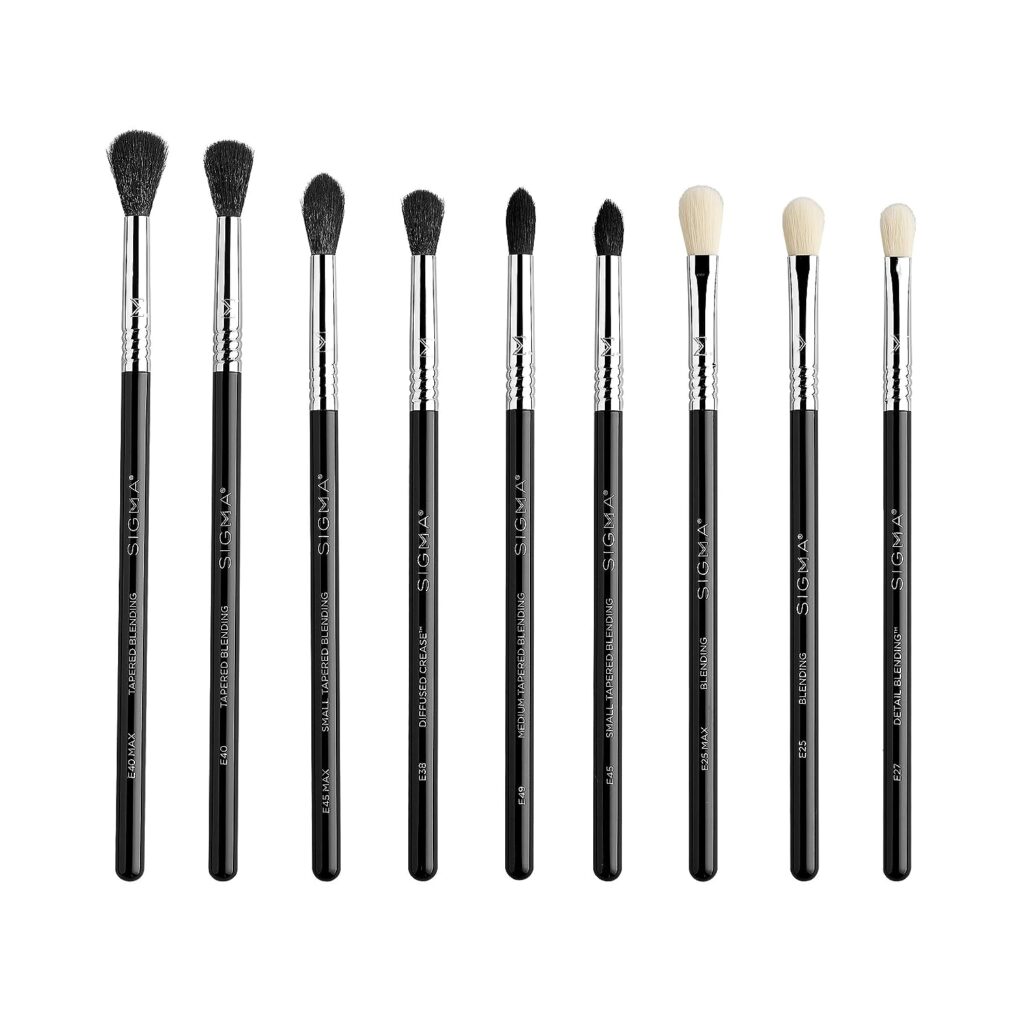
Eyeshadow Brushes
Choosing the right eyeshadow brushes is important for achieving a seamless and professional-looking eye makeup. A flat eyeshadow brush is ideal for packing color onto the lid, while a fluffy blending brush helps to blend and diffuse eyeshadows. A pencil brush is perfect for precise application in small areas, such as the outer corner or along the lash line. Experiment with different brush shapes and sizes to find the ones that work best for your desired look.
Blending Brushes
Blending brushes are essential for achieving a soft and well-blended eyeshadow look. Look for brushes with fluffy, tapered bristles that allow for seamless blending and diffusing of colors. Make sure the brush is dense enough to pick up and distribute the product evenly on the lids and crease. A blending brush is a versatile tool that can be used for various techniques and finishes, making it a must-have in your brush collection.
Pencil Brushes
Pencil brushes are perfect for adding precision and detail to your eyeshadow looks. These small, tapered brushes are ideal for smudging eyeliner, applying eyeshadow along the lower lash line, or creating a defined crease. The pointed tip allows for precise application, while the bristles are dense enough to deposit and blend eyeshadow effectively. A pencil brush is a handy tool for creating various eye looks and achieving a polished finish.
Flat Eyeshadow Brushes
Flat eyeshadow brushes are essential for packing color onto the lids and creating intense and vibrant eyeshadow looks. Look for brushes with dense, flat bristles that allow for maximum color payoff. These brushes are perfect for applying shimmery or metallic shades, as they efficiently pick up and distribute the product onto the lids. A flat eyeshadow brush is a must-have tool for achieving high-impact and show-stopping eye looks.
Sponge Applicators
Sponge applicators are a convenient tool for applying and packing on eyeshadow. They are often included in eyeshadow palettes and can be used to apply color to the lids. Sponge applicators work well for packing on glitter or loose pigments, as they hold onto the product and ensure minimal fallout. However, for more precise and blended looks, it is recommended to use brushes.
Using Fingers
Using fingers to apply eyeshadow can be a quick and convenient method, especially for cream or liquid eyeshadows. The warmth of your fingers helps to melt the product onto the skin, resulting in a seamless and smooth application. Simply dab your finger into the eyeshadow and gently pat it onto the desired area of the lid. Use your fingertip to blend and diffuse the color for a natural and effortless look.
Tips and Tricks
Starting Light and Building Up
When applying eyeshadow, it is always best to start with a light hand and gradually build up the intensity. By applying eyeshadow lightly at first, you have more control over the color payoff and can easily adjust the shade to your desired level of intensity. It is easier to add more eyeshadow than to remove excess product, so take your time and build up the color gradually for a seamless and well-blended look.
Layering Sheer to Intense
Layering sheer to intense shades is a technique that creates depth and dimension in your eyeshadow look. Start by applying a sheer or lighter shade as a base all over the lid, and then slowly build up the intensity with a more vibrant or darker shade on top. This technique allows the colors to blend seamlessly and adds dimension to the eyes. Layering sheer to intense shades also creates a gradient effect that enhances the overall look.
Blending Edges for Seamless Transitions
Blending the edges of your eyeshadows is crucial for achieving a seamless and well-blended look. Take a clean blending brush and blend over the edges of each eyeshadow shade to soften any harsh lines and create a smooth transition between colors. The key to seamless transitions is to blend with light, circular or windshield wiper motions until the colors seamlessly melt into each other.
Avoiding Muddy Colors
To avoid muddy colors, it’s important to clean your brushes between different eyeshadow shades or use separate brushes for each color. Muddy colors occur when different eyeshadow shades mix together and create a muddled or indistinct look. By ensuring that your brushes are clean and free from any residual pigments, you can achieve the true color payoff and prevent your eyeshadows from becoming muddy.
Gradual Blend Technique
The gradual blend technique involves gradually blending eyeshadows together for a seamless and gradient effect. Start by applying a transition shade in the crease and blend it upwards towards the brow bone. Then, layer a darker shade on the outer corners and blend it into the crease, gradually diffusing the color. Finally, use a clean blending brush to blend the edges for a seamless transition and a well-blended look.
Experimenting with Placement
Don’t be afraid to experiment with different eyeshadow placements and techniques. Try applying eyeshadows in different shapes and angles to create unique and personalized looks. For example, instead of applying eyeshadow in a traditional rounded shape, try applying it in a winged or triangular shape for a bold and artistic effect. Experimenting with placement allows you to explore your creativity and discover new and exciting eye looks.
Using Tape for Sharp Lines
Using tape as a guide can help you achieve sharp and precise eyeshadow lines. Place a small piece of tape diagonally along the outer corner of your eye, aligning it with the outer corner of your eyebrow. Apply eyeshadow as desired, ensuring that the color follows the tape’s edge. Once you remove the tape, you will be left with a clean and sharp line. This technique is especially useful for creating winged or cut crease looks.
Fixing Mistakes
Erasing Excess Shadow
If you accidentally apply too much eyeshadow or want to clean up any fallout, a makeup remover wipe or cotton swab dipped in micellar water can come to the rescue. Gently wipe away the excess eyeshadow or fallout, being careful not to disturb the rest of your makeup. By using this technique, you can easily fix any mistakes or clean up any unwanted eyeshadow.
Cleaning Up Fallout
Fallout refers to the excess eyeshadow that falls onto the under-eye area during application. To clean up fallout, use a clean fluffy brush or a makeup sponge and gently sweep away the excess eyeshadow. You can also use a makeup remover wipe or a cotton swab to remove any fallout. To prevent fallout in the first place, tap off any excess eyeshadow from the brush before applying it to the lids.
Correcting Uneven Blend
If you notice an uneven blend between your eyeshadow shades, there are a few ways to correct it. First, take a clean blending brush and gently blend over the uneven area to soften the edges. If the color difference is significant, you can apply a transition shade over both colors and blend them together. Additionally, you can use a clean blending brush to buff the colors together until they blend seamlessly.
Using Concealer for Precision
Concealer can be used to clean up and sharpen the edges of your eyeshadow for a more precise and defined look. Use a small concealer brush or a clean cotton swab dipped in concealer to trace along the edges of your eyeshadow, creating a clean and sharp line. This technique can help fix any mistakes or smudging and create a flawless and polished eye look.
Buffing Out Harsh Lines
If you have applied eyeshadow with a heavy hand and created harsh lines, don’t worry. Take a clean blending brush and gently buff over the harsh lines to soften them. Use light circular or windshield wiper motions to blend the colors together and create a more seamless and diffused look. This technique helps to blend the eyeshadows together and create a smooth transition between colors.
Creating Depth: Layering and Blending Eyeshadows
In the world of makeup, eyeshadow is a powerful tool that can transform your eyes and elevate your overall look. By understanding color theory, preparing your eyelids correctly, and mastering various layering, blending, and dimension techniques, you can create stunning eye makeup looks that suit your individual style and enhance your natural beauty. Remember to experiment, have fun, and let your creativity shine. With the right tools, techniques, and a little practice, you can become an eyeshadow connoisseur and create endless eye-catching looks.