If you’ve ever struggled with applying foundation smoothly and achieving a flawless finish, then this article is for you. In “Flawless Foundations: An Expert’s Guide to Seamless Application,” you’ll find expert tips and tricks that will help you master the art of foundation application. Whether you’re a makeup novice or a beauty aficionado, this guide will provide you with all the information you need to create a seamless, natural-looking base that lasts all day. Say goodbye to streaks, cakey patches, and uneven coverage – with these expert techniques, your foundation will always look flawless.
Choosing the Right Foundation
When it comes to achieving a flawless makeup look, choosing the right foundation is essential. With so many options available on the market, it can be overwhelming to find the perfect match for your skin. However, by following a few simple steps, you can easily determine the ideal foundation for your needs.
Determining Skin Type
Before selecting a foundation, it’s crucial to understand your skin type. Is your skin oily, dry, combination, or normal? This will help you choose a formula that caters to your specific needs. For instance, if you have oily skin, a matte foundation that controls shine would be a great option. On the other hand, if you have dry skin, a hydrating foundation with a dewy finish would be more suitable.

Understanding Undertones
Undertones play a significant role in finding a foundation shade that matches your skin perfectly. There are three main undertones: warm, cool, and neutral. Warm undertones have a yellow or golden hue, cool undertones have a pink or bluish hue, and neutral undertones have a balance of both warm and cool tones. Understanding your undertone will help you select a foundation shade that complements your skin tone flawlessly.

Matching Shade to Skin Tone
Once you’ve determined your undertone, it’s time to match the foundation shade to your skin tone. The best way to do this is by testing the foundation on your jawline or the back of your hand. Look for a shade that disappears into your skin seamlessly, without any noticeable difference in color. Keep in mind that your skin tone may vary slightly depending on the season, so it’s always a good idea to have a couple of different shades on hand.
Considering Coverage and Finish
The level of coverage and finish you desire is another crucial factor to consider when selecting a foundation. If you have blemishes or discoloration that you want to cover, a full-coverage foundation would be the best choice. However, if you prefer a more natural look, a light or medium coverage foundation would be more suitable. Additionally, consider the finish you want – whether you prefer a matte, satin, or dewy finish.
Prepping the Skin
Before applying foundation, it’s essential to prepare your skin to ensure a smooth and long-lasting application. This step involves cleansing, moisturizing, and protecting your skin from the sun.
Cleansing and Moisturizing
Start by thoroughly cleansing your face to remove any dirt, oil, or makeup residue. This will create a clean canvas for your foundation. After cleansing, apply a moisturizer that suits your skin type. Moisturizing will not only hydrate your skin but also create a barrier that allows the foundation to adhere better.
Using Primer
A primer is a great addition to your makeup routine as it helps create a smooth base for your foundation. Choose a primer that addresses your specific skin concerns, whether it’s blurring pores, reducing redness, or adding radiance. Apply a small amount of primer all over your face and allow it to settle for a few minutes before moving on to the next step.
Applying Sunscreen
One vital step that should never be skipped is applying sunscreen. Regardless of the weather or time of year, protecting your skin from harmful UV rays is essential. Before applying foundation, make sure to apply a broad-spectrum sunscreen with at least SPF 30. This will not only protect your skin but also prevent any sun damage that can accelerate aging.

Tools and Techniques
The tools and techniques you use to apply foundation can make a significant difference in achieving a flawless finish.
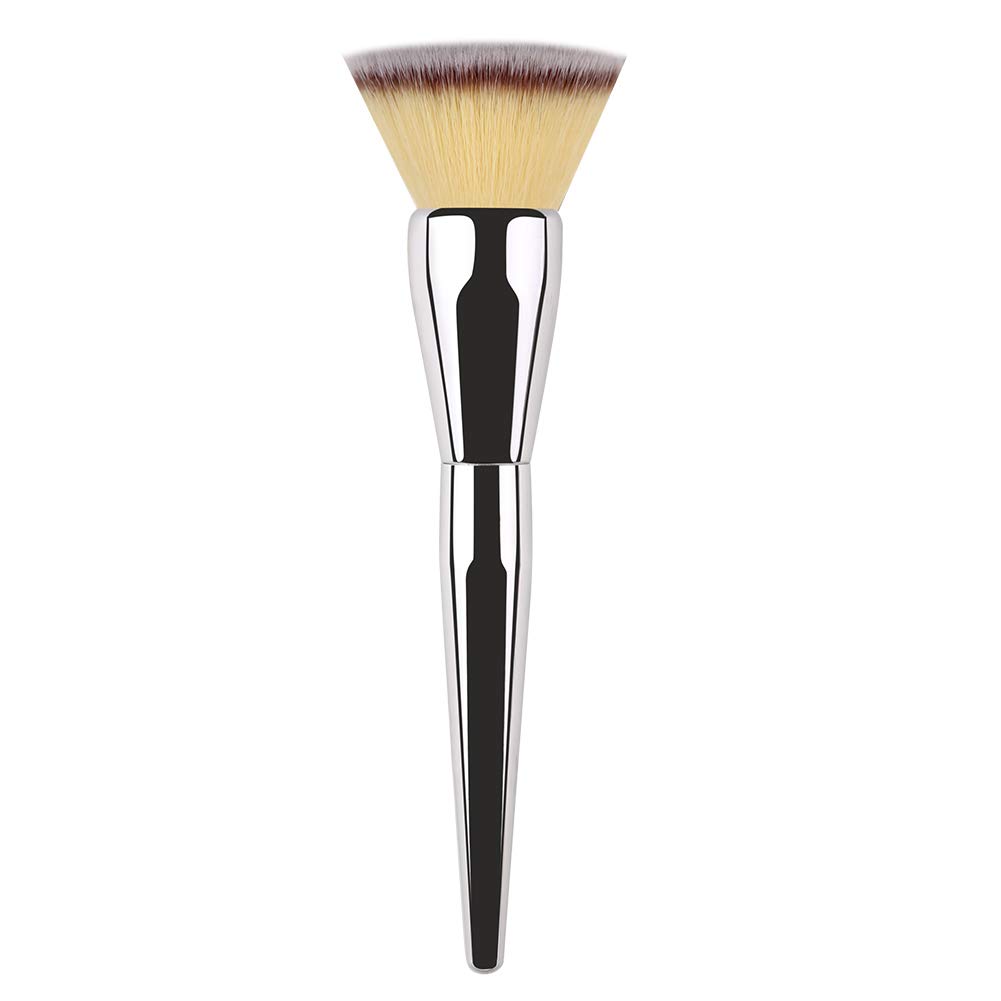
Brushes
Foundation brushes come in various shapes, sizes, and materials. Synthetic brushes work well for liquid and cream foundations, while natural hair brushes are better suited for powder foundations. Brushes provide more precision and control, allowing you to evenly apply foundation and blend it seamlessly into your skin.
Beauty Blenders
Beauty blenders or makeup sponges are a popular alternative to brushes. They are versatile and can be used with both liquid and powder foundations. When using a beauty blender, dampen it with water and squeeze out any excess moisture. Bounce the sponge onto your skin to apply and blend the foundation for an airbrushed finish.

Fingers
Using your fingers is another option for foundation application. The warmth of your fingertips helps to melt the product into your skin, creating a natural and effortless look. This technique works best with lightweight foundations or tinted moisturizers. Simply dab small amounts of foundation onto your face and blend it out with your fingers, making sure to reach all areas of your face.
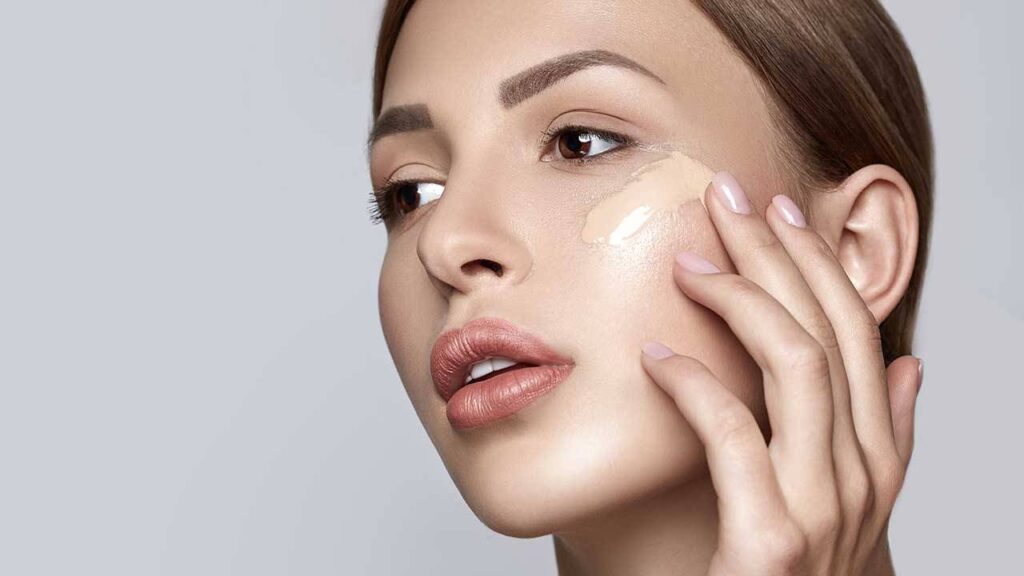
Applying Liquid Foundation
Liquid foundation is the most popular choice due to its versatility and ease of application. Here are some tips and techniques for applying liquid foundation flawlessly.
Pumping and Dispensing
Start by pumping a small amount of foundation onto the back of your hand or onto a clean palette. This will prevent contamination and allow you to control the amount of product you use. Remember, it’s always better to start with a small amount and build up if needed.
Dotting Method
The dotting method involves placing small dots of foundation onto your face, focusing on areas that need more coverage. Start with the center of your face and work your way outwards. Use your fingers, a brush, or a beauty blender to gently blend the foundation into your skin in a stippling motion.
Buffing Technique
The buffing technique is perfect for achieving a seamless and airbrushed finish. After applying the foundation using the dotting method, take a dense brush and buff the product into your skin using circular motions. This technique helps to melt the foundation into your skin and blur any imperfections.
Layering for Buildable Coverage
If you prefer more coverage, layering is the key. Allow the first layer of foundation to dry slightly before applying another thin layer. This technique allows you to build coverage gradually without the foundation looking cakey. Remember to blend each layer thoroughly for a natural and flawless appearance.

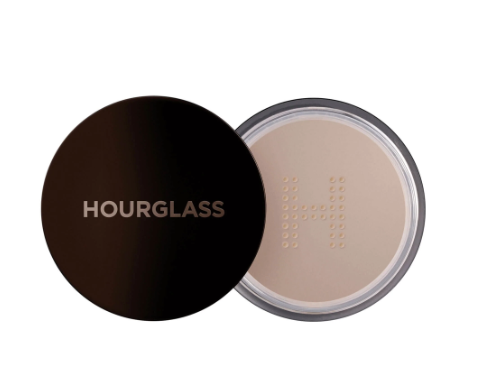
Applying Powder Foundation
Powder foundation is an excellent choice for those with oily or combination skin, as it helps control shine and provides a matte finish. Here’s how to apply powder foundation for a seamless and long-lasting result.
Choosing the Right Powder
When selecting a powder foundation, opt for one that matches your skin tone and blends seamlessly with your liquid foundation if you’re using one. It’s essential to choose a powder with a finely-milled texture for a smooth and natural-looking finish.
Using a Powder Brush
Using a fluffy powder brush, swirl the brush into the powder foundation and tap off any excess. Apply the powder in a pressing motion onto your skin, starting from the center of your face and working towards the outer areas. This technique ensures an even application and helps to control shine throughout the day.
Buffing or Pressing Techniques
After applying the powder foundation, you can choose to buff it into your skin using a circular motion, similar to the buffing technique for liquid foundation. This will help the powder melt into your skin, creating a seamless finish. Alternatively, you can press the powder onto your skin using a puff or sponge, which provides more coverage and helps control oiliness.
Blending and Seamless Application
Blending is the key to achieving a seamless and natural-looking foundation. Here are some techniques to help you blend and create a flawless finish.
Diffusing Lines and Edges
After applying foundation, it’s essential to blend any visible lines or edges. Use a clean brush or sponge and gently blend the foundation in upward and outward motions. This will ensure a smooth transition between your foundation and the rest of your skin.
Blurring Techniques
To achieve a flawless and airbrushed finish, use a powder or a setting spray to blur any imperfections. Gently press a translucent powder onto your skin using a fluffy brush or apply a setting spray with a misting motion. This will help to set your foundation and soften the appearance of pores and texture.
Feathering for a Natural Look
To create a natural and soft look, feather the foundation along your hairline, jawline, and neck. This technique ensures that there are no visible lines or harsh edges. Use a clean brush or sponge to blend the foundation seamlessly into these areas, creating a seamless transition.
Concealer Tips
Concealer is your best friend when it comes to hiding blemishes, dark circles, and imperfections. Here are some tips for using concealer effectively.
Correcting Under Eye Circles
To conceal under-eye circles, use a peach or salmon-toned concealer. Apply the concealer in a triangular shape under your eyes, starting from the inner corners and extending towards your cheekbones. Blend the concealer using a brush or your fingers, making sure to tap and blend it gently to avoid any creasing.

Covering Blemishes
For blemishes or spots, use a concealer that matches your skin tone exactly. Dab a small amount of concealer onto the blemish and gently blend the edges to ensure a seamless finish. Set the concealer with a light dusting of translucent powder to ensure it stays in place throughout the day.
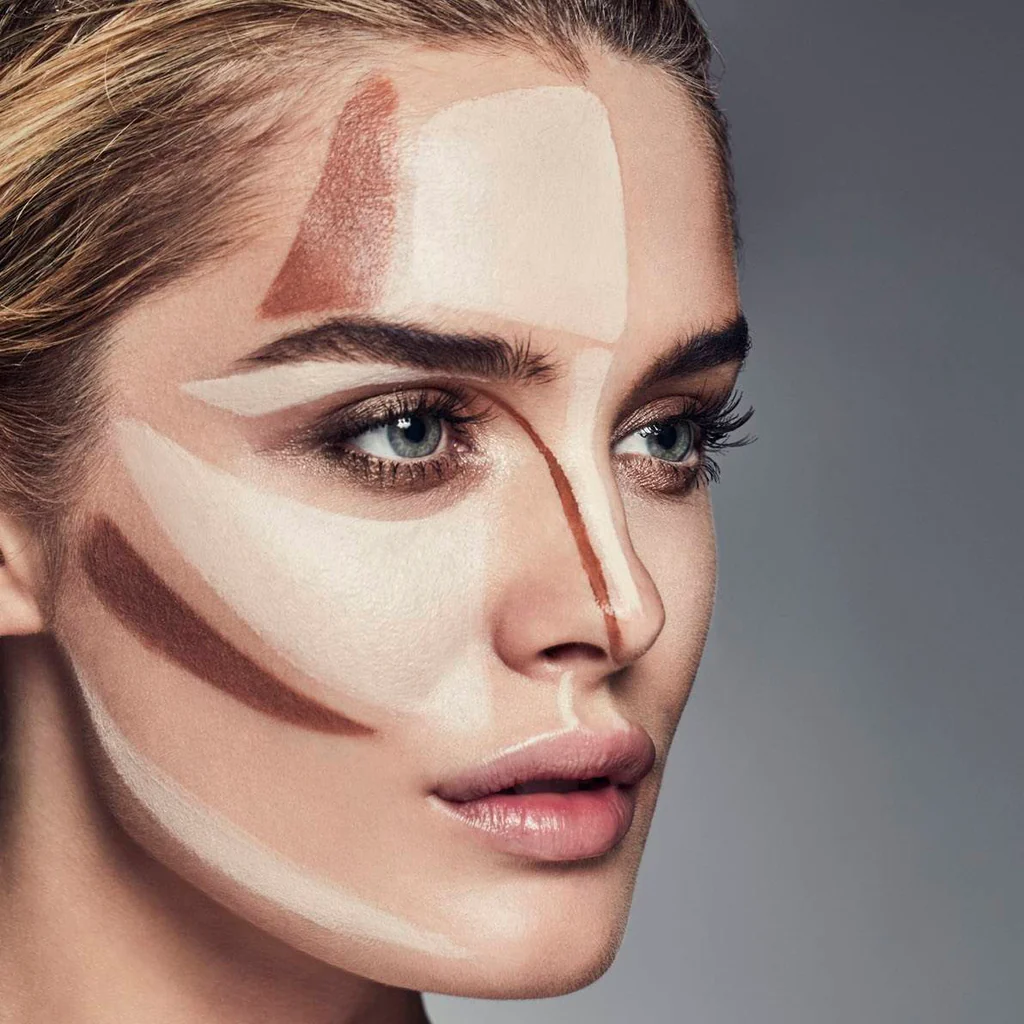
Highlighting and Contouring
Concealer can also be used to highlight and contour your face. Choose a shade lighter than your skin tone to highlight areas such as the center of your forehead, under your brow bone, down the bridge of your nose, and the center of your chin. Use a shade darker than your skin tone to contour the hollows of your cheeks, the sides of your nose, and along your jawline. Blend the concealer thoroughly for a natural-looking result.
Setting and Longevity
After applying foundation and concealer, it’s essential to set your makeup to ensure longevity and prevent it from smudging or fading throughout the day.
Setting Powder
A setting powder helps to mattify the skin and set the foundation in place. Choose a translucent powder that matches your skin tone and lightly dust it all over your face using a fluffy brush. This will help to blend the foundation and concealer seamlessly and provide a matte finish.
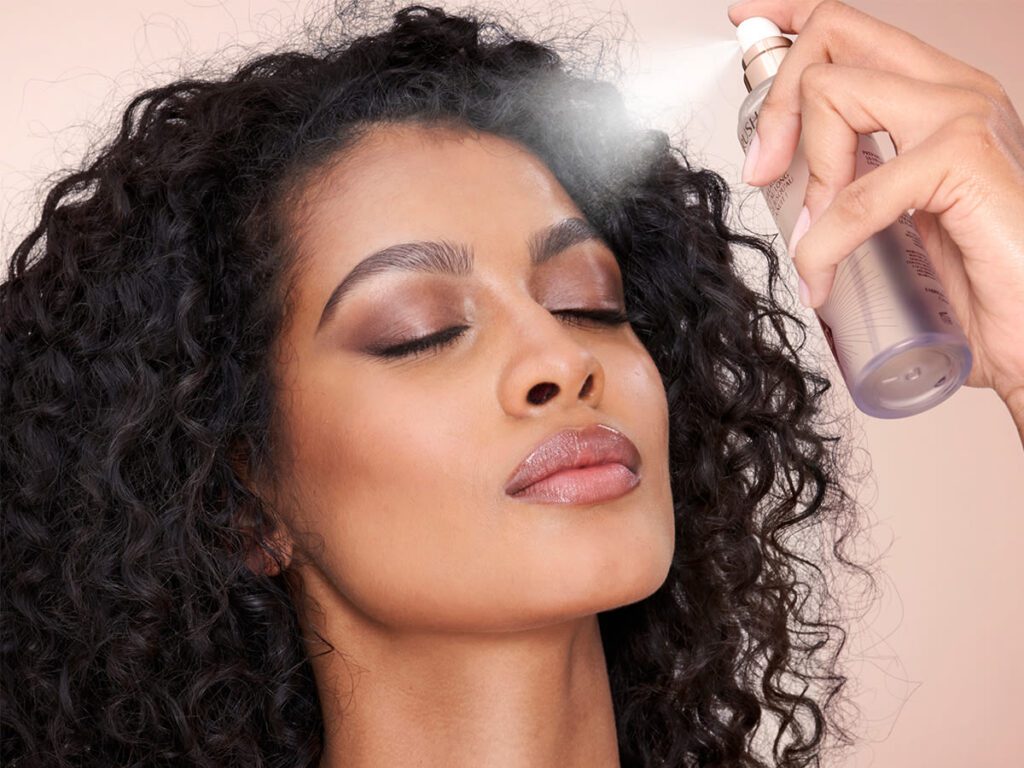
Setting Spray
Setting sprays are a great addition to your makeup routine, as they help to lock in your foundation and prolong its wear. After applying all your makeup, lightly mist a setting spray all over your face. This will ensure that your foundation stays in place and looks fresh throughout the day.
Touch-ups
Throughout the day, you may need to touch up your foundation to maintain a flawless look. Carry a powder compact or a blotting paper with you to absorb excess oil and touch up areas where the foundation may have faded. By doing this, you can keep your foundation looking fresh and seamless all day long.
Avoiding Common Mistakes
Even the most experienced makeup enthusiasts can make common foundation mistakes. Here are some mistakes to avoid for a flawless application.
Applying Too Much Foundation
One of the most common mistakes is applying too much foundation. Using an excessive amount of product can lead to a cakey and unnatural appearance. Start with a small amount of foundation and build up the coverage gradually, focusing on areas that need more attention.
Neglecting the Neck and Jawline
Forgetting to blend foundation into your neck and jawline is a mistake that can create an obvious line of demarcation. When applying foundation, make sure to extend the product down to your neck and blend it seamlessly into your skin. This will create a more natural and cohesive look.
Forgetting to Blend Into the Hairline
A common mistake is forgetting to blend foundation into your hairline. When applying foundation, make sure to blend it into your hairline and temples to avoid any noticeable difference in color or texture. Take your time to blend thoroughly and smooth out any lines.
Overlooking SPF Protection
Many foundations now come with SPF protection, but it’s crucial not to overlook this essential factor. SPF helps protect your skin from the harmful effects of the sun’s UV rays, preventing premature aging and skin damage. Look for a foundation with a broad-spectrum SPF of at least 30 for optimal protection.
Caring for Your Brushes and Tools
Proper care and maintenance of your brushes and tools are essential to ensure their longevity and hygienic use.
Cleaning and Drying
Regularly clean your brushes and tools to remove any buildup of product, dirt, and bacteria. Use a gentle cleanser or brush cleaner and rinse them thoroughly under lukewarm water. Gently squeeze out any excess water and reshape the bristles. Lay them flat on a clean towel to dry naturally overnight.
Replacing Old Tools
As much as we love our favorite brushes and tools, it’s essential to know when to replace them. Over time, brushes can become worn out, lose their shape, or accumulate bacteria that can cause breakouts. Replace brushes and tools as needed to ensure your makeup application remains flawless and hygienic.
By following these comprehensive tips and techniques for seamless foundation application, you can achieve a flawless and natural-looking complexion that lasts all day. Remember, foundation is the base of your makeup look, so taking the time to choose the right formula, prep your skin, and apply it correctly will make a significant difference in achieving a flawless finish.

Maybelline New York Face Foundation Warm Nude 128 30 ml Pack Of 1 Review(Opens in a new browser tab)
Maybelline New York Fit Me Fresh Tint Foundation SPF 50 Review(Opens in a new browser tab)
Maybelline Fit Me Fresh Tint Foundation SPF 50 Review(Opens in a new browser tab)