Have you ever wondered how to achieve that perfect, glowing complexion? Look no further than the Inner Eye Highlight! This revolutionary makeup technique is transforming the way we enhance our natural beauty. With its subtle yet impactful touch, the Inner Eye Highlight illuminates the eyes, giving you a radiant and youthful appearance. In this article, we will explore the power of this makeup trend and how you can easily incorporate it into your daily routine. Get ready to uncover the secrets of the Inner Eye Highlight and embrace your most dazzling self!

What is the Inner Eye Highlight?
Definition of Inner Eye Highlight
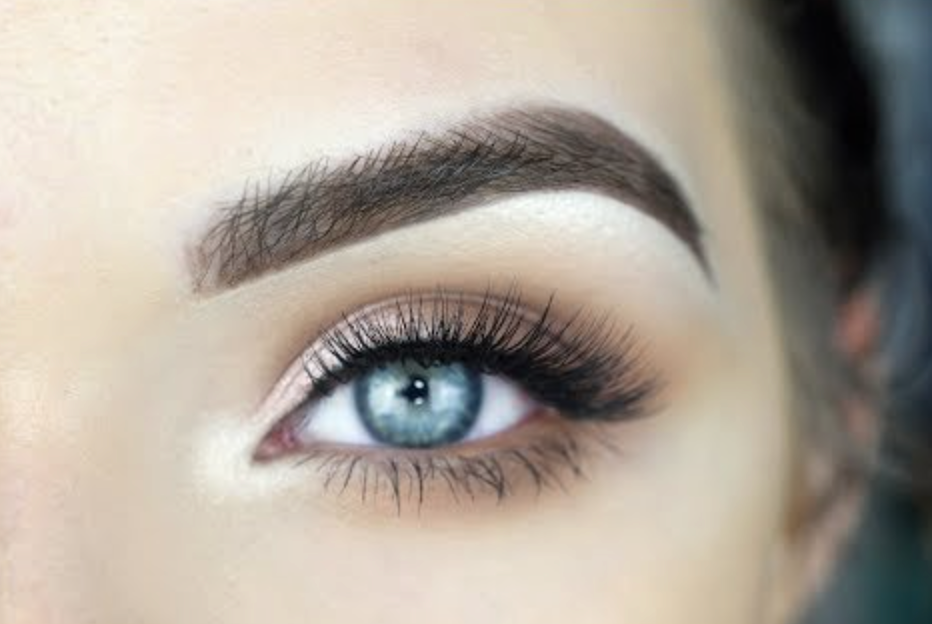
The Inner Eye Highlight refers to the technique of applying a light-reflecting product to the inner corner of the eye. This area, also known as the tear duct, is where the upper and lower eyelids meet near the nose. By adding a touch of brightness to this spot, it creates an illusion of wider, brighter eyes.
Purpose of Inner Eye Highlight
The purpose of the Inner Eye Highlight is to enhance the natural beauty of the eyes. It adds dimension, radiance, and a subtle pop of light to the overall eye makeup look. By drawing attention to this area, it can make the eyes appear more open and awake, giving a youthful and refreshed appearance.
Benefits of Inner Eye Highlight
There are numerous benefits to incorporating the Inner Eye Highlight into your makeup routine. Firstly, it brightens the eyes, making them appear more alert and vibrant. Secondly, it can help to counteract any darkness or shadows that may be present in the inner corner of the eyes. Thirdly, the Inner Eye Highlight can create the illusion of larger, more awake eyes, making it a must-have technique for those wanting to achieve a wide-eyed look.
How to Achieve the Inner Eye Highlight
Preparation
Before applying the Inner Eye Highlight, it’s important to prepare the area. Start by cleansing the face and applying a moisturizer. This helps to create a smooth canvas for makeup application, allowing the products to glide on effortlessly. Consider using an eye primer specifically designed for the delicate eye area to ensure longevity and prevent creasing.
Choosing the Right Products
When it comes to selecting the right products for the Inner Eye Highlight, there are three main options: powder highlight, cream highlight, and liquid highlight. Powder highlight is easy to work with and provides a subtle, natural-looking sheen. Cream highlight offers a more intense, dewy glow and is ideal for those with dry or mature skin. Lastly, liquid highlight provides a high-shine, metallic finish and is great for creating a bold and dramatic look.

Application Techniques
To achieve the Inner Eye Highlight, start by gently patting a small amount of highlighter onto the inner corner of the eye using a small, fluffy brush or your fingertips. Gradually build up the intensity until you achieve the desired level of brightness. For a more precise application, consider using a small angled brush to target the innermost part of the eye. Remember to blend the product seamlessly into the surrounding areas for a natural and flawless finish.
Blending and Diffusing
To ensure a seamless transition between the highlighted inner corner and the rest of the eye makeup, it is crucial to blend and diffuse the product. Use a clean blending brush or a fluffy brush to lightly blend the highlighter outward, towards the middle of the eyelid. This softens any harsh lines and creates a smooth gradient effect. Avoid applying too much pressure while blending, as this could remove the product or create a patchy appearance. Practice gentle, circular motions for a well-blended Inner Eye Highlight.

Different Types of Inner Eye Highlight
Powder Highlight
Powder highlight is a versatile option for achieving the Inner Eye Highlight. It comes in various shades and finishes, ranging from subtle shimmer to intense metallic. Powder highlight is easy to work with and provides a natural-looking glow. Simply apply the powder highlighter to the inner corner of the eye using a small brush or your fingertips. Build up the intensity as desired, and blend for a seamless finish.

Cream Highlight
Cream highlight offers a more intense and dewy glow. It is especially suitable for those with dry or mature skin, as it adds hydration and luminosity to the eye area. To achieve the Inner Eye Highlight with a cream product, use your fingertips to dab a small amount of highlighter onto the inner corner of the eye. Gently blend it outwards towards the middle of the eyelid for a radiant and glowing effect.

Liquid Highlight
For a bold and dramatic Inner Eye Highlight, liquid highlight is the perfect choice. Liquid highlight provides a high-shine, metallic finish that instantly grabs attention. To apply liquid highlighter, use a small brush or the applicator wand to carefully place the product on the inner corner of the eye. Lightly blend and diffuse the highlighter for a seamless transition.

Selecting the Right Shade for Inner Eye Highlight
Consider Skin Tone
When selecting a shade for the Inner Eye Highlight, it is important to consider your skin tone. For fair skin tones, champagne or pale pink highlighters tend to complement the complexion beautifully. Those with medium skin tones can opt for gold or peachy tones to add warmth and radiance. For deeper skin tones, bronze or copper shades work well to create a stunning contrast and enhance the inner corner of the eyes.
Matching Eye Makeup
To achieve a cohesive and harmonious look, it is essential to match the Inner Eye Highlight with the rest of your eye makeup. If you’re going for a natural everyday look, choose a highlighter that is a few shades lighter than your natural skin tone to create a subtle, soft glow. For a more glamorous and bold eye makeup look, opt for a highlighter that coordinates with the eyeshadow or eyeliner colors used.
Going for a Natural Look
If you prefer a natural-looking Inner Eye Highlight, consider using a highlighter with a subtle sheen or a matte finish. This creates a soft and understated glow that looks effortlessly beautiful. Avoid using overly shimmery or glittery highlighters if you want a more subtle effect. Remember, the goal of the Inner Eye Highlight is to enhance your natural features without overpowering the rest of your makeup.

Tips for Enhancing the Inner Eye Highlight
Layering Technique
To take the Inner Eye Highlight to the next level, try using the layering technique. After applying the initial layer of highlighter to the inner corner of the eye, wait a few seconds for it to set. Then, apply a second layer of highlighter using a smaller brush or your fingertips. This adds an extra dimension and intensity to the Inner Eye Highlight, giving a mesmerizing effect.
Using Complementary Colors
Experimenting with complementary colors can elevate the Inner Eye Highlight and create a captivating look. Consider using a highlighter shade that complements your eye color to make your eyes pop. For example, if you have blue eyes, a champagne or gold-toned highlighter can enhance the natural color of your eyes. Similarly, green or hazel eyes can be accentuated by using a highlighter with a hint of purple or pink.

Pairing with Outer Corner Highlight
For a truly captivating and mesmerizing eye makeup look, pair the Inner Eye Highlight with an outer corner highlight. After applying the Inner Eye Highlight, apply a darker shade or a shimmery eyeshadow to the outer corner of the eye. This adds depth, dimension, and a touch of drama to the eyes. The contrast between the bright inner corner and the darker outer corner creates a stunning and eye-catching effect.
Common Mistakes to Avoid with Inner Eye Highlight
Over-Application
One common mistake with the Inner Eye Highlight is over-application. Adding too much highlighter to the inner corner of the eye can create an unnatural and exaggerated look. Remember, subtlety is key when it comes to highlighting this area. Start with a small amount of product, and gradually build up the intensity if desired. It’s easier to add more highlighter than to remove excess product.
Using the Wrong Brush
Using the wrong brush can also lead to a less-than-desirable Inner Eye Highlight. A small, fluffy brush or a precise brush with an angled tip is best for precise and controlled application. Avoid using large, fluffy brushes as they can diffuse the highlighter too much and create a messy look. Experiment with different brushes to find the one that works best for your desired effect.
Skipping Eye Primer
Skipping eye primer is a common mistake that can impact the longevity and appearance of the Inner Eye Highlight. Eye primer helps to create a smooth and even base for the highlighter, allowing it to adhere better and last longer. The primer also prevents creasing and fading, ensuring that your Inner Eye Highlight stays flawless throughout the day or night. Don’t underestimate the power of a good eye primer.

Creating Different Looks with Inner Eye Highlight
Subtle Everyday Look
For a subtle everyday look, opt for a light champagne or pale pink highlighter. Apply a small amount to the inner corner of the eye using a precise brush or your fingertips. Blend and diffuse the highlighter for a natural and effortless glow. Pair this with a neutral eyeshadow and mascara for a fresh and polished look that brightens your eyes without being too overpowering.

Glamorous Evening Look
To create a glamorous evening look, choose a more intense and shimmery highlighter. Apply the highlighter to the inner corner of the eye and layer it for added intensity. Pair this with a smoky eye or a bold eyeshadow color for a striking and captivating look. Finish off with eyeliner and false lashes for extra drama and allure.
Monochromatic Eye Look
For a monochromatic eye look, choose a highlighter that matches your eyeshadow or eyeliner color. Apply the highlighter to the inner corner of the eye, using a small, precise brush. This creates a cohesive and harmonious look that ties the entire eye makeup together. Whether you’re sporting a natural, neutral look or a vibrant, colorful look, the monochromatic Inner Eye Highlight adds a touch of elegance and sophistication.

The Inner Eye Highlight for Different Eye Shapes
Almond-shaped Eyes
For almond-shaped eyes, the Inner Eye Highlight can enhance the natural shape and beauty. Apply the highlighter to the inner corner of the eye, focusing on the area closest to the tear duct. This brightens the eyes and draws attention to their unique shape. Pair with a winged liner or a gradient eyeshadow look to further elongate and emphasize the almond shape.
Round Eyes
To make round eyes appear more elongated and defined, apply the Inner Eye Highlight in a triangular shape. Start from the inner corner of the eye and extend the highlighter outwards towards the center of the lower lash line. Blend and diffuse the product for a seamless finish. This technique helps to create the illusion of longer, more almond-shaped eyes.
Hooded Eyes
For hooded eyes, the Inner Eye Highlight can help to lift and brighten the eye area. Apply the highlighter to the inner corner of the eye and extend it slightly along the lower lash line. This creates the illusion of a more open and awake eye. Pair with a smoky eye or a cat-eye liner to further enhance the appearance of the eyes.
Deep-set Eyes
Deep-set eyes can benefit from the Inner Eye Highlight, as it helps to bring attention to this area. Apply the highlighter to the inner corner of the eye, focusing on the deepest part of the socket. This adds brightness and dimension to the eyes, making them stand out. Pair with a neutral or matte eyeshadow to create a balanced and sophisticated look.
Monolid Eyes
For monolid eyes, the Inner Eye Highlight can create the illusion of more defined creases and enhanced depth. Apply the highlighter to the inner corner of the eye and extend it slightly upwards towards the brow bone. This technique adds brightness and dimension to the eyes, making them appear more open and lifted. Pair with a gradient eyeshadow look or a winged liner for a stunning monolid eye makeup look.

Styling the Inner Eye Highlight with Eye Makeup
Eyeliner Techniques
When it comes to eyeliner techniques, there are various options that can be paired with the Inner Eye Highlight. For a classic look, a thin line of black or brown eyeliner along the upper lash line brings definition to the eyes without overpowering the Inner Eye Highlight. For a more dramatic look, consider a bold winged liner or a double-winged liner. These techniques add depth and intensity to the eyes while still allowing the Inner Eye Highlight to shine.

Eyeshadow Placement
The placement of eyeshadow can greatly enhance the Inner Eye Highlight. For a simple and understated look, apply a neutral or matte eyeshadow to the eyelid and blend it upwards towards the crease. This allows the Inner Eye Highlight to take center stage. For a more intricate and glamorous look, experiment with different eyeshadow techniques such as cut crease, halo eye, or smoky eye. These techniques create depth and dimension around the Inner Eye Highlight, making it even more striking.
Mascara and False Lashes
Completing the eye makeup look with mascara and false lashes adds the finishing touch to enhance the Inner Eye Highlight. Apply a coat or two of volumizing mascara to the upper and lower lashes to define and frame the eyes. Consider using an eyelash curler beforehand for an extra lift. For a more dramatic effect, opt for false lashes with length and volume. Choose lashes that complement the eye shape and placement of the Inner Eye Highlight.
Taking Care of the Inner Eye Highlight
Preventing Creasing
To prevent creasing of the Inner Eye Highlight, it is essential to apply a good eye primer before adding the highlighter. Eye primer creates a smooth and even base, allowing the highlighter to adhere better and last longer. Additionally, using a setting powder or a translucent powder can help to set the highlighter and prevent it from creasing throughout the day.
Setting and Longevity
To ensure the Inner Eye Highlight lasts all day or night, consider setting it with a setting spray. After applying the highlighter, spritz a setting spray over the entire face, including the eye area. This helps to lock in the makeup and prevent any smudging or fading. Opt for a setting spray with a long-lasting formula for maximum longevity.
Removing the Highlight
Removing the Inner Eye Highlight is just as important as applying it. To gently remove the product, use an oil-based makeup remover or a micellar water specifically designed for the delicate eye area. Soak a cotton pad with the remover and gently press it onto the inner corner of the eye, allowing it to dissolve the highlighter. Gently wipe away the product, taking care not to tug or pull at the skin. Follow up with a gentle cleanser to ensure all traces of makeup are removed.