You’re in for a treat with stylish.ae’s Ultimate Guide to Mastering Beach Waves! Packed with practical tips and tricks, this comprehensive guide is your ticket to effortlessly achieving those coveted beachy waves. Whether you have straight, curly, or wavy hair, this article will walk you through the step-by-step process, from choosing the right products to perfecting the technique. Get ready to rock those beachy waves with confidence and style!
Choose the Right Hair Length

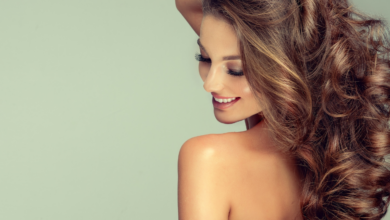
Long Hair
Long hair is a great choice for achieving beach waves because it gives you more hair to work with and creates a stunning cascading effect. This length allows you to create waves that flow beautifully down your back, giving you a romantic and ethereal look. Long hair is versatile and can be styled in various ways, from loose and tousled waves to more defined and structured curls. If you love the idea of having flowing beach waves that make a statement, long hair is the perfect length for you.
Medium Hair
Medium-length hair is another fantastic option for creating beach waves. With medium hair, you have enough length to achieve gorgeous waves, but it is also easier to manage compared to long hair. Beach waves on medium hair can add texture and movement to your look, giving you a carefree and effortlessly chic hairstyle. Whether you prefer subtle and loose waves or more defined and voluminous curls, medium hair can be styled to suit your personal taste and style.
Short Hair
Short hair can also rock beach waves with the right technique and tools. Although the length may be a bit more limiting, short hair creates a unique and edgy look when styled into waves. Beach waves on short hair can add volume and texture to your overall appearance, making your hair look fuller and more dynamic. Whether you have a pixie cut or a bob, there are various ways to achieve stunning beach waves and embrace the laid-back and stylish vibe they create.
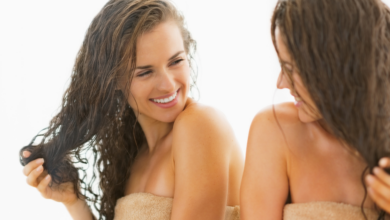
Prepare Your Hair
Before diving into the process of creating beach waves, it is essential to prepare your hair properly. This includes washing and conditioning your hair, applying a heat protectant, and detangling your locks.
Wash and Condition
Start by washing your hair with a hydrating shampoo and conditioner to ensure your strands are clean and ready for styling. Choose products that are specifically formulated for your hair type to achieve optimal results. After washing, gently towel-dry your hair to remove excess water, but avoid vigorous rubbing as this can cause damage and frizz.
Apply Heat Protectant
Using heat styling tools on your hair can be damaging if not done correctly. To protect your hair from heat damage, it is crucial to apply a heat protectant product before styling. Heat protectants create a barrier between your hair and the hot styling tools, minimizing the damage caused by the heat. Make sure to evenly distribute the product throughout your hair, focusing on the mid-lengths and ends, which are the most susceptible to heat damage.
Detangle Your Hair
Before styling, it is important to detangle your hair to ensure smooth and even waves. Start by using a wide-toothed comb or a detangling brush to gently remove any knots or tangles. Begin at the ends of your hair and work your way up, using short and gentle strokes to avoid causing any breakage. Detangling your hair before styling will lead to more seamless and effortless beach waves.
Choose the Right Tools
To achieve the perfect beach waves, it is essential to choose the right styling tools. While there are various options available, the most popular tools for creating beach waves are curling irons, flat irons, and heatless curlers.

Curling Iron
A curling iron is a classic tool for creating beach waves. When selecting a curling iron, opt for one with a barrel size that matches the type of waves you want to achieve. Larger barrels will create looser and more relaxed waves, while smaller barrels will produce tighter and more defined curls. The technique for using a curling iron involves wrapping sections of your hair around the barrel, holding for a few seconds, and then releasing.
Flat Iron
Another tool that can be used to create beach waves is a flat iron. While flat irons are typically associated with straightening hair, they can also be used to achieve beautiful waves. This technique involves twisting sections of your hair and sliding the flat iron down to create a wave pattern. The advantage of using a flat iron is that it can create more natural-looking waves with a slight bend, giving you a beachy and undone vibe.
Heatless Curlers
For those who want to avoid heat styling tools altogether, heatless curlers are a great alternative for creating beach waves. Heatless curlers come in various forms, such as foam rollers, flexi rods, or even socks. These curlers work by setting your hair in curls overnight, allowing your strands to dry and form waves without the use of heat. This option is ideal for those looking for a low-maintenance and heat-free way to achieve beach waves.
Section Your Hair
To create beach waves evenly, it is essential to section your hair properly. This will allow you to work through your hair more efficiently and ensure that every strand gets the attention it deserves.

Divide into Layers
Start by dividing your hair into layers. This will help you achieve more dimension and prevent your waves from looking flat. Use clips or hair ties to separate your hair into sections, starting from the bottom and working your way up. By dividing your hair into layers, you can focus on one section at a time, ensuring that each layer gets the perfect amount of curl or wave.
Part Your Hair
Once you have divided your hair into layers, consider parting your hair in a way that suits your face shape and desired style. You can part your hair in the middle for a more symmetrical look, or try a deep side part for added drama. Experimenting with different partings can provide you with different beach wave variations, so don’t be afraid to switch it up and see what works best for you.
Clip Up the Sections
To keep the sections of your hair neat and organized while styling, it is helpful to clip them up as you work. Unclipped hair can get in the way and make it difficult to create beach waves evenly. Use hair clips or bobby pins to secure the sections of hair that you are not currently working on, ensuring that they stay out of your way and prevent any confusion or tangles.
Create Beach Waves with a Curling Iron
A curling iron is an excellent tool for creating beautiful beach waves. Here’s a step-by-step guide on how to achieve this look using a curling iron.

Preheat the Curling Iron
Before you begin, make sure your curling iron is properly heated. The temperature will depend on your hair type and the desired outcome, but a good starting point is around 300-350 degrees Fahrenheit. Allow the curling iron to heat up fully according to the manufacturer’s instructions.
Wrap Sections of Hair
Start by taking a small section of hair and wrapping it around the barrel of the curling iron. Begin at the root and wrap the section of hair away from your face, holding the ends of the hair with your fingers or the clamp of the curling iron. Hold the hair around the barrel for a few seconds to create the desired curl or wave.
Release and Repeat
Once you have held the hair around the barrel for the desired amount of time, release the curl or wave by gently sliding the curling iron out of the hair. Let the curl or wave cool down before touching it to ensure that it sets properly. Repeat this process with the rest of your hair, section by section, until you have achieved the desired beach wave look.
Create Beach Waves with a Flat Iron
If you prefer to use a flat iron for creating beach waves, here’s a step-by-step guide to help you achieve the perfect look.

Preheat the Flat Iron
Just like with the curling iron, it is important to preheat the flat iron to the appropriate temperature for your hair. This will ensure that your beach waves are created effectively and without damaging your strands. Once the flat iron reaches the desired temperature, you can begin the styling process.
Twist and Slide Technique
To create waves with a flat iron, take a small section of hair and twist it away from your face. Hold the twisted section of hair with one hand while holding the flat iron in the other. Slide the flat iron down the twisted section of hair, going all the way to the ends. The twisting motion combined with the heat of the flat iron will create a beautiful beach wave. Repeat this process with the rest of your hair until you achieve the desired look.
Alternate Directions
For a more natural and effortless look, it is essential to alternate the direction of your waves as you work through your hair. This means that for one section, you twist the hair towards your face, and for the next section, you twist it away from your face. This alternating technique will prevent your waves from looking too uniform and create a more laid-back and tousled effect.
Create Beach Waves with Heatless Curlers
If you prefer to give your hair a break from heat styling tools, heatless curlers are a great option for achieving beach waves. Here’s a step-by-step guide on how to use them effectively.
Dampen Your Hair
To use heatless curlers, it is best to start with slightly damp hair. Lightly mist your hair with water using a spray bottle or use a leave-in conditioner to add moisture to your strands. This will help the curlers set and create long-lasting beach waves.
Roll and Secure the Curlers
Take a small section of damp hair and wrap it around the heatless curler of your choice. Start at the ends and roll the hair up to the roots, securing the curler in place with a pin or clip. Repeat this process with the rest of your hair until all sections are secured in curlers.
Allow Your Hair to Set
The key to achieving beach waves with heatless curlers is patience. Allow your hair to set in the curlers for a few hours or ideally overnight. This will give your hair enough time to dry completely and bond with the shape of the curlers. Once your hair is dry, carefully remove the curlers, and you will be left with beautiful beach waves.
Enhance Your Beach Waves
Once you have created your beach waves, it’s time to enhance them and add the finishing touches. The following techniques and products will help you achieve the perfect beachy look.
Apply Texturizing Spray
Texturizing spray is a must-have product for adding volume and definition to your beach waves. Spritz the texturizing spray onto your hair, focusing on the mid-lengths and ends, and gently scrunch your hair with your fingers to create texture and movement. This will give your beach waves a more effortlessly tousled and lived-in look.
Scrunch and Tousle Your Hair
To enhance the natural texture of your beach waves, gently scrunch and tousle your hair with your fingers. This technique will make your waves look more organic and carefree. Avoid using a comb or brush as this can disrupt the shape and structure of your waves.
Use Sea Salt Spray
Sea salt spray is another fantastic product for achieving that beachy texture and enhancing your waves. The sea salt-infused formula adds texture and mimics the effect of ocean water, giving your hair that effortless and tousled appearance. Spray the sea salt spray onto your hair, focusing on the mid-lengths and ends, and scrunch it with your fingers for best results.
Finish and Maintain Your Beach Waves
To ensure that your beach waves last all day and stay looking fabulous, it is important to finish and maintain them properly. These final steps will help you achieve a long-lasting and polished beach wave look.
Apply Hair Spray
To set your beach waves and prevent them from falling flat, apply a light mist of hairspray all over your hair. This will help lock in the waves and keep them in place throughout the day. Make sure to choose a hairspray that provides flexible hold to maintain the natural movement and bounce of your beach waves.
Use Hair Oil for Shine
To add a glossy and radiant finish to your beach waves, apply a small amount of hair oil to the mid-lengths and ends of your hair. Hair oil will not only add shine but also help smooth out any frizz or flyaways. Avoid applying too much oil, as it can weigh down your waves.
Touch Up and Refresh
Throughout the day, your beach waves may start to lose their shape and become a bit unruly. To touch up and refresh your waves, use a curling iron or flat iron to redefine any sections that have fallen flat or lost their wave. You can also spritz some texturizing spray or sea salt spray to revive the texture and volume of your beach waves.
Experiment with Beach Wave Variations
Beach waves are incredibly versatile, and you can customize them to suit your personal style and preferences. Try experimenting with different variations to add variety and explore new looks.
Loose Beach Waves
For a relaxed and effortless vibe, opt for loose beach waves. Use a larger barrel curling iron or choose a flat iron with a wider plate size to achieve these voluminous waves. Keep the wrapping technique loose and hold the hair around the barrel or flat iron for a shorter amount of time. This will create beach waves that are relaxed, soft, and full of movement.
Tight Beach Waves
If you prefer more defined and structured waves, go for tight beach waves. Use a smaller barrel curling iron or a flat iron with a narrower plate size to achieve these tighter curls. Wrap smaller sections of hair around the barrel or flat iron, and hold for a longer duration to create more defined curls. Tight beach waves can add a touch of sophistication and glamour to your overall look.
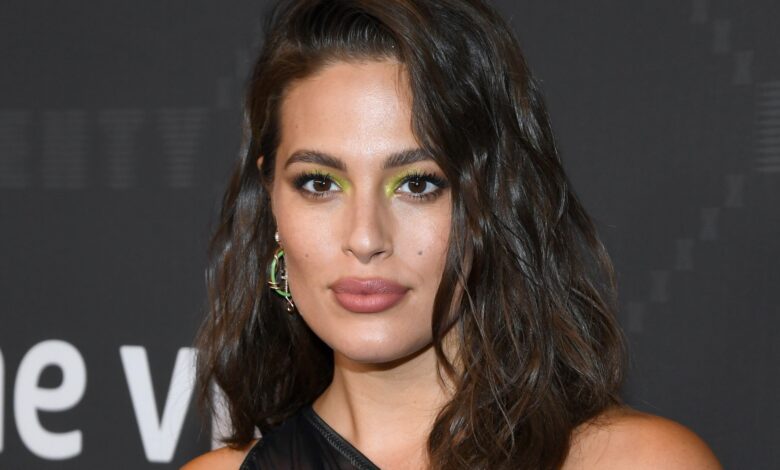
Messy Beach Waves
For a more casual and undone look, try creating messy beach waves. This style is all about embracing imperfections and adding texture to your waves. Use your fingers to tousle and separate your waves, and apply a texturizing spray or sea salt spray for added texture and volume. Messy beach waves are perfect for days when you want to achieve that effortlessly cool and laid-back vibe.
By following these steps and techniques, you can master the art of creating beach waves and transform your hair into a stunning and stylish masterpiece. Whether you have long, medium, or short hair, and regardless of the tools you choose to use, beach waves are a versatile and timeless hairstyle that will never go out of fashion. So embrace the beachy vibes, get ready to turn heads, and enjoy your effortlessly chic and glamorous beach wave look!