Have you ever wondered how people achieve those intricate and stunning nail designs that seem impossible to recreate? Well, look no further because nail stamping is here to revolutionize your at-home manicures. In this article, we will explore the art of nail stamping and discuss the essential tools needed to master this technique. Get ready to elevate your nail game and become a nail stamping pro in no time!

What is Nail Stamping?
Nail stamping is a popular nail art technique that allows you to effortlessly transfer intricate and detailed designs onto your nails. It involves using special tools and materials to transfer pre-designed patterns or images onto the nails, creating beautiful and unique nail art looks.
Nail stamping, also known as nail plate stamping or nail art stamping, is a technique where a design or image is transferred to the nails using a metal plate, a stamper, and a scraper. The design is first etched onto the plate, which is then coated with nail polish. The excess polish is scraped off with the scraper, leaving the design only on the etched portion of the plate. The stamper is then used to pick up the design from the plate and transfer it to the nail by simply pressing the stamper onto the nail surface.

History of Nail Stamping
Nail stamping has its roots in the early 2000s and gained popularity in the nail art community. It was initially introduced in Asian countries, where nail art was already a well-established trend. The technique quickly spread globally, thanks to the rise of social media platforms and the influence of beauty bloggers and influencers.
Benefits of Nail Stamping
Nail stamping offers a multitude of benefits that make it a favorite among nail art enthusiasts.
Creativity and Personalization
With nail stamping, you can unleash your creativity and personalize your nail art like never before. The wide range of designs and patterns available on stamping plates allows you to create unique and eye-catching designs that perfectly match your style, outfit, or mood. Whether you prefer delicate floral patterns, bold geometric shapes, or trendy abstract designs, nail stamping provides endless possibilities for expressing your individuality.
Time and Cost Efficiency
Nail stamping is a time and cost-efficient alternative to traditional hand-painted nail art. With a few simple steps, you can achieve intricate and professional-looking designs in a fraction of the time it would take to paint them by hand. Additionally, stamping plates can be reused multiple times, making them a cost-effective investment. By mastering the art of nail stamping, you can achieve salon-quality nail art without breaking the bank.

Essential Tools for Nail Stamping
To successfully master nail stamping, you’ll need a few essential tools and materials. Let’s take a look at each one:
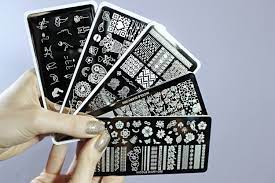
Stamping Plates
Stamping plates are the key component of nail stamping. They are small metal plates with etched designs on their surface. These designs can range from intricate patterns to detailed images, making it easy to find the perfect design for your nail art. Stamping plates are typically made of stainless steel, which ensures durability and longevity.
Stamper
A stamper is used to pick up the design from the stamping plate and transfer it onto the nail. It consists of a soft, rubbery head attached to a handle. The head of the stamper should be slightly sticky to allow for proper transfer of the design. You can choose from various stamper shapes and sizes, depending on your preference and the size of your nails.
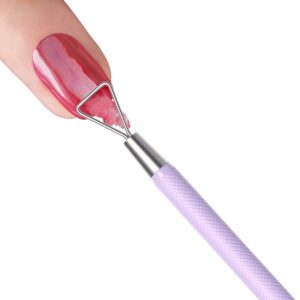
Scraper
The scraper is used to remove excess nail polish from the stamping plate after applying the polish onto the design. It is usually made of plastic or metal and has a straight edge. The scraper should be held at a 45-degree angle and gently dragged across the plate to remove the excess polish without smudging the design.
Nail Polish
Highly pigmented nail polishes are essential for nail stamping. They provide vibrant colors and ensure that the design transfers onto the nails with crisp and clear details. Look for nail polishes specifically formulated for stamping, as they have a thicker consistency and better opacity. Additionally, choose colors that contrast well with your base color to make the design stand out.
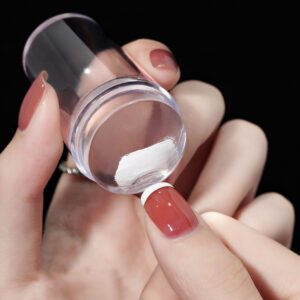
Clear Stamper
A clear stamper is a valuable tool for nail stamping, especially for beginners. Unlike regular stampers, which have a solid colored head, clear stampers allow you to see through the stamper head, making it easier to position the design accurately onto your nail. This visibility helps prevent mistakes and ensures that the design is transferred precisely as desired.
Nail Polish Remover
Nail polish remover is a must-have for nail stamping. In case you make any mistakes, you can use a cotton swab or a clean-up brush dipped in nail polish remover to remove excess or misplaced polish around the nail. Make sure to use a non-acetone nail polish remover, as acetone can damage the stamper and the stamping plate.
Cotton Swabs
Cotton swabs, also known as Q-tips, are useful for both clean-up and stamping. You can dip the cotton swab in nail polish remover to clean up any mistakes, smudges, or excess polish. Additionally, you can use the cotton swab to apply nail polish directly to the stamping plate when creating gradient or layered designs.
Clean-up Brush
A clean-up brush is a small and thin brush used to clean up any stray polish that may have transferred onto the surrounding skin during the stamping process. It is crucial for achieving clean and professional-looking nail art. Dip the brush in nail polish remover, gently clean around the nails, and create crisp, well-defined lines.
Top Coat
A top coat is the finishing touch to your nail stamping design. It provides a glossy and protective layer, sealing in the design and extending its longevity. Choose a top coat that is quick-drying, chip-resistant, and long-lasting to ensure that your nail art stays intact for as long as possible.
How to Master Nail Stamping
Mastering nail stamping requires practice and attention to detail. Follow these steps to achieve flawless nail stamping results:
Preparing Your Nails
Before starting any nail art, it is essential to prepare your nails properly. Begin by trimming and filing your nails to the desired shape and length. Push back your cuticles using a cuticle pusher or a wooden stick. Apply a base coat to protect your nails from staining and provide a smooth surface for the nail polish.
Selecting the Right Design
The key to successful nail stamping lies in selecting the right design for your desired look. Browse through your stamping plate collection and choose a design that appeals to you. Consider factors such as the size of the design in relation to your nail, the complexity of the design, and how it will complement your base color.
Applying Nail Polish
Apply a generous amount of nail polish over the design you have chosen on the stamping plate. Use the scraper to remove excess polish by holding it at a 45-degree angle and dragging it across the plate firmly and swiftly. This action will leave polish only in the etched design, ensuring a clean transfer.
Transferring the Design
Immediately after scraping off the excess polish, gently and quickly press the stamper onto the design, ensuring the entire design is picked up onto the stamper head. Check the stamper head to see if the design has fully transferred, and make any necessary adjustments if parts of the design are missing or uneven.
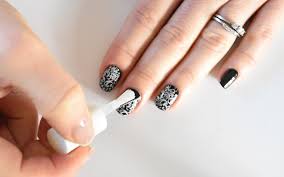
Cleaning and Finishing Touches
Once the design is transferred, align the stamper with your nail, and gently press it onto the nail surface, ensuring even and light pressure. Roll the stamper slightly to stamp the design onto the nail fully. Remove the stamper, and any excess polish around the nail using a clean-up brush or a cotton swab dipped in nail polish remover. Finally, apply a top coat to seal and protect your nail art.

Troubleshooting Tips
While nail stamping is a straightforward technique, there are some common challenges that you may encounter. Here are some troubleshooting tips to help you overcome them:
5.1 Smudged Design
If the design smudges or blurs during the transfer process, it could be due to several reasons. Make sure to use a quick-drying nail polish to minimize the risk of smudging. Additionally, avoid pressing the stamper too hard onto the nail, as it may cause the design to shift or smudge.
Incomplete Transfer
If parts of the design do not fully transfer onto the nail, it may be because the stamper did not pick up the entire design from the plate. Ensure that the stamper head is clean, slightly sticky, and properly aligned with the design on the stamping plate before transferring it onto the nail.
Staining or Bleeding
To prevent staining or bleeding of the design, use a high-quality base coat before applying the stamping polish. This will create a barrier between the nail and the polish, preventing any color transfer or staining. Additionally, make sure to remove any excess polish from the plate and scraper to avoid unwanted smudging.
Uneven Designs
If the design appears uneven or patchy, it could be due to insufficient or uneven pressure when transferring the design. Ensure that you apply even and light pressure when stamping the design onto the nail. You can practice on a nail wheel or a practice surface to perfect your technique before attempting it on your nails.
Design Inspiration and Techniques
Nail stamping opens up a world of design possibilities. Here are some popular design inspiration and techniques to try:
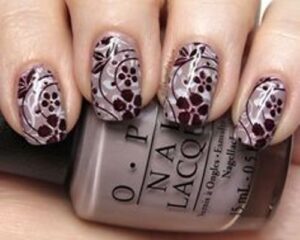
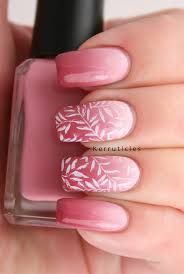
Floral Designs
Floral designs are timeless and versatile. They can range from delicate and dainty to bold and vibrant. Experiment with different floral patterns, such as roses, daisies, or cherry blossoms, and incorporate them into your nail stamping designs for a feminine and romantic look.
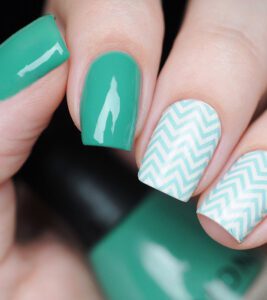
Geometric Patterns
Geometric patterns are modern, edgy, and perfect for creating geometric nail art designs. From clean lines and shapes to intricate geometric details, the options are endless. Combine different geometric elements, such as triangles, squares, or hexagons, to create unique and eye-catching nail stamping designs.
Gradient Stamping
Gradient stamping combines the beauty of gradient nail art with the precision of nail stamping. Start by applying different nail polish colors side by side on the stamping plate. Use a cotton swab to blend the colors together slightly. Transfer the gradient design onto your nail, creating a stunning gradient effect without the hassle of sponge gradient techniques.
Negative Space Stamping
Negative space nail art is a trendy and minimalist approach to nail stamping. Instead of covering the entire nail with the stamped design, leave empty spaces to create a modern and chic look. Combine negative space elements with geometric or abstract designs for a contemporary twist.
Layering and Decals
Layering and decals offer endless possibilities for intricate and multi-dimensional nail art designs. Combine different stamping plates, designs, and colors to create layered effects. You can also use water decals or nail stickers in conjunction with nail stamping to enhance the overall design and add extra detail.

Nail Stamping Tips for Beginners
If you’re new to nail stamping, here are some tips and tricks to help you get started:
Start with Simple Patterns
Beginners should start with simple patterns with larger designs. These designs are easier to transfer and require less precision. As you gain more experience and confidence, you can progress to more intricate and detailed designs.
Practice on False Nails
Practice makes perfect, so consider practicing on false nails or a nail wheel before attempting nail stamping on your own nails. This allows you to familiarize yourself with the process, perfect your technique, and test out different designs without the pressure of getting it right on your natural nails.
7.3 Experiment with Different Stamping Polishes
Not all nail polishes work well for nail stamping. Experiment with different brands and formulas specifically designed for stamping to find the ones that work best for you. Look for polishes with high opacity and good pigmentation to ensure vibrant and well-defined designs.
Clean the Stamper Regularly
Regularly clean your stamper to remove any excess polish or debris that may affect the transfer of the design. Use a lint roller or sticky tape to remove any residue from the stamper head. Avoid using acetone or harsh chemicals, as they can damage the stamper’s surface.
Master the Right Amount of Pressure
The amount of pressure you apply when transferring the design is crucial for a successful nail stamping. Too much pressure can cause smudging or bleeding, while too little pressure may result in an incomplete transfer. Practice finding the right amount of pressure to achieve crisp and clear nail stamping designs.
Taking Care of Stamping Tools
Proper care and maintenance of your stamping tools are essential to ensure their longevity and optimal performance. Here are some tips for taking care of your stamping tools:
Cleaning Stamping Plates
After each use, clean the stamping plates with a lint-free cloth or a paper towel soaked in non-acetone nail polish remover. Gently wipe off any residue or polish from the plate, making sure to clean both the etched design and the surrounding surface. Avoid using acetone or abrasive materials that can damage the plate.
Caring for the Stamper
To keep the stamper in good condition, clean it after each use. Gently wipe the stamper head with a lint-free cloth or a paper towel soaked in non-acetone nail polish remover. Make sure to remove any leftover polish, debris, or lint that may affect the transfer of the design. Avoid using acetone or rough materials that can damage the stamper’s surface.
Proper Storage
Store your stamping plates, stampers, and scrapers in a dry and cool place, away from sunlight and excessive heat. To prevent scratching or damage, consider storing the stamping plates in protective sleeves or with a layer of plastic wrap between them. Keep the stamping tools separate from other nail art supplies to avoid any potential damage.

Nail Stamping vs. Nail Art Decals
While both nail stamping and nail art decals are methods of creating intricate nail designs, they differ in various aspects. Let’s explore the differences between the two:
Differences in Application
Nail stamping requires using a metal plate, a stamper, and a scraper to transfer the design onto the nails manually. On the other hand, nail art decals are pre-printed designs that are applied to the nails by soaking them in water or using a clear adhesive. Nail art decals offer a quicker and easier application process compared to nail stamping.
Customization and Design Variability
Nail stamping provides greater customization and design variability compared to nail art decals. With stamping plates, you can create endless combinations of designs, mix and match patterns, and experiment with various colors and effects. Nail art decals, on the other hand, typically come in pre-designed sets or sheets, limiting the creativity and customization options.
Durability and Longevity
Nail stamping tends to offer better durability and longevity compared to nail art decals. The stamped designs adhere to the nail surface more securely and can withstand daily activities without easily peeling or chipping. Nail art decals, although easy to apply, may not last as long and may require additional top coats or sealants for better durability.
Nail Stamping Innovations and Trends
Nail stamping continues to evolve, with new innovations and trends emerging in the nail art community. Here are some recent developments in the world of nail stamping:
Clear Stampers with Reversed Designs
Clear stampers with reversed designs have become increasingly popular. These stampers allow for better accuracy and precision when transferring the design onto the nail. The clear stamper head allows you to see through the design, ensuring proper alignment and placement on the nail.
Multi-Image Stamping Plates
Multi-image stamping plates feature multiple small designs on a single plate. They allow you to create intricate and detailed nail art by combining different images or by layering designs. These plates are perfect for creating unique and dynamic nail stamping looks.
Magnetic Nail Stamping
Magnetic nail stamping adds a dimensional effect to your nail art by using magnetic particles in the stamping polish. After transferring the design onto your nail, a magnet is placed near the nail, causing the particles to move and create a unique pattern or effect.
Foil Stamping
Foil stamping involves transferring metallic foil onto the nail using the stamping technique. The foil adheres to the nail, creating a metallic and reflective effect. Foil stamping gives your nail art an eye-catching and glamorous look, perfect for special occasions or festive events.
Stamping on Acrylic or Gel Nails
Stamping on acrylic or gel nails has become a popular trend, allowing nail technicians to create intricate and detailed designs using stamping plates and techniques. The smooth and solid surface of acrylic or gel nails provides an ideal canvas for nail stamping, resulting in stunning and long-lasting nail art.
In conclusion, nail stamping is a versatile and creative nail art technique that allows you to express your individuality and create unique designs. With the right tools, practice, and inspiration, you can master the art of nail stamping and showcase your creativity through your fingertips. So grab your stamping plates, prepare your nails, and let your imagination run wild as you embark on a journey into the world of nail stamping. Happy stamping!
French Tips With A Twist: Modern Takes On A Classic Manicure(Opens in a new browser tab)
Nail Health 101: What Your Nails Say About Your Well-being(Opens in a new browser tab)