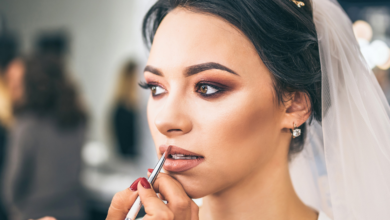
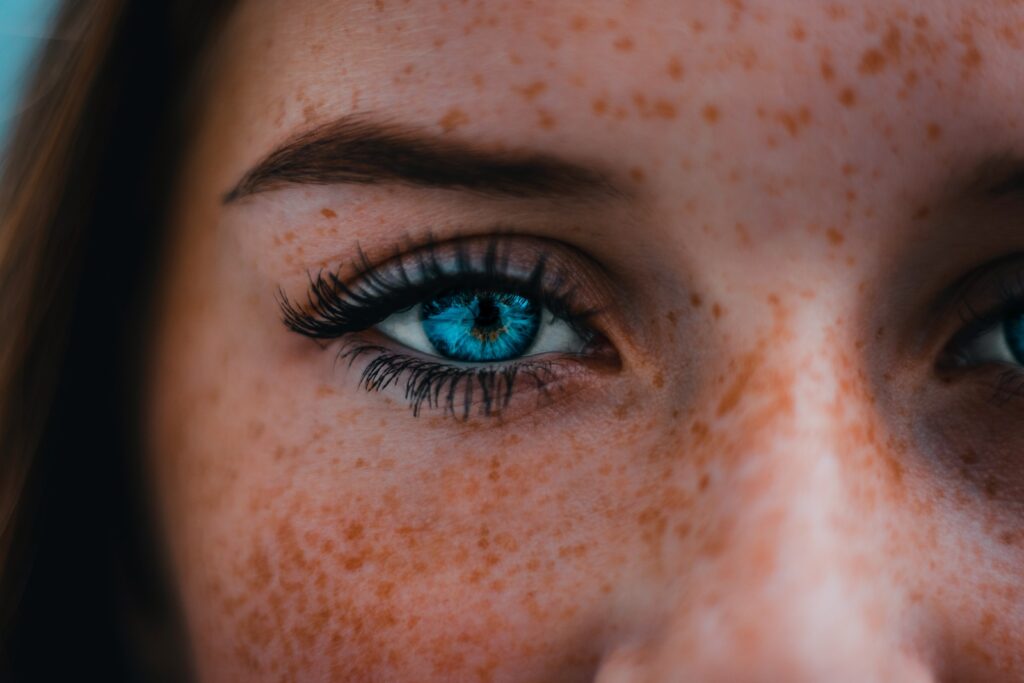
If you’re looking to enhance your eye makeup game, then gel liners might just be the secret weapon you need. With their smooth application and long-lasting formula, gel liners have become a popular choice for creating precise and defined eye looks. From classic black to vibrant colors, navigating the world of gel liners opens up a wide range of possibilities for experimenting and expressing your individual style. Whether you’re a makeup novice or an experienced artist, this article will guide you through the basics of gel liners, helping you find the perfect product and techniques to elevate your eye makeup to the next level.

Choosing the Right Formula
When it comes to gel liners, choosing the right formula is essential in achieving that perfect, long-lasting eyeliner look. Understanding the basics of gel liners can help you make an informed decision. Gel liners are a creamy, often waterproof, alternative to traditional pencil or liquid eyeliners. They come in a variety of textures and finishes, allowing for versatile application techniques and different effects. Whether you prefer a subtle everyday look or a bold, dramatic wing, selecting the right formula is key to achieving your desired results.
Understanding the Basics
Gel liners are typically housed in small pots or jars and require the use of a brush for application. The creamy consistency of gel liners allows for smooth and precise application, giving you more control over the intensity and thickness of your eyeliner. Unlike pencil liners that may smudge or liquid liners that can be difficult to control, gel liners offer a balance of ease and precision.
Different Types of Formulas
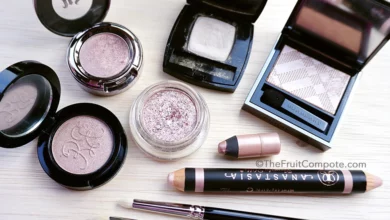
There are numerous gel liner formulas available in the market, each offering its own unique properties. Some formulas are highly pigmented, providing intense color payoff, while others are more buildable, allowing for a softer, more natural finish. Additionally, you can choose between matte or shimmer finishes, depending on the look you want to achieve. Some gel liners also offer added benefits, such as being waterproof or long-wearing, perfect for those hot summer days or special occasions where you need your eyeliner to last all day.
Considerations for Different Eye Shapes
Another important factor to consider when choosing a gel liner is your eye shape. Different eye shapes require different application techniques to enhance their natural features. For example, if you have round eyes, a thicker winged eyeliner can help elongate the shape. On the other hand, if you have hooded eyes, a thin and precise line close to the lash line can create the illusion of more defined eyes. Understanding your eye shape and the best techniques to enhance it will help you choose the right formula and application method for your gel liner.
Waterproof vs. Regular Formulas
When it comes to gel liners, you have the option to choose between waterproof and regular formulas. Waterproof gel liners are formulated to withstand water, sweat, and humidity, making them ideal for long-lasting wear and smudge-proof results. Regular gel liners, while not completely waterproof, still offer excellent longevity and are easier to remove at the end of the day. Consider your lifestyle and needs when deciding between waterproof and regular formulas. If you need your eyeliner to stay put all day or during special occasions, waterproof gel liners are your best bet. However, if you prefer a formula that is easier to remove and offers more flexibility in terms of application and removal, regular gel liners may be the better choice.
Finding the Right Shade
While selecting the right formula is important, finding the perfect shade for your gel liner is equally crucial in achieving a flattering look. Understanding undertones and color selection can help you find the shade that enhances your eyes and complements your overall makeup look.
Understanding Undertones
Undertones play a significant role in determining the most flattering shade of gel liner for your eyes. Undertones can be cool, warm, or neutral. Cool undertones have hints of blue and purple, while warm undertones have hints of yellow and orange. Neutral undertones have a balance of both cool and warm tones. Identifying your undertones can help guide you in choosing the right shades. For cool undertones, rich black, navy, or deep charcoal gray gel liners can enhance the natural coolness of the eyes. Warm undertones can be complemented by shades like deep brown, bronze, or olive green. Neutral undertones have the advantage of being versatile and can carry off a wide range of shades.
Choosing the Right Color
When selecting the color of your gel liner, consider your eye color and the effect you want to achieve. If you have brown eyes, earthy shades like deep chocolate brown, bronze, or copper can enhance the warmth of your eyes. Green or hazel eyes can be beautifully emphasized with shades of deep green, forest green, or even a subtle touch of purple. For blue or gray eyes, shades of navy blue, steel gray, or soft charcoal can create a striking contrast and make your eyes pop. Experimenting with different colors can be a fun way to diversify your eyeliner collection and create countless eye-catching looks.
Experimenting with Different Shades
Don’t be afraid to step out of your comfort zone and experiment with different shades of gel liner. The beauty of gel liners is that they allow for versatility and creativity. Blend different shades together to create ombre effects or try incorporating metallic or shimmer finishes for added dimension. Playful pops of color, such as bright blues or vibrant purples, can add a touch of excitement to your makeup looks. Remember, makeup is all about self-expression, so don’t be afraid to have fun and explore different shades to discover what works best for you.

Tools and Application Techniques
Now that you have chosen the right formula and shade for your gel liner, it’s essential to understand the tools and techniques that will help you achieve flawless application and professional-looking results.
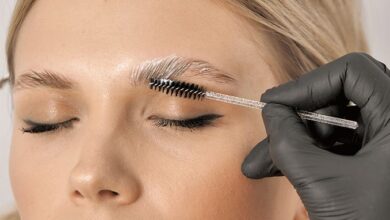
Brushes and Tools to Use
The key tool for applying gel liner is a small, angled brush. This type of brush is designed to provide precision and control, allowing for smooth and even application along the lash line. Look for a brush with soft, synthetic bristles that seamlessly glide across the skin without tugging or pulling. Other tools that can come in handy include a fine-tipped eyeliner brush for intricate designs or a smudging brush for creating smokey eyes with your gel liner.
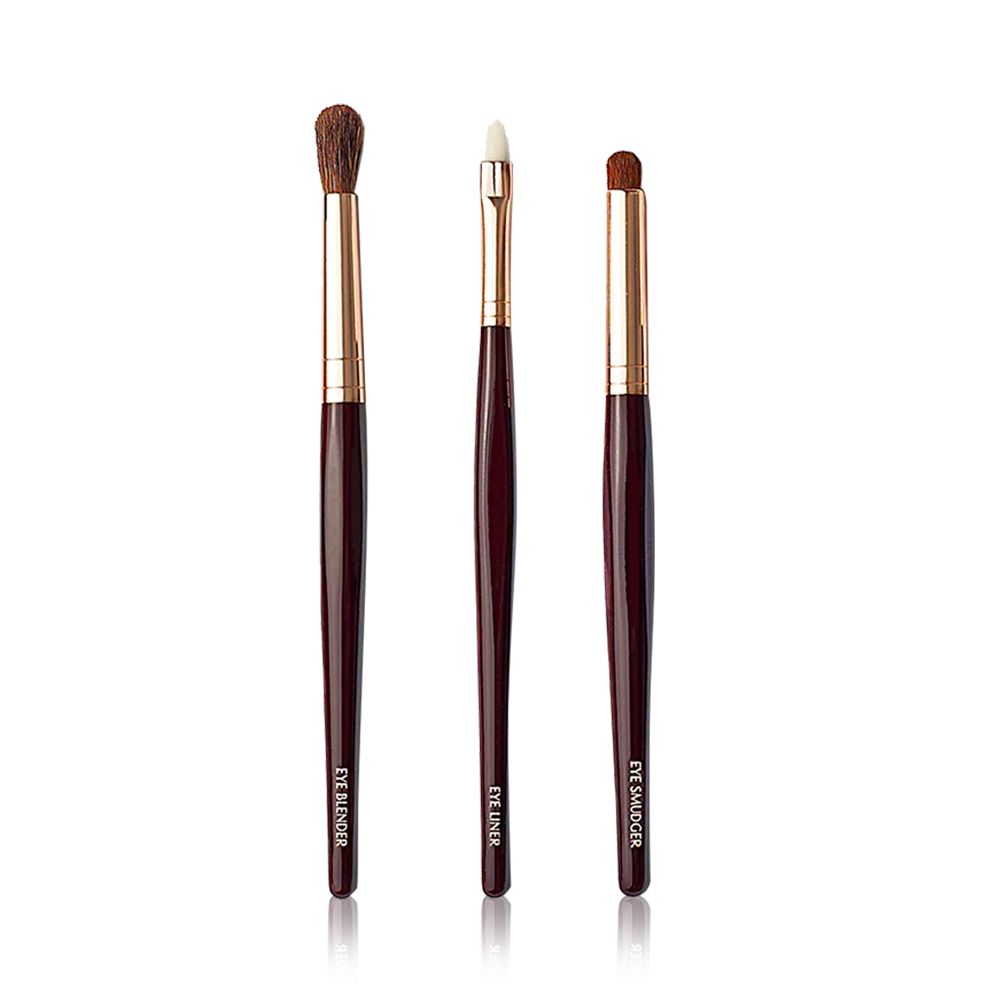
Proper Brush Selection
When choosing a brush for your gel liner, ensure that the bristles are firm enough to hold the product and create clean lines, but also soft enough to be gentle on the delicate eye area. Opt for an angled brush with a thin and precise edge for creating sharp winged liners. The bristles should be densely packed to pick up enough product and distribute it evenly along the lash line.
Application Techniques for Different Effects
The application techniques you use can dramatically transform the appearance of your gel liner. For a classic and timeless look, start by loading your brush with gel liner and gently glide it along the upper lash line, beginning from the inner corner towards the outer corner. You can create a thin and natural line for a more subtle effect or gradually build up the thickness for a more defined look. To achieve a precise winged liner, use the angled brush to extend the line slightly beyond the outer corner of your eye, angling it upwards towards the end of your eyebrow. For a smokey eye effect, use a smudging brush to blend and soften the gel liner along the lash line, creating a sultry and seductive look. Remember to experiment with different techniques to find what suits your eye shape and personal preferences.
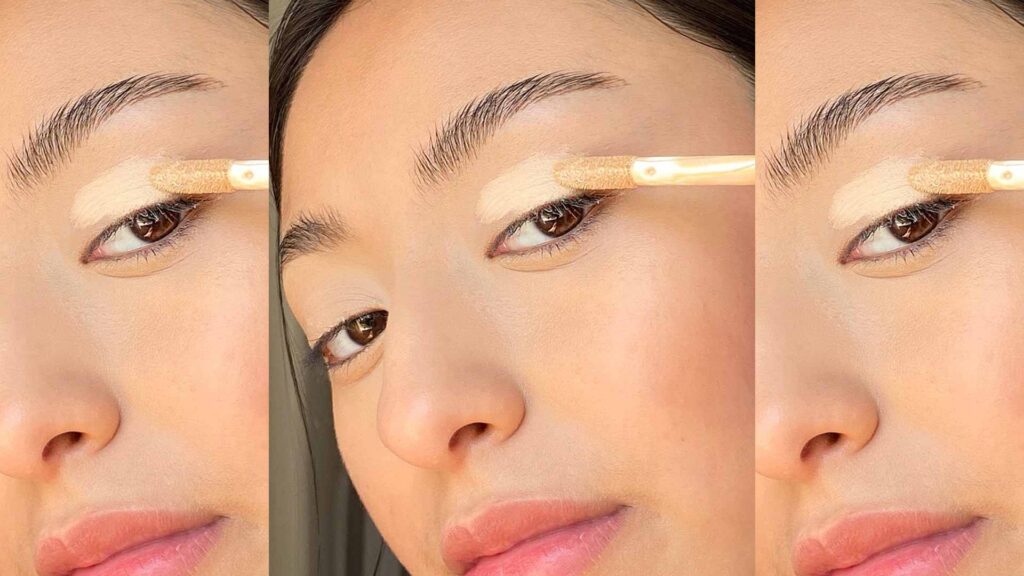
Prepping Your Eyes
Before diving into the application process, it’s essential to properly prep your eyes to ensure a flawless and long-lasting gel liner application. Taking a few extra steps to cleanse, prime, and set the eye area can make a significant difference in the overall look and longevity of your eyeliner.
Cleansing the Eye Area
Begin the process by thoroughly cleansing your eye area to remove any traces of makeup, dirt, or oil. Use a gentle eye makeup remover or a micellar water formula to ensure that your eyelids are clean and free of any residue. Cleansing your eye area not only helps create a clean canvas for your gel liner but also helps prevent smudging or uneven application.
Using Eye Primers
To create a smooth and even base for your gel liner, consider using an eye primer. Eye primers not only improve the staying power of your eyeliner but also enhance the vibrancy of the color. Apply a small amount of eye primer to your eyelids and gently blend it in using your fingertips. Allow the primer to set for a few seconds before proceeding with the gel liner application.
Setting the Eye Area
If you have oily eyelids or live in a humid climate, setting your eye area before applying gel liner can help prevent smudging and ensure a long-lasting finish. Using a translucent powder or an eyeshadow that matches your skin tone, gently dust the powder over your eyelids, focusing especially on the areas where you’ll be applying the gel liner. This step helps absorb excess oil and sets your eyelids, providing a smooth and matte surface for the gel liner to adhere to.
Creating the Ideal Canvas
Once you have cleansed, primed, and set your eye area, you have created the ideal canvas for gel liner application. The clean and prepped surface ensures that the gel liner applies smoothly, adheres well, and stays in place throughout the day. By taking these extra steps, you can achieve a flawless and professional-looking eyeliner look.
Applying Gel Liner
Now that you have prepped your eyes, it’s time to dive into the step-by-step process of applying gel liner. From creating the perfect wing to achieving a smudge-proof finish, we’ll cover everything you need to know to master the art of gel liner application.

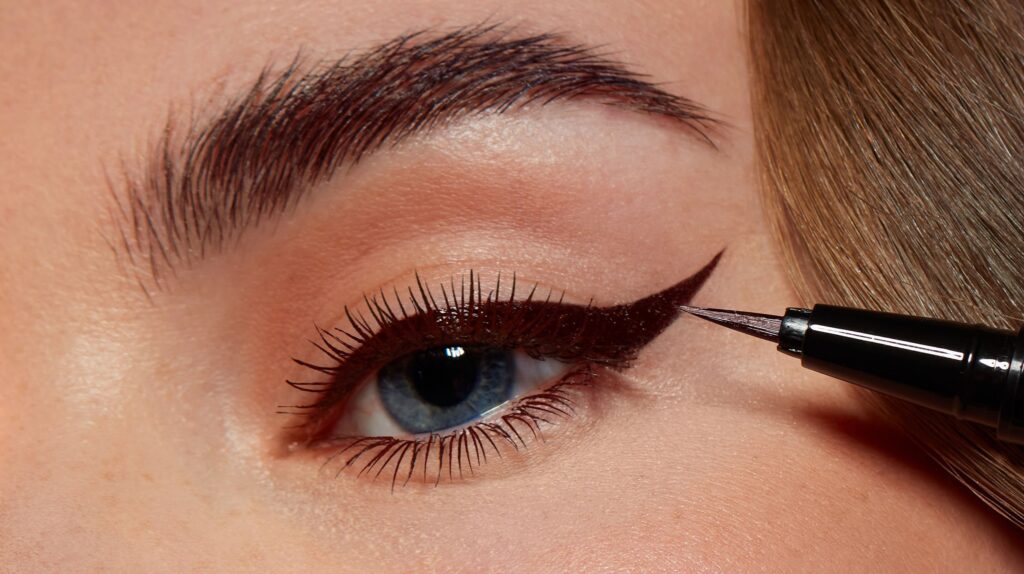
Step-by-Step Application Process
Start by dipping your chosen angled brush into the pot of gel liner. Ensure that the brush is evenly coated with product, but not overloaded. Begin applying the gel liner at the inner corner of your upper lash line, as close to the roots of your lashes as possible. Apply short strokes, moving outward towards the outer corner. Take your time and build up the intensity gradually, rather than applying too much product at once. For a more precise wing, extend the line slightly beyond the outer corner of your eye, angling it upwards towards the end of your eyebrow. Once the upper lash line is complete, repeat the process on the lower lash line if desired. Remember to create a balanced and symmetrical look on both eyes.
Creating Different Wing Styles
One of the most popular and versatile applications of gel liner is creating different wing styles. Wings can range from subtle and natural to bold and dramatic, depending on the occasion or your personal preference. To achieve a classic and natural wing, start by applying a thin line as close to your upper lash line as possible, gradually building up the thickness towards the outer corner. Then, extend the line slightly beyond the outer corner of your eye, angling it upwards towards the end of your eyebrow. For a more dramatic and bold wing, apply a thicker line along the upper lash line and extend it with a more pronounced flick. Feel free to experiment with different wing styles to find the one that suits your eye shape and desired look.
Tips for Achieving a Smudge-proof Finish
To ensure that your gel liner stays in place and remains smudge-proof throughout the day, there are a few additional tips you can follow. Firstly, allow the gel liner to dry completely before opening your eyes fully or blinking excessively. This will prevent the liner from transferring onto your eyelid or creasing. Secondly, consider setting your gel liner with a matching eyeshadow or translucent powder. This extra step can help absorb any excess oil and set the gel liner, providing a matte and long-lasting finish. Lastly, if you have watery eyes or find that your gel liner tends to smudge, try using a waterproof or long-wearing formula for added durability.
Troubleshooting and Common Mistakes
Even the most experienced makeup enthusiasts encounter challenges and make mistakes when it comes to gel liner application. Knowing how to troubleshoot common issues can save you time and frustration, ensuring that your gel liner always looks flawless.
Avoiding Uneven Lines
If you find that your gel liner is resulting in uneven lines or shaky application, there are a few tricks you can try. One method is to use short, feather-like strokes instead of attempting to draw a continuous line. This technique allows for more control and precision. Another tip is to rest your elbow on a stable surface, such as a table or vanity, while applying the liner. This provides added stability and reduces the chances of your hand shaking. Finally, practice makes perfect. The more you practice, the better control you’ll have over the brush and the smoother your application will become.
Fixing Smudges or Mistakes
If you make a mistake or experience a smudging mishap while applying your gel liner, don’t fret. There are ways to fix and correct these issues without starting over. One method is to use a clean cotton swab or a pointed cotton bud dipped in makeup remover or micellar water. Gently swipe away any mistakes or smudges, being careful not to smear them further. For more precise corrections, you can use a fine-tipped cotton swab or a cotton bud dipped in a concealer that matches your skin tone to clean up any smudges or uneven lines. Remember to blend the concealer seamlessly into your skin to avoid any noticeable patches.
Preventing Flakes or Crumbles
If you notice that your gel liner is prone to flaking or crumbling throughout the day, there are a few techniques you can try to prevent this issue. Firstly, ensure that you are not applying too much product at once. Overloading the brush with gel liner can result in excess product on the lids, leading to flaking. Secondly, set your gel liner with a matching eyeshadow or translucent powder. This step helps absorb any excess oil and provides a barrier that prevents the liner from crumbling. Lastly, consider using an eye primer before applying the gel liner. Eye primers create a smooth and even base, minimizing the chances of flaking or crumbling.

Longevity and Maintenance
To maximize the longevity of your gel liner and ensure its quality remains intact, proper setting and storage techniques are essential. Taking care of your gel liner not only ensures that it lasts longer but also maintains its smooth and creamy consistency.
Setting Gel Liner for Maximum Longevity
To ensure that your gel liner stays in place throughout the day and doesn’t transfer or smudge, consider setting it with an eyeshadow or a translucent powder. Using a small angled brush or a blending brush, gently dust a matching eyeshadow shade or a translucent powder over the gel liner. This additional step helps absorb any excess oil and sets the gel liner, ensuring a long-lasting and smudge-proof finish.
Proper Storage and Maintenance
To maintain the quality of your gel liner, proper storage and maintenance are crucial. Ensure that the lid of the gel liner pot is tightly closed after each use to prevent the product from drying out. Store the gel liner in a cool and dry place, away from direct sunlight and humidity. Avoid touching the gel liner with dirty or wet brushes, as this can introduce bacteria into the product. Additionally, regularly cleaning your brushes will prevent product buildup, ensuring smooth and seamless application every time.
Removing Gel Liner
At the end of the day, properly removing your gel liner is essential to maintain the health of your eyes and skin. Gentle cleaning techniques and hydrating the eye area can help prevent any irritation or discomfort.
Gentle Eye Makeup Removers
When it comes to removing gel liner, opt for gentle eye makeup removers specifically formulated to dissolve and remove waterproof or long-wearing formulas. Look for oil-based or dual-phase eye makeup removers that effortlessly dissolve the gel liner without tugging or pulling on the delicate eye area. Apply a small amount of the remover to a cotton pad and gently press it against your closed eye for a few seconds, allowing the formula to break down the gel liner. Then, gently swipe the cotton pad across your lash line and eyelids, removing the gel liner in a gentle and efficient manner.

Avoiding Tugging or Pulling
When removing your gel liner, avoid tugging or pulling on your eyelids. The skin around the eyes is delicate and prone to sagging, so it’s crucial to treat it gently and with care. Instead of harshly rubbing or pulling at the gel liner, allow the eye makeup remover to work its magic and gently glide the cotton pad across your eyelids and lash line, loosening the product for easy removal. Patience and a gentle approach will ensure that your eyes and skin stay healthy and irritation-free.
Cleansing and Hydrating the Eye Area
After removing your gel liner, it’s important to cleanse and hydrate the eye area. Cleanse the eye area with a gentle facial cleanser or micellar water to remove any residue or remaining traces of gel liner. Gently massage the cleanser onto your eyelids and lashes, using circular motions to ensure a thorough cleanse. Rinse with warm water and pat dry with a soft towel. Once your eye area is clean, apply a hydrating eye cream or serum to moisturize and nourish the skin. Hydrating the eye area helps prevent dryness or flakiness and keeps your skin looking healthy and vibrant.

Innovations and Recommendations
The beauty industry is continuously evolving, with new gel liner products hitting the market regularly. Staying up to date with the latest innovations and customer recommendations can help you discover new favorites and enhance your gel liner experience.
New Gel Liner Products on the Market
There are numerous new gel liner products on the market, each offering unique features and benefits. Some brands have developed gel liners with built-in brushes for on-the-go application, making it easier to achieve that perfect cat eye anytime, anywhere. Others have introduced gel liners with innovative waterproof or smudge-proof formulas that can withstand even the most demanding conditions without compromising on color payoff or longevity. Exploring new gel liner products can open up a world of possibilities and help you find the perfect formula for your desired look.

Customer Reviews and Recommendations
Customer reviews and recommendations are invaluable when it comes to navigating the world of gel liners. Reading reviews and listening to other customers’ experiences can provide insights into different formulas, shades, and application techniques. Consider checking beauty forums, social media platforms, or beauty influencer recommendations to gather information and make an informed decision. However, keep in mind that individual preferences and experiences may vary, so it’s essential to try products and techniques yourself to find what works best for you.
Exploring Different Styles and Looks
Now that you have mastered the art of gel liner application, it’s time to explore different styles and looks that you can create with this versatile product. From classic cat eyes to bold color experiments, the possibilities are endless.
Creating Classic Cat Eyes
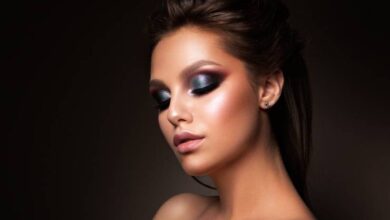
The classic cat eye is a timeless and iconic look that can elevate any makeup look. To achieve this style, start by applying your gel liner along the upper lash line, gradually thickening the line towards the outer corner. Then, extend the line slightly beyond the outer corner of your eye, angling it upwards towards the end of your eyebrow. To create the wing, imagine an invisible line extending from the outer corner of your eye to the end of your eyebrow and connect it with the upper lash line. Fill in the space between the upper lash line and the wing, creating a smooth and seamless winged liner. For a more intense cat eye, apply a thin line along the lower lash line, connecting it to the winged liner. The classic cat eye is versatile, flattering, and perfect for both daytime and evening looks.
Experimenting with Bold Colors
Gel liners aren’t just limited to classic black or brown shades. One of the most exciting aspects of gel liners is their ability to help you experiment with bold and vibrant colors. Step out of your comfort zone and try shades like electric blue, emerald green, or deep purple to add a pop of color and excitement to your makeup look. Apply the colored gel liner in the same way you would with a traditional black liner, following the contours of your lash line. Experiment with different colors and combinations to create eye-catching and unique looks. Whether you want to make a statement or simply feel like adding a touch of playfulness to your makeup routine, bold colors are an excellent choice.

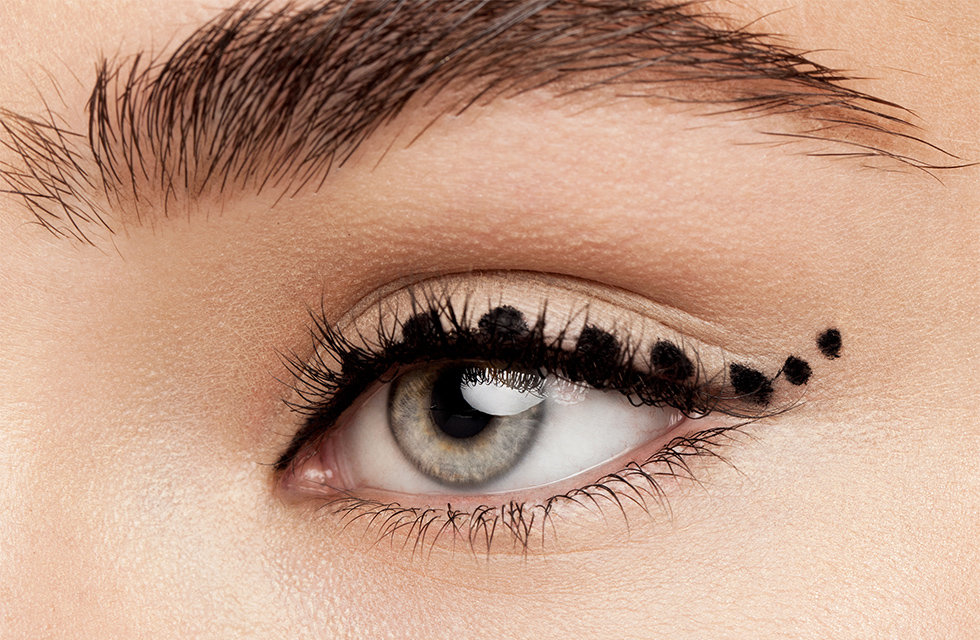
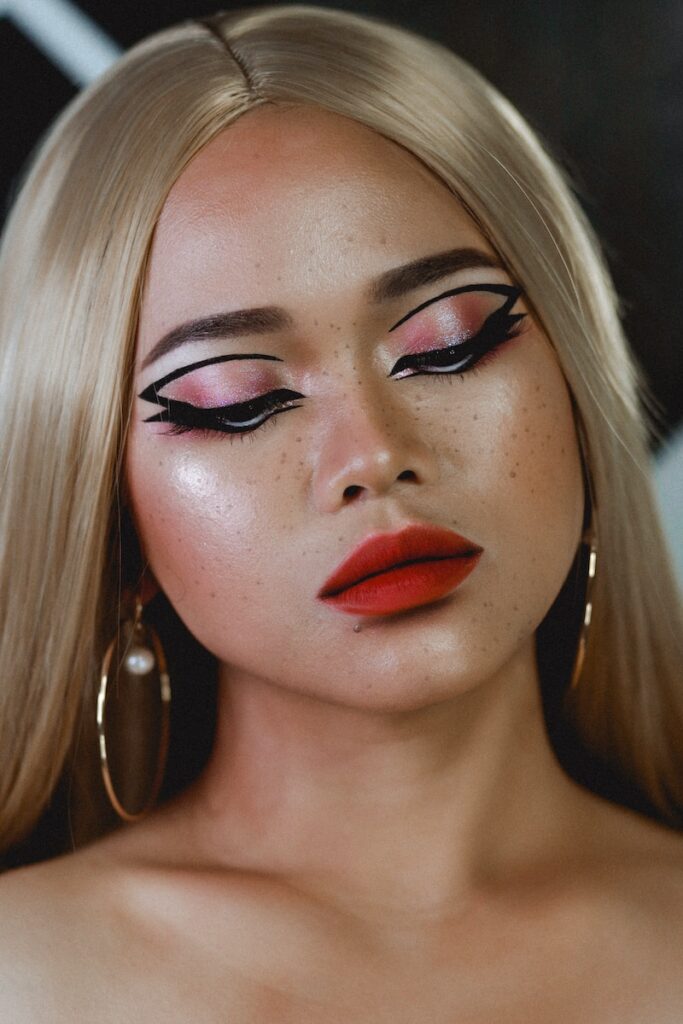
Exploring Unique Eyeliner Designs
If you’re feeling adventurous and want to take your gel liner game to the next level, exploring unique eyeliner designs is the way to go. Gel liners offer unparalleled versatility and precision, making them perfect for intricate and artistic designs. Challenge yourself to create geometric shapes, ombre effects, or even graphic designs using different shades and finishes of gel liner. You can also incorporate rhinestones, glitter, or other embellishments to take your designs to the next level. The possibilities are endless, and the world of gel liners becomes your artistic canvas.
In conclusion, navigating the world of gel liners can be a rewarding and exciting journey. By understanding the basics, choosing the right formula and shade, mastering application techniques, prepping your eyes, troubleshooting common mistakes, and exploring different styles and looks, you can create stunning eyeliner looks that elevate your makeup game. Gel liners offer versatility, longevity, and endless possibilities, allowing you to express your creativity and enhance your natural features. So go ahead, embrace the gel liner experience, and have fun exploring the world of gel liners.