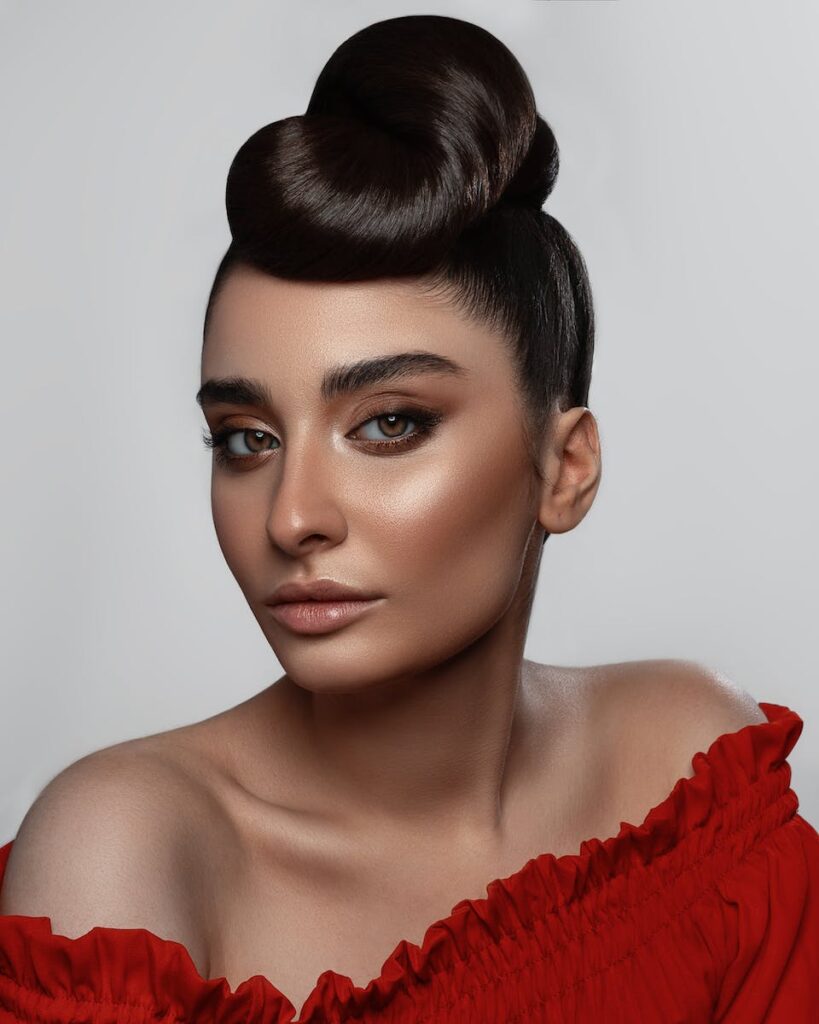
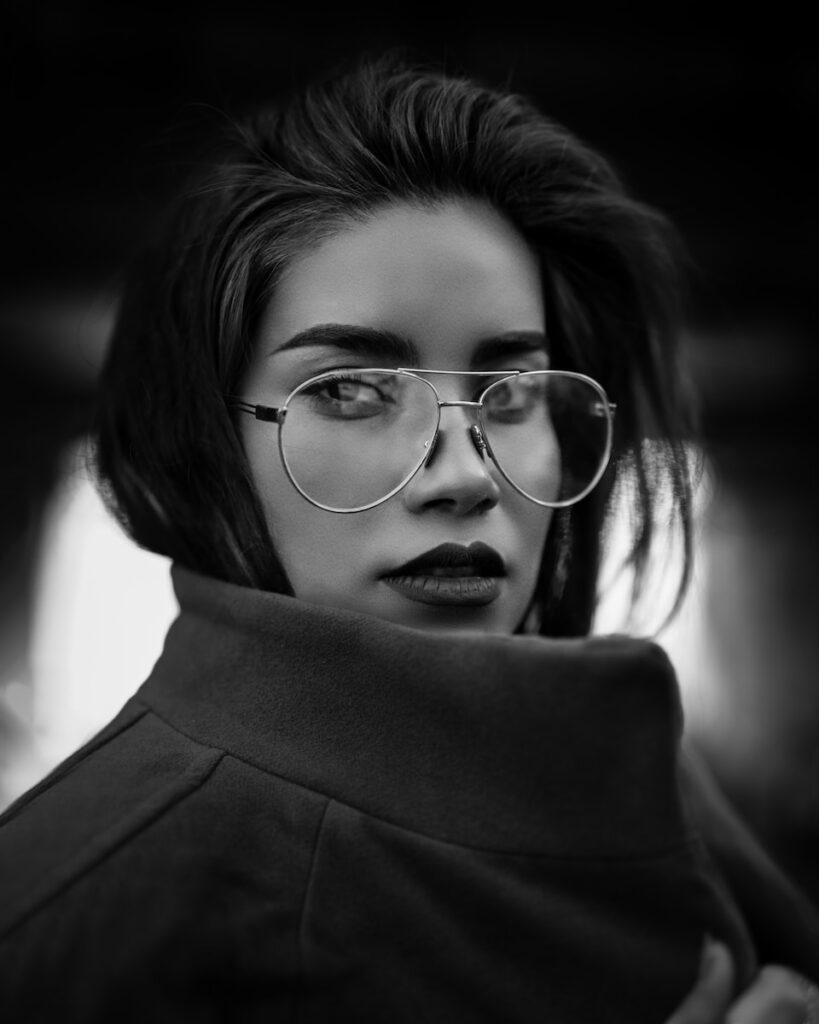
You’re a proud spectacle wearer who loves to experiment with makeup, but sometimes, the combination of face makeup and glasses can be a bit tricky to master. Luckily, Stylish.ae has got your back! In this article, we’ll share some insider tips and tricks to help you enhance your natural beauty while rocking those stylish frames. From choosing the right foundation to accentuating your eyes, we’ll guide you through the process step by step. So, put on your glasses and get ready to elevate your makeup game!”

Choosing the Right Glasses
Consider your face shape
When choosing glasses, it’s essential to consider your face shape. Different face shapes suit different styles of glasses, so take the time to find out which shape complements your features best. For example, if you have a round face, opt for rectangular or square frames to add some angles and definition. On the other hand, if you have a square face, try round or oval frames to soften your features. Remember, the right glasses can enhance your natural beauty and make a fashion statement.

Consider your skin tone
Your skin tone can also play a crucial role in determining the perfect glasses for you. Consider whether you have warm or cool undertones in your skin. If you have warm undertones, glasses with earthy or warm-toned frames, such as brown or gold, will complement your complexion beautifully. For cool undertones, frames in silver, black, or bold shades like blue or purple can bring out the best in your skin tone. Matching your glasses to your skin tone will make your overall look harmonious and put-together.
Consider your personal style
Lastly, consider your personal style when choosing glasses. Do you prefer a bold and trendy look, or do you lean towards a more classic and timeless aesthetic? The frames you choose should align with your overall style and reflect your personality. If you’re someone who likes to experiment with fashion, consider trying out unique shapes or vibrant colors. If you prefer a minimalist and understated approach, opt for more neutral and versatile frames that can complement any outfit. Remember, your glasses are not just an accessory but an extension of your style.

Applying Foundation
Moisturize your skin
Before applying foundation, it’s crucial to prepare your skin properly. Start by moisturizing your face to create a smooth canvas. Hydrated skin ensures that the foundation glides on effortlessly and prevents it from looking cakey or dry. Choose a moisturizer that suits your skin type, whether it’s oil-free for oily skin or a more nourishing formula for dry skin. Allow the moisturizer to fully absorb into your skin before moving on to the next step.
Use a primer
Using a primer before foundation application can make all the difference in creating a flawless base. A primer not only helps to smooth out imperfections but also extends the longevity of your foundation. Apply a small amount of primer onto your face, focusing on areas where you have enlarged pores or uneven texture. Gently blend it into your skin with your fingertips or a brush, ensuring an even and thin layer. The primer will create a barrier between your skin and the foundation, allowing it to glide on smoothly and stay in place throughout the day.
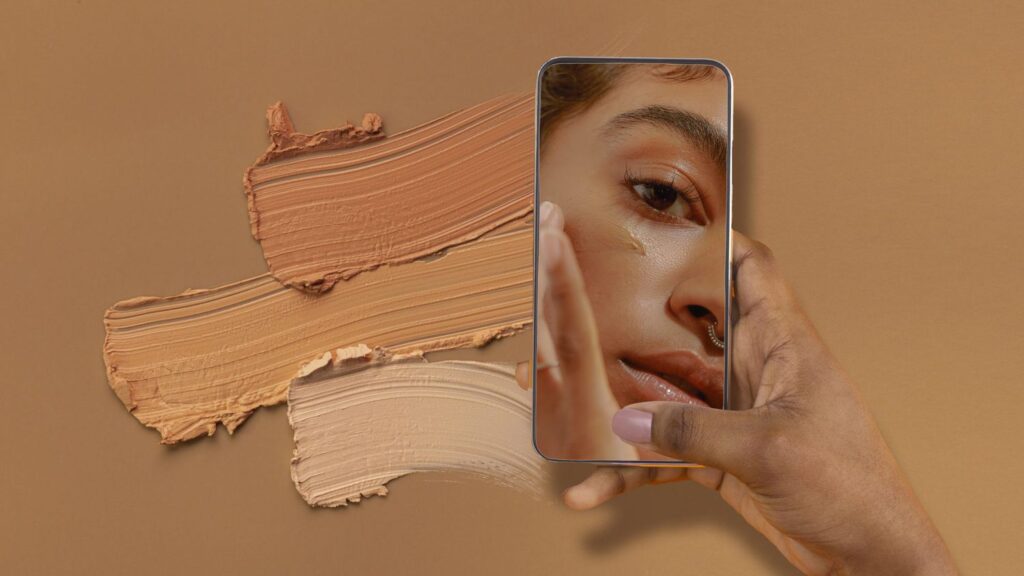
Choose the right shade
Selecting the right shade of foundation is key to achieving a natural and seamless look. Take the time to find a shade that matches your skin tone perfectly. Avoid choosing a foundation that is too light or too dark, as it can create a stark contrast between your face and the rest of your body. To find your perfect match, swatch a few shades on your jawline or wrist and choose the one that disappears into your skin. Remember, your foundation should enhance your complexion rather than mask it.
Apply foundation evenly
Once you have moisturized and primed your skin, it’s time to apply foundation. Start by using a damp makeup sponge or a foundation brush to distribute the product evenly across your face. Begin at the center of your face, such as your forehead, nose, and chin, then blend outwards to ensure seamless coverage. Pay attention to areas that may need extra coverage, such as under the eyes or blemishes. Remember to blend the foundation into your neck for a cohesive and natural look. Building up the coverage gradually if necessary will give you more control over the final result.
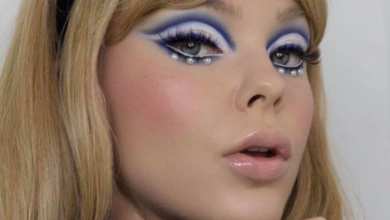
Enhancing Eyes with Eyeshadow
Opt for neutral tones
When wearing glasses, it’s best to opt for neutral eyeshadow tones that complement your frames and enhance your eyes without overpowering them. Subtle shades like beige, taupe, or soft brown can create a natural and effortless look. These colors work well with any type of glasses and are versatile enough to complement various eye colors. Neutral eyeshadows also help to create a harmonious balance between your eye makeup and your frames, highlighting your eyes without drawing too much attention away from your stylish spectacles.
Use matte eyeshadows
Matte eyeshadows are your best friend when it comes to wearing glasses. Shimmer or glittery eyeshadows can reflect light and create a distracting effect, especially when paired with the glare of your lenses. Opting for matte shades will create a more refined and polished look that won’t compete with your glasses. Matte eyeshadows also tend to blend more seamlessly, allowing you to achieve a soft and diffused look that won’t overpower your frames.
Apply eyeshadow above the crease
To ensure that your eyeshadow is visible when wearing glasses, it’s important to apply it slightly above the crease of your eyelid. This technique helps to create the illusion of more lid space, preventing your eyeshadow from being covered by your frames. Use a fluffy blending brush to sweep the eyeshadow along your crease and then blend it outwards towards the outer corner of your eye. This will give your eyes more dimension and make them appear larger behind your glasses.
Blend well
Blending is the key to achieving a seamless and professional-looking eyeshadow application. Use a clean blending brush to soften any harsh lines and blend different eyeshadow shades together. This will create a gradient effect that adds depth and dimension to your eye makeup. Ensure that there are no visible lines or patches of color and that everything is seamlessly blended for a polished finish. Taking the time to blend your eyeshadow properly will make your eyes pop and ensure that your glasses frame them beautifully.
Defining Eyebrows
Shape your eyebrows
Well-defined eyebrows can make a significant difference in framing your face and enhancing your overall appearance, especially when wearing glasses. Take the time to shape your eyebrows to suit your face shape and personal preference. If you’re unsure about the best shape for your eyebrows, considering consulting with a professional eyebrow stylist or esthetician. They can help you determine the ideal brow shape that suits your features and complements your glasses. Always aim for a shape that enhances your natural brow structure and creates a flattering frame for your eyes.
Fill in your eyebrows
Once your eyebrows are well-shaped, filling them in can add depth and definition. Use an eyebrow pencil, powder, or gel in a shade that matches your natural hair color. Start by lightly filling in any sparse areas or gaps in your eyebrows, following the natural direction of your hair growth. Use small, light strokes to mimic the appearance of individual brow hairs, creating a natural and realistic look. Pay attention to the arch and the tail of your eyebrows to ensure symmetry and balance.
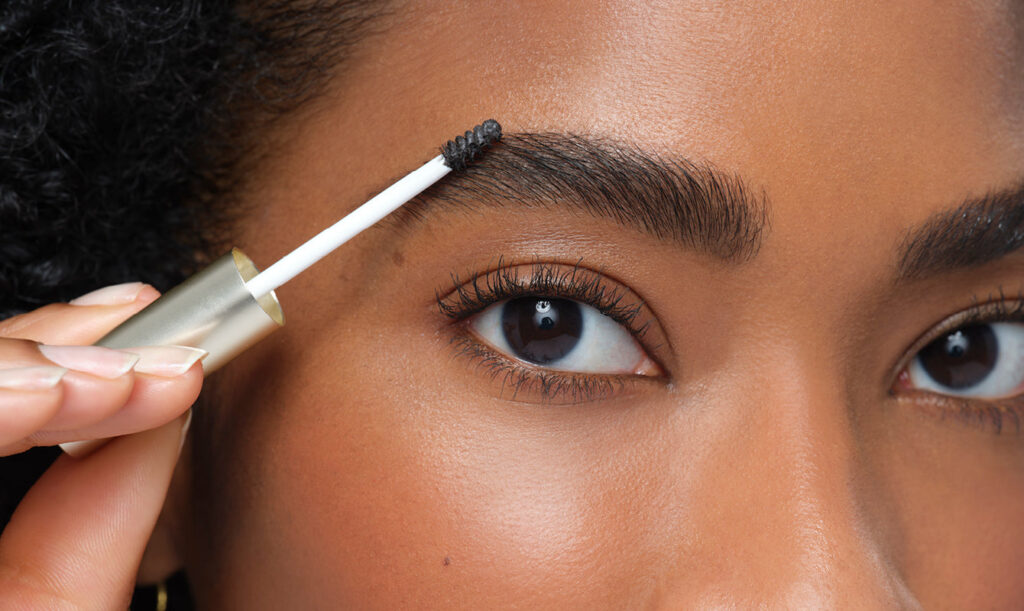
Use eyebrow gel or mascara
To further enhance your eyebrows and keep them in place throughout the day, consider using an eyebrow gel or mascara. This product will help set your eyebrow hairs in the desired shape and add volume. Choose a gel or mascara that matches the color of your eyebrows or opt for a clear formula if you want a more subtle effect. Comb the gel or mascara through your eyebrows, following the direction of the hair growth, to create a polished and groomed look. This step will ensure that your eyebrows stay put, even under the weight of your glasses.

Creating Stunning Eyelashes
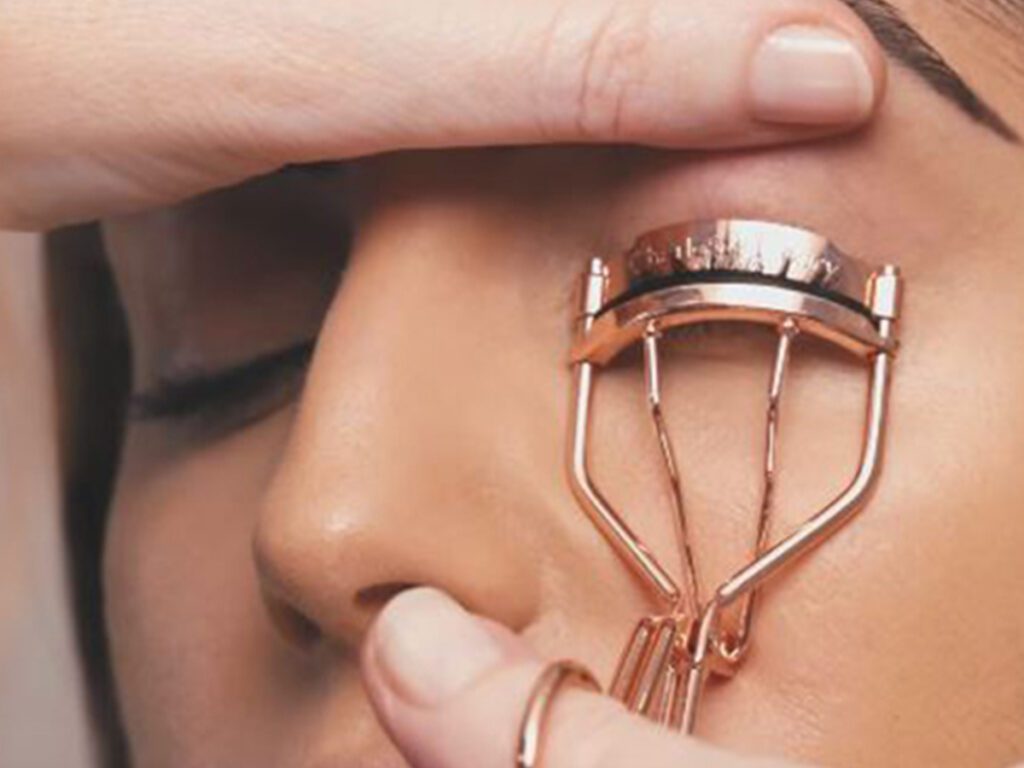
Curl your lashes
Curling your eyelashes can instantly open up your eyes and make them appear more awake and youthful. When wearing glasses, curled lashes help to prevent them from touching your lenses and creating a smudged or messy look. Use an eyelash curler before applying mascara to give your lashes a gorgeous lift. Gently clamp the curler at the base of your lashes, hold for a few seconds, and then release. Repeat this process along the length of your lashes to achieve a natural curve.
Use lengthening mascara
Choosing the right mascara can make all the difference in achieving stunning eyelashes that accentuate your eyes behind your glasses. Opt for a lengthening mascara that will add drama and intensity to your lashes, making them stand out even more. Look for mascaras with a formula that separates and elongates the lashes without causing clumping or flaking. Apply the mascara in a zigzag motion from the root to the tip of your lashes, ensuring even coverage and elongation.
Apply false lashes
For a more dramatic look, consider using false lashes to add volume and length to your natural lashes. False lashes can create a stunning effect behind your glasses and make your eyes truly captivating. Choose lashes that are not overly long or dense, as they may touch the lenses and cause discomfort. Trim the lashes to fit the length of your lash line and apply lash glue along the band. Wait a few seconds for the glue to become tacky and then carefully place the lashes as close to your natural lash line as possible.
Avoid clumping
Clumpy mascara can ruin your entire eye makeup look, especially when paired with glasses. To avoid clumping, make sure to wipe off any excess product from the mascara wand before applying it to your lashes. Start with a thin coat of mascara and build up the volume gradually if desired. Use a clean mascara wand or a lash comb to comb through your lashes and separate any clumps. This will ensure that your lashes look defined and voluminous rather than spidery or messy.
Emphasizing Your Eyes with Eyeliner
Choose the right eyeliner formula
When choosing eyeliner to accentuate your eyes behind glasses, it’s important to consider the formula that works best for you. Gel or cream eyeliners are excellent options as they are long-lasting, smudge-proof, and easy to apply. They also offer more precision, allowing you to create clean lines and intricate designs. If you prefer a more effortless application, opt for a pencil eyeliner that can be smudged for a softer look or a liquid eyeliner for a precise and bold line. Experiment with different formulas and find the one that suits your needs and preferences.
Apply eyeliner to the upper lash line
To enhance your eyes when wearing glasses, focus on applying eyeliner to your upper lash line. This technique adds definition to your eyes without overwhelming them or making your frames appear too heavy. Begin from the inner corner of your eye and draw a thin line along your lash line, gradually thickening it towards the outer corner. Use small and precise strokes to create a smooth line that follows the natural shape of your eye. Avoid extending the eyeliner past the outer corner to maintain a balanced and harmonious look.
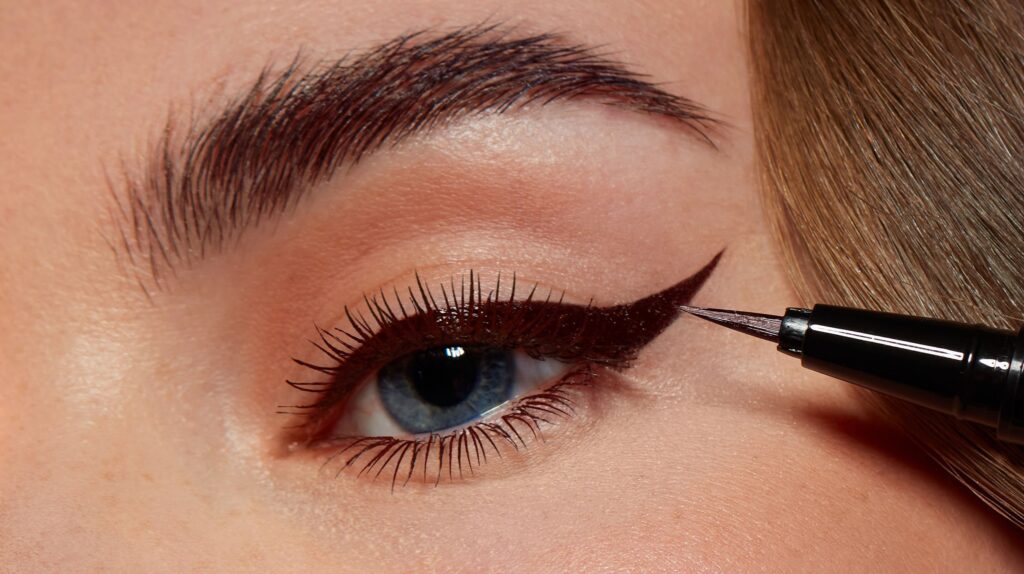
Create a winged eyeliner look
If you want to add some flair to your eye makeup, a winged eyeliner look can be a stylish choice. The winged eyeliner creates a subtle cat-eye effect that elongates your eyes and adds a touch of glamour. Start by drawing a thin line along your upper lash line, extending it slightly beyond the outer corner of your eye. Then, create a small flick upwards, following the natural curve of your lower lash line as a guide. Fill in the space between the line and the flick, ensuring a smooth and seamless wing. Experiment with the length and thickness of the wing to find the style that complements your glasses best.
Adding Color to Your Cheeks
Choose a blush shade
Blush adds a healthy and youthful glow to your complexion, and choosing the right shade is essential when wearing glasses. Opt for a blush color that complements your skin tone and coordinates with your glasses. If you have warm undertones, peachy or coral shades can bring warmth and radiance to your cheeks. For cool undertones, pink or mauve blushes can create a beautiful contrast. Consider the intensity of your glasses frames as well – if they are bold and vibrant, a softer blush shade may be more suitable, while a stronger blush can balance out more delicate frames.
Apply blush to the apples of your cheeks
To apply blush in a flattering way, focus on the apples of your cheeks. Smile to locate the roundest part of your cheeks and apply the blush to this area. Start with a light hand and build up the color gradually if desired. Use a soft and fluffy blush brush or a stippling brush to blend the blush in a circular motion for a natural and seamless finish. The goal is to achieve a healthy and natural flush that enhances your complexion without overpowering your glasses.

Blend the blush for a natural look
Blending is key when it comes to applying blush, especially when wearing glasses. Take the time to blend the blush properly, ensuring there are no harsh lines or patches of color. Use a clean, fluffy brush to blend the blush into your skin, creating a soft and diffused effect. This will give your cheeks a natural and radiant appearance that complements your overall makeup look. Remember, blending is a crucial step to ensure that your blush stays in place and does not distract from your stylish glasses.
Highlighting and Contouring
Apply highlighter to the high points of your face
Highlighter can add a luminous and radiant glow to your complexion when applied to the high points of your face. When wearing glasses, it’s important to apply the highlighter strategically to ensure it doesn’t create excess shine or emphasize any textures on your skin. Focus on the tops of your cheekbones, the bridge of your nose, the cupid’s bow, and the inner corners of your eyes. Use a fan brush or a small fluffy brush to apply the highlighter with a light hand for a subtle and natural glow.

Contour to add definition
Contouring can add definition and structure to your face, especially when your glasses are on. Choose a contour shade that is slightly darker than your natural skin tone and use it to enhance your cheekbones, jawline, and forehead. Start by applying the contour shade to the hollows of your cheeks, blending it upwards towards your temples. Then, apply a light dusting of contour to the sides of your nose to create the illusion of a slimmer shape. Finally, sweep the contour shade along your jawline and hairline to add dimension. Blend well for a seamless and natural-looking contour.
Blend well
When highlighting and contouring, blending is essential to create a seamless and natural finish. Ensure that there are no visible lines or harsh transitions between the highlighter, contour shade, and your natural skin. Use a clean and fluffy brush to blend the products into your skin, ensuring a soft and diffused effect. Circular motions and gentle strokes will help achieve a seamless blend. Remember, the goal is to enhance your features subtly without drawing too much attention away from your glasses.
Selecting a Lip Color
Consider your eye makeup
When selecting a lip color to complement your glasses, take into consideration the intensity and color palette of your eye makeup. If you have opted for neutral or soft eye shadows, you have more freedom to experiment with bolder lip colors. Bold reds, deep berries, or vibrant pinks can add a pop of color to your face and brighten your overall look. On the other hand, if you have chosen a more dramatic eye makeup look, it’s best to stick with softer and more neutral lip shades to maintain a balanced and cohesive appearance.
Choose a lip color that complements your skin tone
Your skin tone is another crucial factor to consider when selecting a lip color. Similar to choosing glasses frames, warm undertones pair well with warmer lip shades, such as corals or oranges. Cool undertones, on the other hand, can be complemented by cooler lip shades like pinks or berries. However, don’t be afraid to step outside of your comfort zone and experiment with different shades. Sometimes, unexpected pairings can create a unique and striking look that showcases your personality and style.
Opt for long-lasting formulas
To ensure that your lip color stays in place throughout the day, opt for long-lasting formulas. Matte or semi-matte lipsticks tend to have a longer staying power compared to glossy or sheer formulas. Look for lipsticks with a hydrating formula that won’t cause your lips to dry out or become uncomfortable. Liquid lipsticks and lip stains are also excellent options as they provide a long-lasting and transfer-proof finish. Consider choosing a lip color that resonates with your personal style and matches the overall aesthetic you want to achieve with your glasses.
Finishing Touches and Setting
Set your makeup with powder
To ensure that your makeup stays in place and looks flawless throughout the day, setting it with powder is essential. Choose a finely milled loose or pressed powder that matches your skin tone. Apply a light dusting of powder all over your face, focusing on areas that tend to become shiny, such as the T-zone. This will help control excess oil, prevent your foundation from creasing, and extend the longevity of your makeup. Remember to use a light hand and tap off any excess powder from your brush to avoid a heavy or cakey finish.
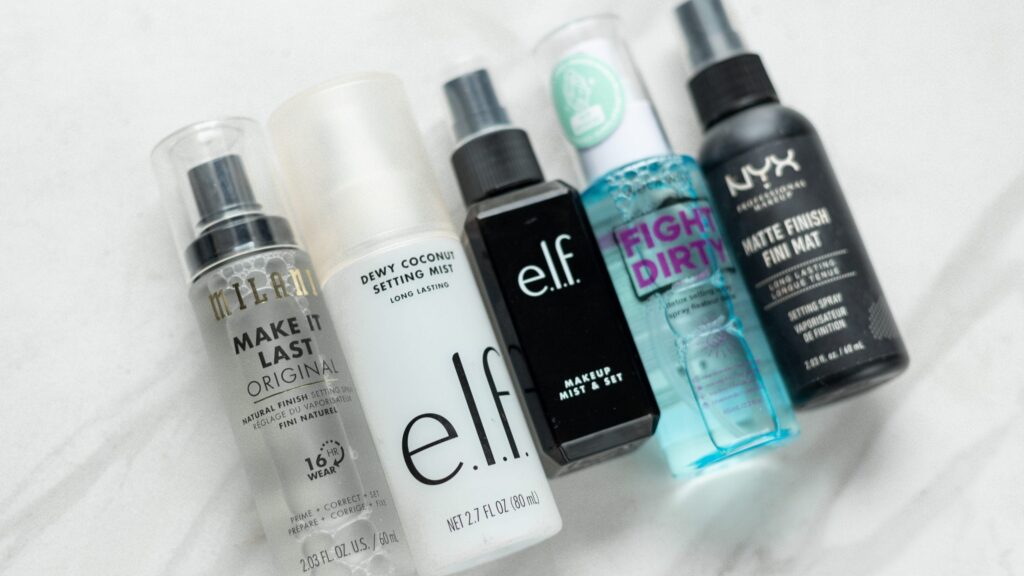
Use setting spray
To further enhance the longevity of your makeup, consider using a setting spray. Setting sprays help to lock your makeup in place and prevent it from fading or melting throughout the day. Choose a setting spray that suits your skin type and desired finish – whether it’s a matte, dewy, or natural finish. Hold the bottle at arm’s length and mist the spray evenly across your face, closing your eyes and mouth. Allow the setting spray to dry naturally, and you’re ready to conquer the day with your flawless makeup and stylish glasses.
Check your makeup in different lighting
Before you step out with your glasses on, take the time to check your makeup in different lighting conditions. Lighting can significantly alter the appearance of your makeup, and it’s essential to make sure everything looks seamless and polished. Step near a window to see how your makeup looks in natural light. Additionally, test your makeup under different artificial lighting sources, such as bathroom lights or outdoor streetlights, to ensure that it still looks flattering and balanced. Making these small adjustments will ensure that your makeup, along with your glasses, looks stunning from day to night.
In conclusion, finding the right glasses and creating a flattering makeup look to wear with them can enhance your natural beauty and make a fashion statement. By considering your face shape, skin tone, and personal style, you can select glasses that complement your features and reflect your personality. When applying foundation, remember to moisturize your skin, use a primer, choose the right shade, and apply it evenly for a flawless base.
Enhancing your eyes with eyeshadow, defining your eyebrows, creating stunning eyelashes, and emphasizing your eyes with eyeliner can make your eyes pop behind your glasses. Adding color to your cheeks with blush, highlighting and contouring to add definition, selecting a lip color, and finishing touches with setting powder and spray will complete your overall makeup look. By following these tips, you can confidently rock your glasses and showcase your unique style.