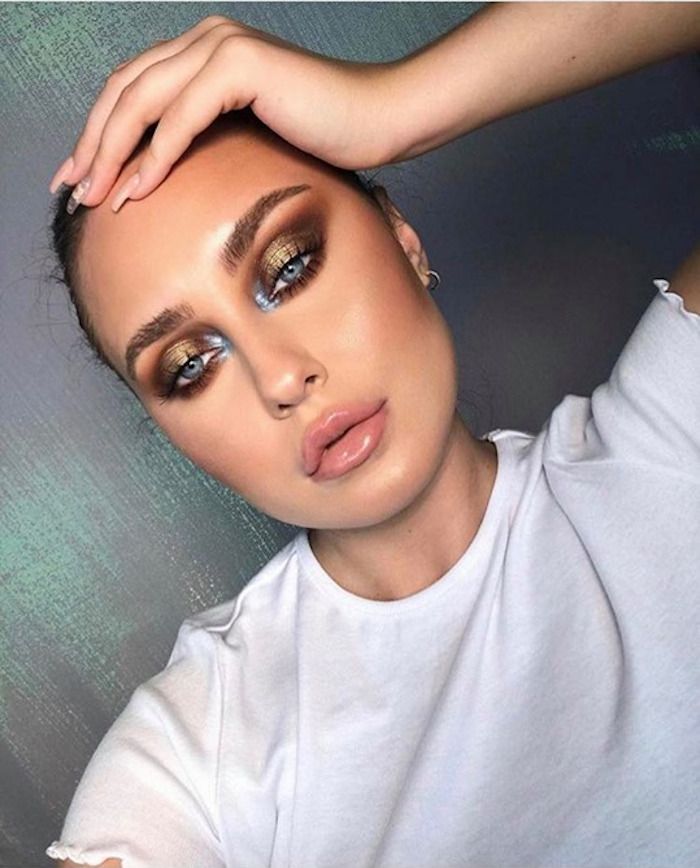
Are you searching for the perfect face makeup to make a statement at your next special event, whether it’s a glamorous gala or a memorable graduation? Look no further than stylish.ae, your go-to destination for all things beauty. With a wide range of high-quality and trendy makeup products, stylish.ae has you covered for any occasion. Enhance your natural beauty and feel confident with their expertly curated collection that is sure to leave a lasting impression. From stunning eyeshadow palettes to flawless foundation, stylish.ae has everything you need to create a captivating look that will turn heads. Get ready to shine and make a lasting impression with stylish.ae’s face makeup for special events.

Choosing the Right Makeup Look
When it comes to choosing the right makeup look for a special event, there are several factors to consider. The first thing to think about is the type of event you will be attending. Is it a formal gala or a casual graduation party? The level of formality will play a role in determining the appropriate makeup look.
Considering the Event Type
For a formal gala, you may want to opt for a more glamorous and sophisticated makeup look. This can include a smoky eye with bold, defined brows, and a classic red lip. On the other hand, for a casual graduation party, you might want to go for a more natural and effortless look. This can be achieved with neutral tones on the eyes, a touch of blush, and a subtle lip color.
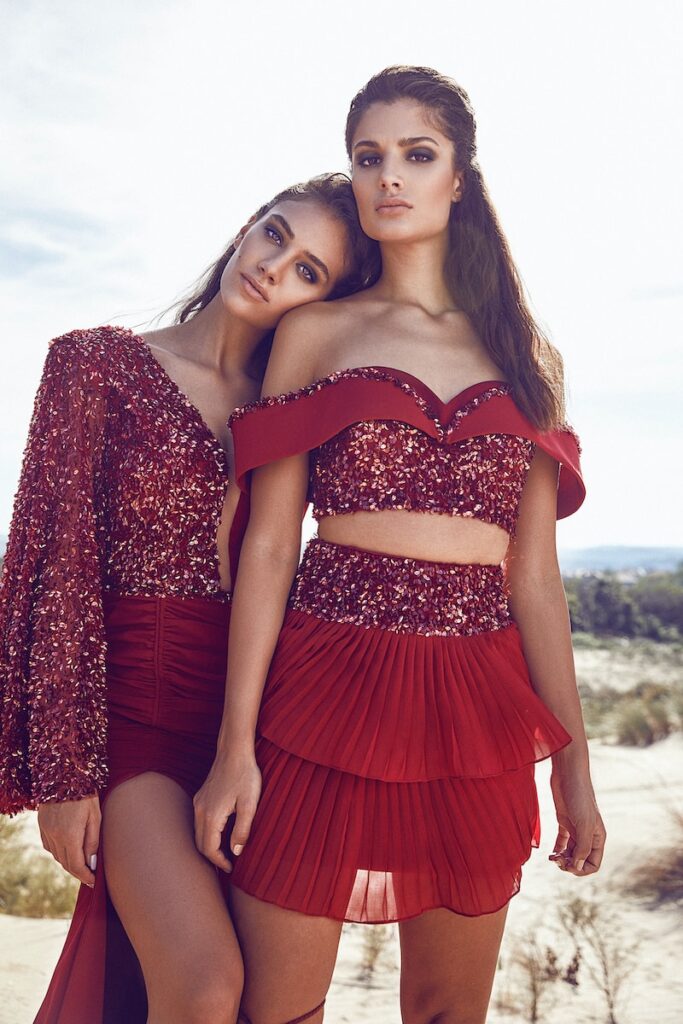
Matching Your Outfit
Another important consideration when choosing the right makeup look is to match it with your outfit. Take into account the colors and style of your attire. If you’re wearing a vibrant, colorful dress, you may want to choose makeup colors that complement or contrast with it. For a monochromatic outfit, you can experiment with pops of color on the eyes or lips. Remember, the goal is to have a cohesive and harmonious look from head to toe.
Taking Your Facial Features into Account
Lastly, don’t forget to consider your own unique facial features. Take a moment to analyze your face shape, eye color, and skin tone. Understanding these aspects can help you determine which makeup styles and colors will enhance your features the most. For instance, if you have beautiful blue eyes, you might want to choose eyeshadow shades that make them pop. If you have a heart-shaped face, contouring techniques can help bring out your cheekbones.
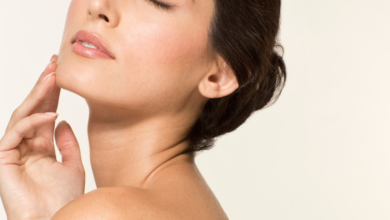
Prepping Your Skin for Makeup
Before applying any makeup, it’s crucial to properly prep your skin to ensure a flawless and long-lasting finish. This involves a few essential steps, including cleansing, exfoliating, moisturizing, and priming.
Cleansing and Exfoliating
Start by cleansing your face to remove any dirt, oil, or impurities. Use a gentle cleanser that is suitable for your skin type. This step will help create a clean canvas for your makeup application. Additionally, consider exfoliating your skin once or twice a week to remove dead skin cells and reveal a smoother complexion. This will allow your makeup to glide on more easily and evenly.
Moisturizing and Priming
After cleansing, it’s important to moisturize your skin to keep it hydrated and plump. Choose a moisturizer that suits your skin type and gently massage it into your face and neck. This step not only nourishes your skin but also creates a smooth base for makeup application. Following moisturizer, apply a primer that is specifically designed for your needs, whether it’s to minimize pores, control oil, or add radiance. Primers help to extend the longevity of your makeup and create a flawless finish.
Applying a Base/Foundation
Once your skin is prepped and primed, it’s time to apply a base or foundation. Select a foundation that matches your skin tone perfectly for a seamless look. Use a foundation brush or a damp sponge to blend the product evenly onto your skin. The foundation will even out your complexion and provide a base for other makeup products to adhere to. Choose a formula that suits your skin type, whether it’s matte, dewy, or satin, for the desired finish.
Creating a Flawless Base
After prepping your skin, it’s time to focus on creating a flawless base using color-correcting techniques, concealing imperfections, and applying foundation.
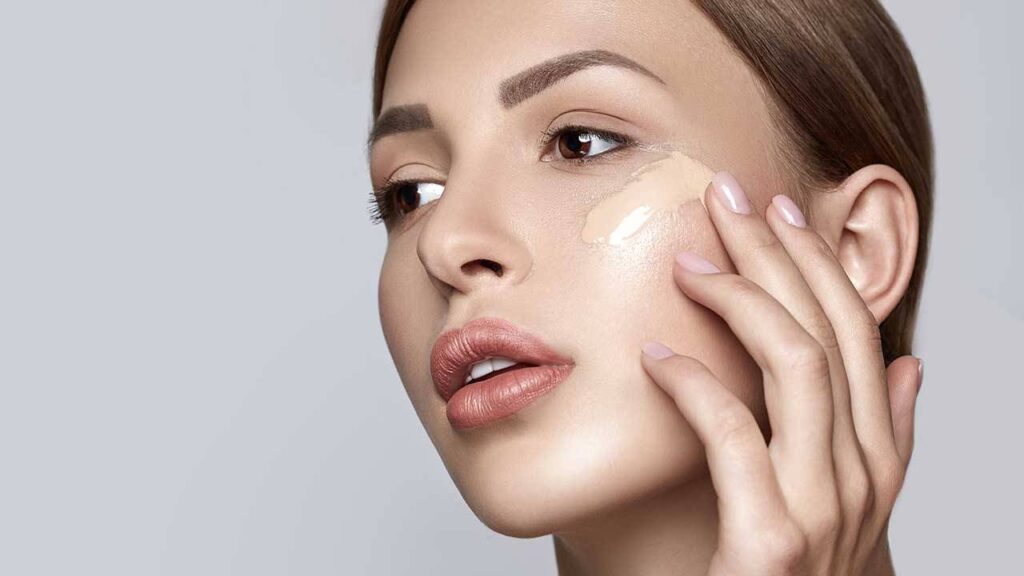
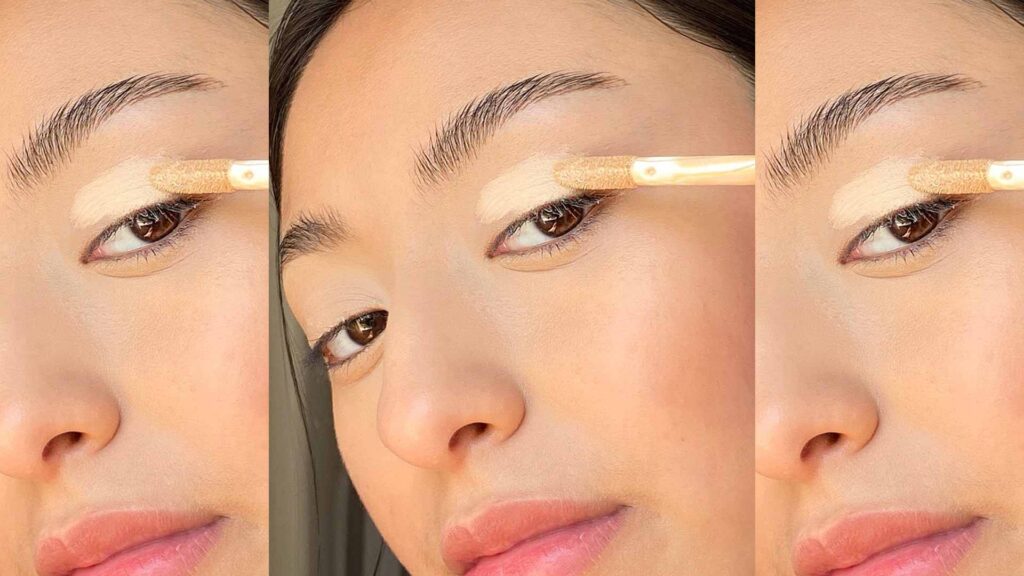
Color-Correcting
Color-correcting involves using specific shades to neutralize any discoloration on the skin. If you have redness, opt for a green color corrector to balance it out. For under-eye dark circles, a peach or salmon color corrector can help cancel out the blue tones. Apply these color correctors sparingly to targeted areas before moving on to concealer and foundation.
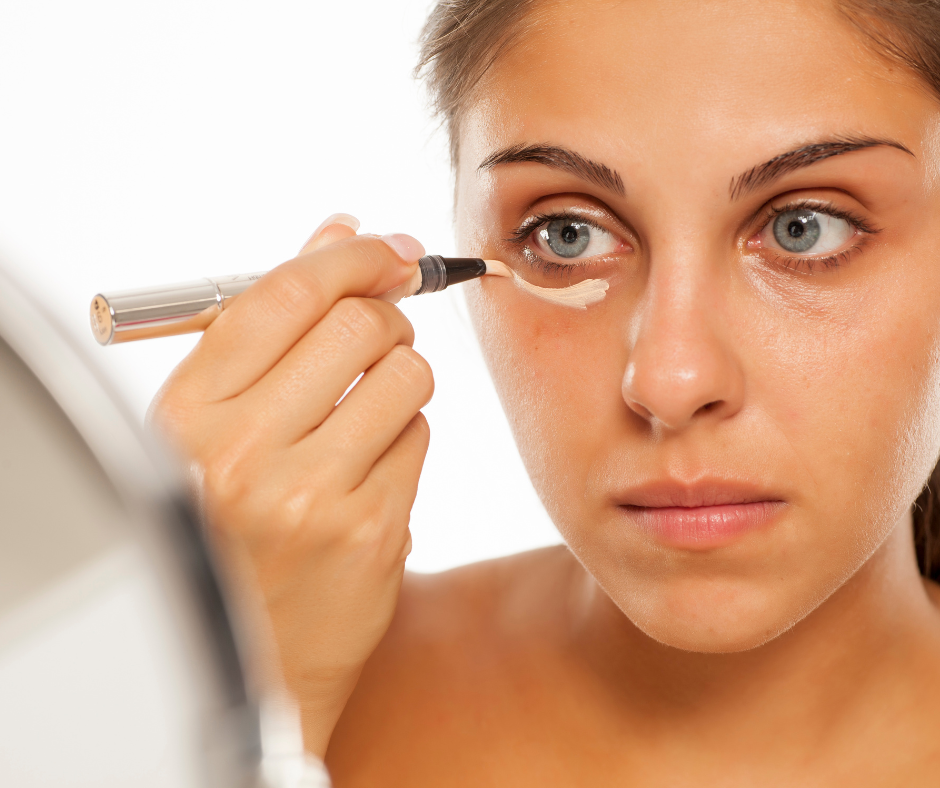
Concealing Imperfections
Once you’ve color-corrected, it’s time to conceal any imperfections that may still be visible. Use a creamy concealer that matches your skin tone to cover blemishes, dark spots, or under-eye circles. Use a small brush or your fingertips to gently pat the concealer onto the areas you want to cover. Blend it out seamlessly for a natural-looking finish.
Applying Foundation
Now that you’ve color-corrected and concealed, it’s time to apply your foundation. Choose a foundation that matches your skin tone perfectly and apply it evenly using a foundation brush or sponge. Start at the center of your face and blend the product outwards for a seamless finish. Be sure to blend well around the hairline and jawline to avoid any visible lines. Set your foundation with a translucent powder to prolong its longevity and minimize shine.
Enhancing Your Features with Contouring and Highlighting
Contouring and highlighting are techniques that can help enhance your natural features and create dimension on your face. By strategically applying shadows and light to certain areas, you can sculpt and accentuate your facial structure.
Identifying Face Shape
First, identify your face shape to determine which areas you want to contour and highlight. Common face shapes include round, oval, square, heart, and diamond. Each shape has its own contouring techniques that can bring out the best in your features. Research and experiment with different contouring methods to find what works best for your face shape.
Contouring Techniques
Contouring involves using a matte bronzer or contour powder to create shadows and define certain areas of your face. Apply the product to the hollows of your cheeks, temples, jawline, and sides of your nose to add depth and structure. Blend the product well using a fluffy brush to create a seamless and natural-looking result.
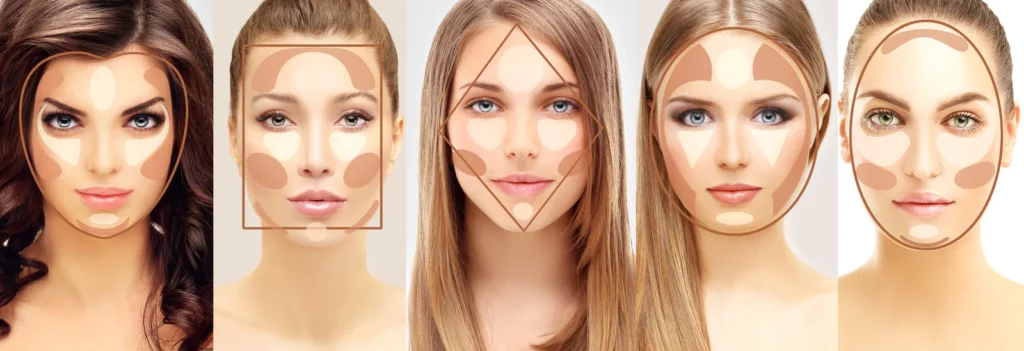
Choosing the Right Products
When selecting contouring and highlighting products, choose shades that are a few shades darker than your skin tone for contouring and a few shades lighter for highlighting. Opt for matte or satin finishes for a more natural look. Cream or powder formulas are both viable options, depending on your preference and skin type. Remember to blend well to avoid any harsh lines and achieve a soft and blended effect.

Adding Definition to Your Eyes
The eyes are often considered the focal point of any makeup look. Adding definition to your eyes can make them stand out and complete your overall makeup style.
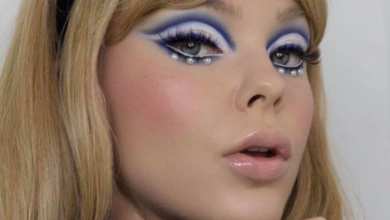
Choosing Eyeshadow Colors
When choosing eyeshadow colors, consider both your outfit and your eye color. If you’re wearing neutral tones, you can opt for a smokey eye with silver, gray, or brown shades. For a bolder look, experiment with vibrant eyeshadow colors that complement your outfit. Additionally, take your eye color into account. Certain shades can enhance the natural color of your eyes, making them pop. Blue eyes may be enhanced with warm, coppery tones, while green eyes may stand out with purple or mauve shades.
Applying Eyeliner
Eyeliner is an essential tool for adding definition and shape to your eyes. Depending on your preference, you can choose between a pencil, liquid, or gel eyeliner. For a classic look, create a thin line along your upper lash line, making it slightly thicker towards the outer corner. This will give your eyes a subtle lift. You can also experiment with winged liner or a smudged-out eyeliner for a more dramatic effect.

Curling and Mascara
To complete your eye look, don’t forget to curl your lashes and apply mascara. Use an eyelash curler to curl your lashes and make them appear longer and more lifted. Follow up with a volumizing or lengthening mascara to add definition and intensity to your lashes. Apply a few coats, allowing each coat to dry before adding the next, for a fuller and fluttery effect. Consider using a waterproof mascara if you anticipate any tears of joy or humid conditions.
Creating Perfect Brows
Well-groomed eyebrows can frame your face and enhance your overall makeup look. Follow these steps to create perfect brows that complement your features.
Determining Brow Shape
To determine your ideal brow shape, consider your natural arch and the shape of your face. If you have a round face, a slightly higher arch can help create balance. For those with heart-shaped faces, a soft, rounded arch can soften the face’s angles. Oval faces can generally pull off a variety of brow shapes, while square faces may benefit from more defined and angular brows. Use an eyebrow pencil or brow grooming product to outline your desired shape before filling in.
Filling in Sparse Areas
If you have sparse areas in your brows, filling them in with an eyebrow pencil or powder can help create a fuller and more defined look. Choose a shade that matches your natural brow color or is slightly lighter for a more natural effect. Lightly fill in the sparse areas using short, feathery strokes, and blend the product with a spoolie brush for a seamless finish.
Setting the Brows
To ensure your brows stay in place throughout the event, set them using a clear or tinted brow gel. This will help keep your brow hairs in position and add a polished finish to your overall brow look. Gently comb the gel through your brows in an upward motion, following their natural shape. You can also use a small amount of hairspray on a clean spoolie brush as a budget-friendly alternative.

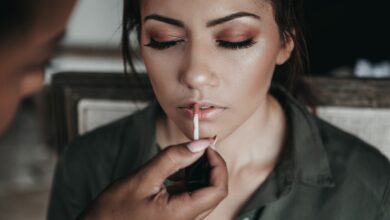
Making Your Lips Pop
The final touch to complete your makeup look is adding a pop of color to your lips. Choose a lip color that flatters your skin tone and complements the overall vibe of your outfit.
Finding the Right Lip Color
Finding the right lip color involves considering both your skin tone and the event you’ll be attending. For fair skin tones, soft pink or peachy nudes can create a fresh and youthful look. Medium skin tones can pull off a wide range of shades, from vibrant berries to warm corals. Darker skin tones can opt for bold reds, deep purples, or rich browns. Keep the undertones of your skin in mind when selecting lip colors, as certain undertones can clash or wash you out.
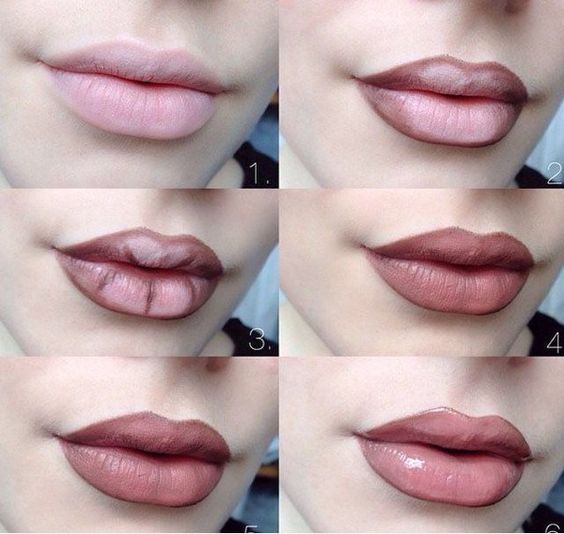
Applying Lip Liner
To achieve a precise and defined lip look, start by applying lip liner. Choose a shade that closely matches your lip color or the lipstick you’ll be using. Line your lips, starting from the cupid’s bow and following the natural shape. Fill in your lips with the liner to create a base for your lipstick and to ensure longer-lasting color.
Adding Lip Gloss
To add dimension and shine to your lips, apply a layer of lip gloss on top of your lipstick or lip liner. Lip gloss can give your lips a fuller appearance and enhance the color payoff. Opt for a clear gloss for a natural look or a tinted gloss that complements your lip color. Be mindful of the event you’re attending, as glossy lips may require more touch-ups throughout the event compared to matte lip products.
Setting Your Makeup for Longevity
Once your makeup look is complete, it’s essential to set it to ensure it lasts throughout the event and maintains its fresh appearance.
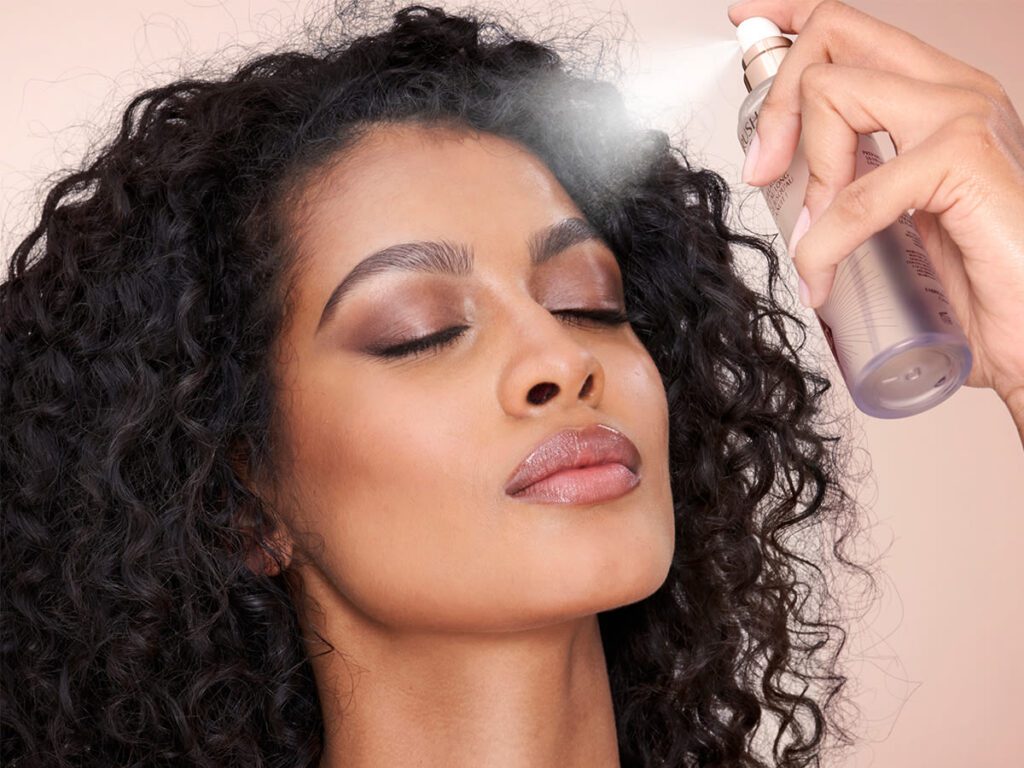
Using Setting Spray
A setting spray is a must-have product to lock in your makeup and extend its longevity. Shake the bottle well and hold it at arm’s length from your face. Close your eyes and mist the spray over your entire face in a T or X motion. This will help set your makeup and prevent it from smudging or fading.

Applying Translucent Powder
Another way to set your makeup is by applying a thin layer of translucent powder. Use a fluffy brush to lightly dust the powder over your face, focusing on areas that tend to get oily or shiny, such as the T-zone. The translucent powder will absorb excess oil and help your makeup stay in place for longer.
Touching Up Throughout the Event
Even with all the right preparation and setting techniques, it’s always a good idea to bring a small touch-up kit with you to the event. Pack essentials such as blotting papers, a compact powder, a lipstick, and a small brush or beauty sponge. Throughout the event, you can blot away any excess oil, touch up your powder to minimize shine, and reapply lipstick after eating or drinking.
Additional Tips and Tricks
To take your makeup look to the next level, consider incorporating these additional tips and tricks into your routine.
Using Primer for Eyeshadow
To ensure your eyeshadow stays vibrant and crease-free, apply an eyeshadow primer or a concealer to your eyelids. This will create a smooth base and help the eyeshadow adhere better to your skin. The primer or concealer will also enhance the color payoff of the eyeshadows, making them appear more intense.
Blending Techniques
Proper blending is the key to achieving a seamless and professional-looking makeup application. Use fluffy brushes to blend your eyeshadows, bronzers, and blushes for a soft and diffused look. When applying foundation or concealer, use a damp sponge or foundation brush to blend the product into your skin for a natural finish.
Adding False Lashes
If you want to add extra drama and volume to your lashes, consider applying false eyelashes. Choose a style that suits the event and your desired look, whether it’s wispy, natural, or full glam. Apply a thin layer of lash glue along the band of the false lashes and wait a few seconds for it to become tacky. Using tweezers or your fingers, carefully press the lashes onto your lash line, starting from the inner corner and moving towards the outer corner.
Seeking Professional Help
If you’re unsure about your makeup skills or want to achieve a specific look for a special event, don’t hesitate to seek professional help.
Booking a Makeup Artist
One option is to book a professional makeup artist who can create a tailored look that suits your event and personal style. A makeup artist will have the expertise and knowledge to enhance your features and ensure your makeup lasts throughout the event. Schedule a consultation with the makeup artist beforehand to discuss your desired look and any specific requirements.
Consulting with Stylists
In addition to makeup, the overall styling of your hair and outfit can greatly impact your overall look. Consider consulting with hairstylists and fashion stylists to complete your desired look. A hairstylist can create a hairstyle that complements your makeup and outfit, while a fashion stylist can help you select the perfect ensemble for the event.
Trying Makeup Trials
If you’re unsure about a certain makeup look or want to ensure you’re comfortable with it before the event, consider scheduling a makeup trial. During a makeup trial, a professional makeup artist can experiment with different looks and techniques, allowing you to see how they translate on your face. This can help you feel more confident and make any necessary adjustments or changes in advance.
Remember, the goal of any makeup look is to enhance your natural features and make you feel confident and beautiful. Whether you choose to go for a bold, glamorous look or a subtle, natural look, the most important thing is to have fun and enjoy the process. With the right techniques, products, and a touch of creativity, you can create a makeup look that will make heads turn at any special event.