Get ready to achieve flawless, high-definition makeup looks with Stylish.ae’s top tips! Whether you’re preparing for a photo shoot or wanting to look stunning on your next video call, this article will guide you through the secrets to achieving a camera-ready finish. From foundation to contouring techniques, Stylish.ae’s expert advice will help you enhance your natural beauty and bring out your best features in high definition. So get your brushes ready and prepare to transform your makeup game with these fabulous tips!

Prepping the Skin
Cleansing and Moisturizing
Before applying any makeup, it is essential to start with a clean canvas. Cleansing the skin removes any dirt, oil, and impurities that can affect the application and longevity of your makeup. Use a gentle cleanser suitable for your skin type and massage it onto your face in circular motions. Rinse thoroughly with lukewarm water and pat dry with a clean towel.
After cleansing, moisturizing is a crucial step to keep your skin hydrated and plump. Choose a moisturizer that suits your skin type – whether it is dry, oily, or combination. Apply a pea-sized amount onto your face and neck, gently massaging it in using upward motions. Let the moisturizer absorb into your skin before moving on to the next step.
Using a Primer
Priming your skin is an important step to create a smooth and even canvas for your makeup. A primer acts as a barrier between your skin and makeup, helping to blur imperfections and minimize the appearance of pores. Apply a small amount of primer onto your fingertips and spread it evenly across your face, focusing on areas where makeup tends to fade or crease.
Correcting Skin Imperfections
If you have any specific skin concerns like redness, discoloration, or acne marks, a color corrector can help neutralize these imperfections. Color correctors work by applying the opposite color on the color wheel to cancel out the unwanted tones. For example, green corrects redness, purple corrects yellow undertones, and peach corrects dark circles. Apply a small amount of color corrector on the areas you want to correct and blend it in gently with your fingers or a brush. Remember to apply your foundation over the color corrector to achieve a seamless finish.
Flawless Foundation
Choosing the Right Shade
Choosing the right shade of foundation is crucial to achieve a seamless and natural-looking finish. The goal is to find a shade that matches your skin tone perfectly. Test the foundation on your jawline or the side of your face to ensure it blends seamlessly with your neck. Be mindful of your undertones – whether they are warm, cool, or neutral – to select a foundation shade that complements your skin tone.
Applying the Foundation
To apply foundation, start by pouring a small amount onto the back of your hand or a makeup palette. Using a beauty blender, foundation brush, or your fingers, apply the foundation to your face in small dots. Start from the center of your face and blend outward, making sure to cover your entire face, including the jawline and neck. Use gentle patting or sweeping motions to achieve an even coverage.
Blending Techniques
Blending is the key to a flawless foundation application. After applying the foundation, ensure that it is well blended into your skin for a seamless finish. Depending on your preferred tools, use a damp beauty blender, foundation brush, or your fingers to blend the foundation into your skin. Start from the center of your face and work your way outwards, making sure to blend the product evenly. Pay extra attention to the hairline, jawline, and neck to avoid any harsh lines.

Concealing Techniques
Covering Dark Circles
Dark circles can make you look tired and dull, but with the right concealer, you can brighten up your under-eye area. Choose a concealer that is one to two shades lighter than your skin tone and has a creamy consistency. Apply small dots of concealer under your eyes, focusing on the inner corners and areas with the most darkness. Gently blend the concealer using your fingers, a beauty blender, or a concealer brush. Make sure to blend it seamlessly with your foundation for a natural look.
Hiding Blemishes
To hide blemishes, such as acne marks or scars, opt for a concealer that matches your skin tone and provides full coverage. Apply a small amount of concealer directly onto the blemish and blend it out gently using your finger or a concealer brush. If necessary, layer the concealer until the blemish is fully covered. Set the concealer with a translucent powder to ensure longevity.
Minimizing Redness
If you have areas of redness on your face, such as acne or rosacea, a green color corrector can help neutralize the red tones. Apply a small amount of green color corrector onto the affected areas and blend it out gently using your fingers or a brush. Once the redness is neutralized, apply your foundation and concealer as usual to create an even complexion.
Highlighting and Contouring
Enhancing Facial Structure
Highlighting and contouring are techniques used to enhance your facial features and create dimension. Start by applying a highlighter on the high points of your face – the tops of your cheekbones, the bridge of your nose, the cupid’s bow, and the brow bone. Use a small brush or your fingertips to blend the highlighter into your skin for a natural-looking glow.
Adding Dimension
Contouring helps to define and sculpt your face by creating shadows. Choose a contour shade that is one to two shades darker than your skin tone. Apply the contour shade along the hollows of your cheeks, the sides of your nose, and the perimeter of your face. Use a contour brush or a fluffy brush to blend the contour shade, ensuring that there are no harsh lines. The key to successful contouring is to blend, blend, and blend!
Choosing the Right Products
When selecting products for highlighting and contouring, opt for cream or powder formulas based on your personal preference and skin type. Cream products tend to give a more natural and dewy finish, while powder products provide a matte finish. Experiment with different textures and find what works best for you. Remember to select shades that complement your skin tone and undertones for a seamless and natural look.

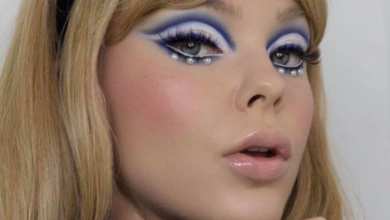
Creating HD-Worthy Eyes
Eyeshadow Application
To achieve a stunning eye look, start by applying an eyeshadow primer to ensure longevity and vibrancy. Choose eyeshadow shades that complement your eye color and desired look. Apply a lighter shade all over your lid as a base, then add depth and dimension by applying a darker shade to the crease. Use a fluffy brush to blend the eyeshadows seamlessly and create a gradient effect. Experiment with different eyeshadow techniques, such as halo eyes or smoky eyes, to find the style that suits you best.
Eyeliner and Mascara Tips
Eyeliner and mascara can make your eyes pop and complete your eye makeup look. For a precise and defined line, use a gel, liquid, or pencil eyeliner along your upper lash line. If you want a softer look, you can also apply eyeliner to your lower lash line or waterline. For mascara, start by curling your lashes using an eyelash curler. Then, apply mascara from the roots to the tips, wiggle the brush to ensure even coverage, and comb through any clumps with a clean mascara wand.
Applying False Lashes
False lashes can elevate your eye makeup and give you a glamorous look. Start by measuring the false lashes against your natural lash line and trim them if necessary. Apply a thin layer of lash glue along the band of the false lashes and wait for a few seconds for it to become tacky. Using tweezers or your fingers, gently place the false lashes as close to your natural lash line as possible. Press them down carefully to ensure they adhere properly. Finish by blending your natural lashes with the false lashes using mascara.
Perfecting the Brow Game
Shaping and Grooming
Well-groomed eyebrows frame your face and can make a significant difference in your overall look. Start by brushing your eyebrows in the direction of hair growth using a spoolie brush. Then, use a brow pencil or powder to fill in any sparse areas, following the natural shape of your eyebrows. To shape your eyebrows, use a small brow brush or an angled brush and apply a clear or colored brow gel to hold them in place.
Filling in Sparse Areas
If you have sparse areas in your eyebrows, use a brow pencil or powder to fill them in. Choose a shade that matches your natural eyebrow color and lightly draw hair-like strokes to mimic the appearance of natural hairs. Concentrate on the sparse areas, but avoid applying too much product to maintain a natural look.
Eyebrow Gel and Tinting
Eyebrow gel is a great product for setting your eyebrows and keeping them in place all day. Choose a clear or colored gel that matches your eyebrow color and brush it through your eyebrows in the direction of hair growth. If you want more long-lasting results, consider eyebrow tinting, which involves dying the eyebrow hairs to a desired shade. This can help define your eyebrows and reduce the need for daily filling and shaping.

Natural-looking Blush and Bronzer
Choosing the Right Shades
Blush and bronzer add warmth and color to your face, bringing life to your complexion. When choosing blush, opt for a shade that complements your skin tone. For fair skin, light pinks or peaches work well. Medium skin tones can go for rosy or coral shades, while deeper complexions can try rich berry or plum tones. Bronzer, on the other hand, should be one to two shades darker than your skin tone to create a sun-kissed effect.
Blending Techniques
To apply blush, smile and apply it to the apples of your cheeks using a blush brush. Gradually build up the color by blending it in circular motions towards your temples. For bronzer, apply it to the areas where the sun naturally hits your face – the forehead, temples, cheekbones, and jawline. Use a fluffy brush and a light hand to blend the bronzer to avoid harsh lines and achieve a natural-looking glow.
Creating a Sun-kissed Glow
To create a sun-kissed glow, consider using a combination of bronzer and highlighter. Apply bronzer to the areas where the sun naturally hits your face, and then add a touch of highlighter to the high points of your face for a radiant finish. Remember to blend both products seamlessly to achieve a natural and healthy glow.
Luscious Lips
Exfoliating and Moisturizing
To achieve smooth and luscious lips, exfoliation is key. Use a lip scrub or a gentle toothbrush to remove dead skin cells and reveal softer lips. After exfoliating, apply a lip balm or moisturizer to hydrate and nourish your lips, creating a smooth canvas for lip products.
Lip Liner Application
Lip liner helps to define and shape your lips while preventing lipstick from bleeding or feathering. Choose a lip liner that matches or is slightly darker than your natural lip color. Start by outlining your lips with short, light strokes, following the natural shape of your lips. For a fuller look, you can slightly overline your lips. Fill in your lips with lip liner to create a base for your lipstick and enhance its longevity.
Lipstick and Gloss Tips
Choosing the right lipstick shade and finish can instantly transform your look. Opt for colors that suit your skin tone and personal style. For a classic and polished look, go for a matte or satin finish lipstick. If you prefer a glossy and luminous look, try a lip gloss. Apply your chosen lip product to your lips, ensuring even coverage. For a long-lasting finish, blot your lips with a tissue and reapply a second layer.

Setting and Longevity
Applying Setting Powder
Setting your makeup is essential to increase its longevity and minimize oiliness. After completing your makeup application, use a loose or pressed setting powder to set your foundation and concealer. Gently dip a fluffy brush into the powder and tap off any excess. Then, lightly dust the powder onto your face, focusing on areas that tend to get oily, such as the T-zone. This will help keep your makeup in place and prevent it from creasing throughout the day.
Makeup Setting Spray
A makeup setting spray is a great addition to your routine to lock your makeup in place and give it a natural finish. Choose a setting spray suitable for your skin type – whether it is mattifying, hydrating, or illuminating. Hold the bottle about 6-8 inches away from your face and mist it evenly over your makeup. Allow it to dry naturally and enjoy a long-lasting and fresh look.
Touch-up Tips
Throughout the day, it is normal for your makeup to fade or need a quick touch-up. Keep a few essentials in your makeup bag to maintain your flawless look. Carry a small powder compact to blot any excess oiliness on your face. Use a small makeup brush to touch up your blush or bronzer if it has faded. Additionally, keep your chosen lipstick or lip product with you for quick touch-ups throughout the day. Remember to always blot excess oil before reapplying any makeup product.
Avoiding Common Mistakes
Cakey Foundation
One common mistake to avoid is applying too much foundation, which can result in a cakey and unnatural appearance. Remember that less is more. Start with a small amount of foundation and build it up gradually as you need more coverage. Use blending techniques to ensure an even and seamless finish.
Overdrawn Lips
While many of us desire fuller-looking lips, overlining them excessively can create an unflattering and unnatural look. Instead, slightly overline your lips within reason, making sure to follow your natural lip shape. Use lip liner and lipstick that are closest to your natural lip color to achieve a more harmonious result.
Mismatched Foundation and Neck
To achieve a cohesive and seamless look, ensure that the shade of your foundation matches both your face and neck. Testing the foundation on your jawline or the side of your face can help determine the proper shade. Blend the foundation into your skin and check in different lighting to ensure a perfect match between your face and neck.
In conclusion, with the right techniques and products, achieving a camera-ready, HD makeup look is within your reach. By properly prepping your skin, choosing the right shades, and applying makeup with care, you can enhance your natural beauty while creating a flawless and long-lasting result. Remember to embrace your uniqueness and have fun experimenting with different looks. With stylish.ae’s tips, you’ll be ready to shine in any situation!