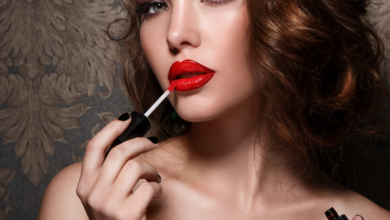
Get ready to achieve the perfect pout with our step-by-step guide on creating ombre lips! In this article, you’ll learn from the experts at stylish.ae how to achieve this trendy and eye-catching lip look. From selecting the right shades to mastering the application technique, we’ll guide you through each step to help you rock this style with confidence. So, grab your favorite lip colors and let’s dive into the world of ombre lips!

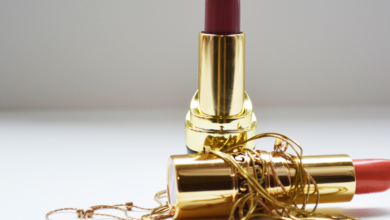
Choosing the Right Colors
When it comes to achieving the perfect ombre lips, one of the first things you need to consider is choosing the right colors. The key here is to find shades that work well together and complement each other. Before you start, take a moment to identify your skin undertone as it plays a crucial role in determining the colors that will flatter your complexion.
Identify your skin undertone
Understanding your skin undertone can help you choose the most flattering shades for your ombre lips. There are three main undertones: cool, warm, and neutral. If you have a cool undertone, opt for shades that have a blue or pink undertone, such as berry or plum. For warm undertones, choose shades with a yellow or orange undertone, like coral or bronze. Those with a neutral undertone can go for a wide range of shades, but mauve or rose tones often work well.
Consider your hair color
Another factor to consider when choosing the right colors for your ombre lips is your hair color. While it’s not a strict rule, coordinating your lipstick shades with your hair can create a harmonious overall look. If you have warm-toned hair, like golden blonde or auburn, warm lipstick shades such as peach or terracotta can complement your hair color. On the other hand, if you have cool-toned hair, like ash blonde or black, cool-toned lipstick shades like pink or red can enhance your hair color.
Match with your outfit
Lastly, consider the outfit you’ll be wearing with your ombre lips. While it’s fun to experiment and play around with different color combinations, it’s essential to choose shades that won’t clash with your outfit. If you’re wearing a bold and colorful outfit, you may want to opt for more neutral ombre lips to balance the overall look. On the other hand, if your outfit is more subdued, you can go for bolder and vibrant ombre lip colors to make a statement.
Prepping Your Lips
Before diving into the ombre lip application process, it’s crucial to prep your lips properly. This step ensures that your lips are smooth, hydrated, and ready for the color application.
Exfoliate your lips
Start by exfoliating your lips to remove any dry, flaky skin. You can use a gentle lip scrub or make your own by combining sugar and honey. Gently rub the mixture on your lips in circular motions, then rinse off with warm water. This step will create a smooth canvas for the ombre lip colors and help the color adhere better.
Moisturize your lips
After exfoliating, it’s essential to provide your lips with some moisture. Dry lips can make the application process more challenging and result in uneven color payoff. Apply a hydrating lip balm or a lip mask and let it sink in for a few minutes. This will ensure your lips are soft, supple, and ready for the next steps.
Apply lip balm
Before moving on to the color application, apply a thin layer of lip balm to prime your lips. This will create a smooth base for the lipstick and help it glide on effortlessly. Opt for a lip balm that is not too heavy or greasy, as this can affect the longevity of the ombre lip colors.
Applying a Base
Now that your lips are prepped and ready, it’s time to create a base for your ombre lips. This step involves using a lip primer, concealer or foundation, and a nude lip liner to create a seamless canvas for the ombre effect.
Use a lip primer
Using a lip primer is optional but can help prolong the wear of your ombre lip colors. It creates a barrier between your lips and the lipstick, preventing it from fading or feathering throughout the day. Apply a thin layer of lip primer over your lips and let it set for a minute or two before proceeding.
Apply concealer or foundation
To ensure a clean and defined ombre lip look, apply a small amount of concealer or foundation on your lips. This step helps to neutralize the natural color of your lips, allowing the ombre lip colors to stand out more. Use a small brush or your finger to blend the concealer or foundation evenly over your lips, ensuring there are no visible edges.
Fill in your lips with a nude lip liner
Next, take a nude lip liner that matches your natural lip color and fill in your entire lips. This step helps to create a smooth and even base for your ombre lip colors. The nude lip liner will also act as a guide when you start applying the darker and lighter shades later on. Make sure to blend the lip liner well into your lips, ensuring there are no harsh lines or uneven edges.
Creating the Ombre Effect
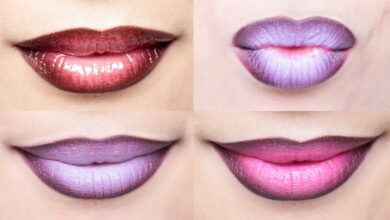
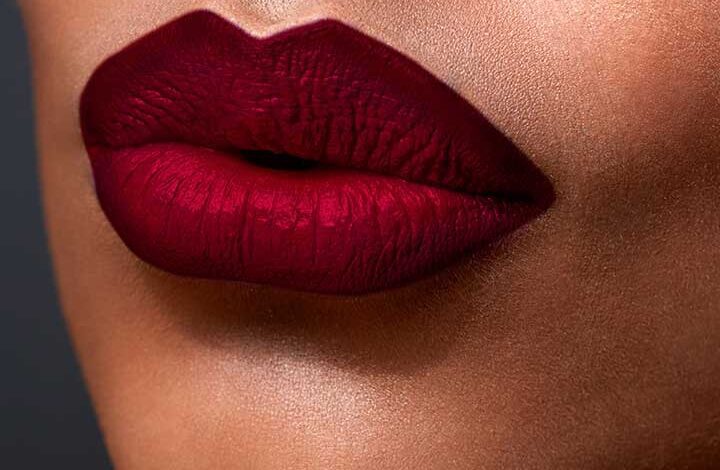
The ombre effect is the highlight of the ombre lip look, creating a gradient from a darker shade on the outer corners to a lighter shade in the center. This technique adds depth and dimension to your lips, making them look fuller and more defined.
Choose your darker shade
Start by selecting a darker shade that complements the rest of your makeup look. This can be a bold red, deep berry, or any color that you feel confident wearing. The key is to choose a shade that stands out but still works well with the other colors you’ll be using.
Apply the darker shade to the outer corners
Using a lip brush or the applicator that comes with the lipstick, carefully apply the darker shade to the outer corners of your lips. Start from the top lip and follow the natural lip line, extending it slightly outward. Repeat the same process on the bottom lip, making sure the color is evenly distributed.
Blend the colors together
To create a seamless transition between the darker shade and the lighter shade, it’s essential to blend the colors together. Use a clean lip brush or your finger to gently blend the edges where the two shades meet. This will soften any harsh lines and create a gradual gradient effect.

Contouring Your Lips
Contouring your lips adds further definition and helps to achieve a polished ombre lip look. Using a lip liner that complements your ombre colors, you can enhance your lip shape and create a more precise finish.
Use a lip liner
Choose a lip liner that matches one of the shades in your ombre lip look. Ideally, it should be slightly darker than your natural lip color to create a subtle contour. Using a sharp lip liner, carefully outline the natural shape of your lips, following the lip line.
Define your lip shape
Once you’ve outlined your lips, you can also slightly overline them if you desire a fuller appearance. Be cautious not to overdo it, as it can make the ombre effect less noticeable.
Blend the lip liner with the ombre colors
After outlining your lips, use the lip liner to fill in the outer corners of your lips, where the darker shade is applied. This will add depth and dimension to the ombre look. With a gentle hand, blend the lip liner with the ombre colors to create a seamless transition.
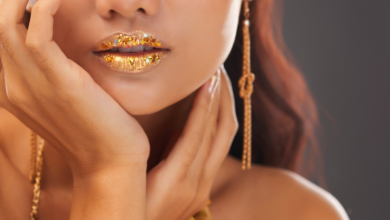
Adding Shimmer or Gloss
To add a touch of glam and make your ombre lips stand out even more, you can incorporate some shimmer or gloss into the look. This step is optional but can elevate your overall lip look.
Choose a shimmery or glossy lip product
Select a shimmery or glossy lip product that complements your ombre colors. Opt for a shade that matches the lighter color in your ombre lips to maintain the overall gradient effect. The shimmer or gloss will be applied only to the central part of your lips, creating a spotlight effect.
Apply it to the center of your lips
Using the applicator or a lip brush, carefully apply the shimmery or glossy lip product to the center of your lips. Start from the bottom lip and work your way up, ensuring an even distribution of the product.
Blend it with the ombre colors
To seamlessly integrate the shimmer or gloss with the ombre colors, gently blend the product towards the outer corners of your lips. This will create a smooth transition and unify the different elements of your ombre lip look.

Setting the Lips
To ensure your ombre lips stay in place throughout the day or evening, setting them is crucial. This step involves using a setting powder or translucent powder to lock in the color and prevent smudging or fading.
Use a setting powder or translucent powder
Choose a setting powder or translucent powder that matches your skin tone. Using a small brush, lightly dust the powder over your lips to set the ombre lip colors. Be careful not to apply too much pressure or disturb the lip products.
Apply it with a small brush
Using a small brush for precision, apply the setting powder in gentle sweeping motions, working from the outer corners towards the center of your lips.
Blot your lips with tissue
To remove any excess powder and to ensure your ombre lips don’t transfer onto other surfaces, gently blot your lips with a tissue. This step will help set the colors while maintaining a comfortable and smudge-proof finish.
Touch-ups and Final Steps
Once your ombre lips are set, it’s time for some final touch-ups and steps to ensure your lips look flawless throughout the day or night.
Clean up any mistakes
Take a cotton swab or a small brush dipped in makeup remover and carefully clean up any mistakes around the lip line or any smudges that may have occurred during the application process. This step will give your ombre lips a polished and professional finish.
Apply a final layer of lip balm
To keep your lips hydrated and maintain the overall look of your ombre lips, apply a final layer of lip balm. This will ensure your lips stay moisturized, especially if you’re wearing the look for an extended period or in dry conditions.
Check for any smudges or unevenness
Take a moment to check if there are any smudges or areas of unevenness on your ombre lips. If necessary, make any necessary touch-ups to ensure a perfect finish. Using a clean lip brush, blend any colors that may have shifted or become uneven during the setting process.

Avoiding Common Mistakes
While mastering the art of ombre lips, it’s essential to be aware of some common mistakes and learn how to avoid them. By avoiding these pitfalls, you can achieve the best possible ombre lip look.
Using too many contrasting shades
When creating ombre lips, it’s important to choose shades that complement each other and create a harmonious gradient. Using too many contrasting shades can create a disjointed and messy appearance. Stick to a maximum of three colors that blend seamlessly together.
Applying too much product
It’s easy to get carried away with the application of ombre lip colors, but applying too much product can result in a heavy and cakey look. Remember to start with a small amount and build up the color gradually until you achieve your desired ombre effect.
Skipping lip liner
Lip liner is an essential component of the ombre lip look. It helps to define the shape of your lips, prevent feathering or bleeding of the colors, and enhances the overall appearance. Skipping lip liner can lead to a less defined and less polished ombre lip look.
Ombre Lips: Dos and Don’ts
To summarize, here are a few essential dos and don’ts to keep in mind when creating your own ombre lips:
Do choose colors that complement each other
When selecting shades for your ombre lip look, opt for colors that harmonize and create a cohesive gradient. Consider your skin undertone, hair color, and outfit to find the most flattering shades.
Don’t forget to blend
Blending is key when creating ombre lips. It ensures a seamless transition between the colors and creates a flawless gradient effect. Take your time to blend the colors together for a polished look.
Do experiment with different ombre styles
Ombre lips offer endless possibilities for creativity and experimentation. Don’t be afraid to try different color combinations or techniques to find the ombre style that suits you best. Have fun and let your imagination run wild!
By following these step-by-step instructions and considering the dos and don’ts, you’ll be able to achieve stunning ombre lips that are sure to turn heads. Remember to practice and be patient, as mastery of this technique comes with time and experience. With the right colors, careful application, and a little bit of creativity, you’ll be rocking the ombre lip trend in no time!

Moisturizing and Subtly-Tinted: The Power of Tinted Lip Balms(Opens in a new browser tab)
Stylish.ae’s Ultimate Guide To Choosing The Perfect Hair Shade(Opens in a new browser tab)