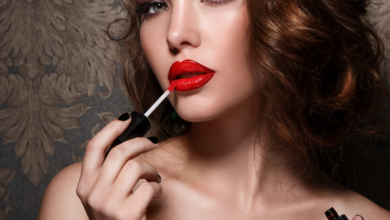
Whether you’re an aspiring makeup artist or just someone who loves experimenting with new looks, mastering the art of lip makeup is essential. In this article, you’ll discover the basics of lip artistry, from choosing the right lipstick shades to creating stunning lip shapes. Get ready to unleash your creativity and bring your lip game to the next level with these essential tips and techniques. It’s time to pucker up and dive into the world of lip artistry!
Choosing the Right Lipstick
When it comes to choosing the right lipstick, there are a few things you need to consider to ensure that the shade and finish complement your overall look. The first thing to consider is your skin tone. Different lipstick shades work best with different skin tones, so it’s important to find a shade that enhances your natural complexion.
Next, you’ll want to decide on a finish that suits your personal style and the occasion. Lipstick finishes range from matte, which gives a more velvety look, to glossy, which adds a touch of shine. Consider the look you want to achieve and choose a finish accordingly.
Once you’ve determined your skin tone and finish preference, it’s time to select the right shade. Your skin undertone can help guide you in choosing the most flattering shades. For example, if you have a warm undertone, shades with a yellow or orange base will complement your skin. If you have a cool undertone, shades with a blue or pink base will work best for you. Don’t be afraid to test out different shades and experiment to find your perfect match!
Prepping Your Lips
Before applying any lip product, it’s important to properly prep your lips to ensure a smooth and flawless finish. Exfoliating your lips regularly helps to remove any dead skin cells and creates a smooth canvas for lipstick application. You can use a lip scrub or a gentle toothbrush to gently exfoliate your lips.
After exfoliating, it’s essential to moisturize your lips. Dry lips can make it difficult for lipstick to adhere properly and can result in a less even application. Using a hydrating lip balm or lip moisturizer before applying lipstick will help keep your lips moisturized throughout the day.
Don’t forget to apply a lip balm as the final step in your lip prep routine. This will help to lock in the moisture and provide a smooth base for your lipstick.
Lip Primer
What is Lip Primer?
Lip primer is a product specifically designed to create a long-lasting base for lipstick. It is typically applied before lipstick to help improve the application and longevity of the color.
Why Use a Lip Primer?
Using a lip primer can make a significant difference in the appearance and staying power of your lipstick. Lip primers create a smooth surface on the lips, making it easier to apply lipstick evenly and prevent feathering or bleeding. They also help to prolong the wear of your lipstick, ensuring that it stays in place throughout the day.
How to Apply Lip Primer
To apply lip primer, start by ensuring that your lips are clean and dry. Use the applicator or your finger to gently apply a thin layer of lip primer to your lips. Allow the primer to dry for a minute or two before applying your lipstick. For best results, follow up with a lip liner and your chosen lipstick shade.
Lip Liner
What is Lip Liner?
Lip liner is a beauty product that helps define the shape of the lips and create a barrier for lipstick, preventing it from bleeding or feathering. It comes in various shades to match different lipstick colors.
Choosing the Right Lip Liner Shade
When choosing a lip liner shade, it’s best to select one that closely matches your natural lip color or the lipstick shade you plan to use. This will help create a seamless and natural look. If you prefer a more dramatic effect, you can choose a lip liner in a slightly darker or lighter shade than your lipstick for a subtle contrast.
Lining and Shaping Your Lips
To line and shape your lips with a lip liner, start by outlining the natural shape of your lips. Begin at the center of your upper lip and follow the natural curve, working your way towards the corners. Then, repeat the same process with your lower lip.
If you want to create the illusion of fuller lips, you can slightly overline your lips by drawing the lip liner just outside your natural lip line. Be careful not to go too far outside the natural shape, as it can look unnatural.
Filling In Your Lips
After lining your lips, you can proceed to fill them in with the lip liner. This step helps create a base for your lipstick and ensures that even if your lipstick fades, you’ll still have color on your lips. Gently fill in your lips using the lip liner, taking care to blend it seamlessly with the natural color of your lips.
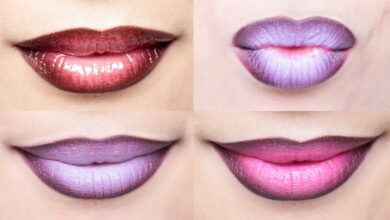
Creating Ombre Lips
What are Ombre Lips?
Ombre lips are a popular makeup technique where two or more lipstick shades are blended together to create a gradient effect on the lips. This adds depth and dimension to your lip look and can be a fun way to experiment with different shades.
Choosing Complementary Lipstick Shades
When creating ombre lips, it’s important to choose lipstick shades that complement each other. You can either choose shades from the same color family or opt for contrasting shades for a bolder look. For example, you can pair a nude shade with a deeper berry shade or a pink shade with a coral shade.
Applying the Base Lipstick
To create ombre lips, start by applying the base lipstick shade all over your lips. This will serve as the foundation for the ombre effect. Use a lip brush or directly apply the lipstick from the tube for precise application.
Adding the Second Lipstick Shade
Once you’ve applied the base shade, it’s time to add the second lipstick shade to create the ombre effect. Apply the second shade to the center of your lips, focusing on the inner part. The goal is to create a gradation from the lighter base shade to the darker or brighter second shade.
Blending the Colors
To create a seamless transition between the two lipstick shades, use a lip brush or your finger to gently blend them together. Make sure to blend where the two shades meet so that there are no harsh lines. This will create a smooth and gradient effect on your lips.
Enhancing Lip Shape
Overlining Your Lips
If you want to create the illusion of fuller lips, you can use a lip liner to slightly overline your lips. Start by outlining just outside your natural lip line, focusing on the cupid’s bow and the center of your lower lip. Be careful not to overdo it, as it can look unnatural. Blend the lip liner into your natural lip color for a more seamless result.
Cupid’s Bow Enhancement
The cupid’s bow is the curve at the center of your upper lip, and enhancing it can add definition and shape to your lips. To enhance your cupid’s bow, use a lip liner in a shade slightly lighter than your natural lip color or the lipstick shade you’re using. Outline the curves of your cupid’s bow, making sure to create a defined and symmetrical shape.
Highlighting the Center of Lips
Another way to enhance your lip shape is by highlighting the center of your lips. Take a light-colored lip gloss or highlighter and apply it to the center of your lips after applying your lipstick. This will create the illusion of fuller and more prominent lips, drawing attention to the center.

Smudge-Proof Lipstick
Using a Lip Primer
To make your lipstick smudge-proof, start by applying a lip primer as mentioned earlier. The lip primer creates a smooth base and helps prevent smudging or feathering of the lipstick.
Using a Lip Liner
Using a lip liner can also help prevent lipstick from smudging. Apply a lip liner that matches your lipstick shade, and make sure to line and fill in your lips completely. This creates a barrier and prevents the lipstick from bleeding or smudging.
Layering and Blotting
Layering your lipstick can help increase its staying power. Apply one coat of lipstick, blot it lightly with a tissue, and then apply another layer. This allows the lipstick to adhere better to your lips and minimizes the chance of smudging.
Making Lipstick Last Longer
Prepping the Lips
Prepping your lips before applying lipstick is essential for making it last longer. Follow the prepping steps mentioned earlier, including regular exfoliation, moisturizing, and applying lip balm.
Applying Lip Primer
Applying lip primer before lipstick can significantly increase its longevity. The lip primer provides a smooth base and helps the lipstick adhere better to your lips, preventing it from fading or smudging throughout the day.
Blotting and Layering
Blotting and layering your lipstick can also help extend its wear time. After applying your lipstick, blot your lips with a tissue to remove excess product. Then, apply another layer of lipstick, making sure to blot lightly again. This technique helps to set the color and ensures that the lipstick lasts longer.
Using a Lip Sealant
If you want the ultimate longevity for your lipstick, consider using a lip sealant. Lip sealants are clear, liquid formulas that are applied over lipstick to create a protective seal. They help lock in the color and prevent it from fading or smudging, even after eating or drinking.

Lipstick Application Techniques
Straight from the Tube
The most straightforward and common way to apply lipstick is straight from the tube. Simply glide the lipstick directly onto your lips, starting from the center and working your way towards the corners. This method allows for quick and easy application, especially when you’re on the go.
Using a Lip Brush
Using a lip brush can give you more control and precision when applying lipstick. Dip the lip brush into the lipstick, then apply the color to your lips using small, feathery strokes. This technique is especially useful when dealing with bold or deep shades that require a more precise application.
Using a Lipstick Applicator
If you prefer a more precise and defined lip shape, a lipstick applicator can be a great tool. Lipstick applicators typically have a small, sponge-like tip that allows for precise application along the lip line. This method is perfect for achieving a sharp and defined cupid’s bow or when using liquid lipstick formulas.
Creating a Defined Cupid’s Bow
Using a Concealer
To create a defined cupid’s bow, start by using a concealer that is one or two shades lighter than your natural skin tone. Apply a small amount of the concealer to the center of your upper lip, following the curve of your cupid’s bow. This will create a highlighted effect and enhance the shape of your lips.
Lining the Cupid’s Bow
Next, use a lip liner in a shade slightly darker or matching your lipstick color to fine-tune the shape of your cupid’s bow. Start at the top center of your upper lip and draw a small “V” shape, following the natural contours of your cupid’s bow. Then, connect the “V” shape to the corners of your upper lip, creating a symmetrical and defined cupid’s bow.
Filling in the Lips
After outlining the cupid’s bow, fill in the rest of your lips using the lip liner. This will create a base for your lipstick and help it adhere better. Make sure to blend the lip liner with the natural color of your lips to achieve a seamless and natural look.
In conclusion, mastering the art of lipstick application takes time and practice, but by following these basic techniques, you’ll be well on your way to achieving the perfect lip look. From choosing the right shade and finish to prepping your lips and applying lipstick with precision, these tips and tricks will help you enhance your natural beauty and create stunning lip looks. So grab your favorite lipstick and start experimenting – the possibilities are endless!